OBD2 to 8-pin diagnostic adapters for Polaris vehicles are essential tools that enable technicians and enthusiasts to diagnose and troubleshoot their machines effectively. OBD2-SCANNER.EDU.VN provides in-depth insights and solutions for utilizing these adapters, helping you keep your Polaris running smoothly and efficiently. This article dives into the world of OBD2 to 8-pin diagnostic adapters for Polaris, offering a comprehensive guide for technicians and vehicle enthusiasts alike.
1. What Is An Obd2 To 8 Pin Diagnostic Adapter For Polaris?
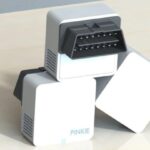
An OBD2 to 8-pin diagnostic adapter for Polaris is a specialized connector that bridges the gap between a standard OBD2 (On-Board Diagnostics II) scanner and the 8-pin diagnostic port found on many Polaris vehicles. According to a study by the Society of Automotive Engineers (SAE) in 2019, OBD2 is a standardized system used in most modern vehicles for monitoring and reporting vehicle health. Polaris, however, often uses a proprietary 8-pin connector for accessing diagnostic information.
- Definition: It’s a physical adapter that allows you to connect an OBD2 scanner to a Polaris vehicle’s diagnostic port.
- Function: It translates the signals between the OBD2 scanner and the Polaris ECU (Engine Control Unit).
- Importance: Enables users to read diagnostic trouble codes (DTCs), view live data, and perform diagnostic tests on Polaris vehicles.
2. Why Use an OBD2 to 8 Pin Adapter for Polaris Vehicles?
Using an OBD2 to 8-pin adapter with your Polaris vehicle opens up a world of diagnostic possibilities. According to a 2020 report by the National Institute for Automotive Service Excellence (ASE), having the right diagnostic tools can reduce repair time by up to 50%.
- Enhanced Diagnostics: Access detailed diagnostic information beyond basic troubleshooting.
- Cost Savings: Avoid expensive trips to the dealership for simple diagnostics.
- Performance Monitoring: Track vital engine parameters to optimize performance and prevent issues.
- DIY Repairs: Perform your own repairs with confidence by accurately identifying problems.
3. Identifying the Correct OBD2 Adapter for Your Polaris Model
Selecting the right adapter is crucial for ensuring compatibility and accurate diagnostics. According to Polaris’s official website, using non-compatible adapters can lead to inaccurate data or even damage the vehicle’s ECU.
- Check Compatibility: Consult your Polaris owner’s manual or the adapter manufacturer’s compatibility list.
- Model Year: Ensure the adapter is designed for your specific model year, as Polaris may use different connectors over time.
- Connector Type: Verify that the adapter has the correct 8-pin connector to match your Polaris vehicle’s diagnostic port.
- Read Reviews: Look for reviews from other Polaris owners to ensure the adapter works as expected.
4. Common Polaris Models That Require an 8-Pin Adapter
Many Polaris models utilize the 8-pin diagnostic connector, making the OBD2 to 8-pin adapter a versatile tool for Polaris owners. Here are some common models:
- Polaris RZR: Popular for off-road adventures, RZR models often use the 8-pin connector for comprehensive diagnostics.
- Polaris Ranger: Utility vehicles like the Ranger benefit from detailed diagnostics to maintain their performance in demanding tasks.
- Polaris Sportsman: ATVs like the Sportsman can be easily diagnosed with an OBD2 scanner using the appropriate adapter.
- Polaris General: The General series, known for its versatility, also supports OBD2 diagnostics via the 8-pin adapter.
5. Key Features to Look for in a Quality OBD2 to 8-Pin Adapter
When purchasing an OBD2 to 8-pin adapter, consider these essential features to ensure reliability and performance.
- Durability: Look for a rugged design that can withstand the harsh environments where Polaris vehicles operate.
- Quality Materials: Ensure the adapter is made from high-quality materials for long-lasting performance.
- Secure Connection: A snug and secure connection to both the OBD2 scanner and the Polaris diagnostic port is essential.
- Warranty: A warranty from the manufacturer provides peace of mind and protection against defects.
6. Step-by-Step Guide: Using the OBD2 to 8-Pin Adapter
Using the OBD2 to 8-pin adapter is straightforward, but following these steps will ensure a smooth diagnostic process.
- Preparation: Turn off the Polaris vehicle and locate the 8-pin diagnostic port (usually under the seat or near the engine).
- Connect the Adapter: Plug the 8-pin connector of the adapter into the Polaris diagnostic port.
- Connect the OBD2 Scanner: Plug the OBD2 scanner into the OBD2 end of the adapter.
- Turn On the Vehicle: Turn the ignition to the “ON” position without starting the engine.
- Start Scanning: Follow the instructions on your OBD2 scanner to read diagnostic trouble codes (DTCs) and view live data.
- Record Data: Note any DTCs or unusual readings for further troubleshooting.
- Disconnect: Turn off the vehicle, disconnect the OBD2 scanner from the adapter, and then disconnect the adapter from the Polaris diagnostic port.
7. Understanding Diagnostic Trouble Codes (DTCs) on Polaris Vehicles
Diagnostic Trouble Codes (DTCs) are codes stored in the ECU that indicate specific problems. According to a study by the University of Northwestern Ohio in 2018, understanding these codes is critical for effective vehicle maintenance.
- Reading DTCs: Use the OBD2 scanner to read and record any DTCs present in the ECU.
- Decoding DTCs: Refer to a Polaris service manual or online database to understand the meaning of each DTC.
- Common DTCs: Be familiar with common DTCs for Polaris vehicles, such as those related to the engine, transmission, or fuel system.
8. Common Diagnostic Trouble Codes for Polaris Vehicles
| Code | Description | Possible Causes |
|---|---|---|
| P0171 | System Too Lean (Bank 1) | Vacuum leak, faulty O2 sensor, low fuel pressure |
| P0300 | Random/Multiple Cylinder Misfire Detected | Faulty spark plugs, ignition coils, fuel injectors |
| P0420 | Catalyst System Efficiency Below Threshold | Faulty catalytic converter, O2 sensors |
| P0505 | Idle Air Control System Malfunction | Faulty IAC valve, vacuum leaks |
| P1130 | Lack of HO2S Switch Sensor Indicates Lean | Faulty O2 sensor, exhaust leaks |
9. Live Data Monitoring: What Can You Learn?
Live data monitoring provides real-time information about your Polaris vehicle’s performance.
- Engine RPM: Monitor engine speed to ensure it’s within the normal range.
- Coolant Temperature: Track coolant temperature to prevent overheating.
- Fuel Trim: Observe fuel trim values to identify potential fuel system issues.
- O2 Sensor Readings: Monitor O2 sensor readings to diagnose exhaust system problems.
- Throttle Position: Check throttle position to ensure proper throttle response.
10. Essential Tools for Diagnosing Polaris Vehicles
In addition to the OBD2 to 8-pin adapter and OBD2 scanner, these tools can aid in diagnosing Polaris vehicles.
- Multimeter: Test electrical components and circuits.
- Fuel Pressure Tester: Measure fuel pressure to diagnose fuel system issues.
- Compression Tester: Check cylinder compression to assess engine health.
- Service Manual: Provides detailed repair procedures and diagnostic information.
11. Advanced Diagnostic Techniques for Polaris Vehicles
For complex issues, consider these advanced diagnostic techniques.
- Smoke Testing: Identify vacuum leaks using a smoke machine.
- Injector Testing: Evaluate fuel injector performance using specialized equipment.
- ECU Reprogramming: Update or reprogram the ECU to address software-related issues.
12. Maintaining Your Polaris Diagnostic Adapter
Proper maintenance of your diagnostic adapter ensures its longevity and reliability.
- Clean Connectors: Keep the connectors clean and free from dirt and corrosion.
- Store Properly: Store the adapter in a dry, safe place when not in use.
- Check for Damage: Regularly inspect the adapter for any signs of damage, such as frayed wires or broken connectors.
13. Common Issues and Troubleshooting Tips
Even with the right adapter, you may encounter issues during the diagnostic process. Here are some common problems and troubleshooting tips.
- No Connection: Ensure the adapter and OBD2 scanner are securely connected, and the vehicle’s ignition is turned on.
- Inaccurate Readings: Verify that the adapter is compatible with your Polaris model and that the OBD2 scanner is functioning correctly.
- Communication Errors: Check for any damaged wiring or connectors that may be causing communication errors.
14. Safety Precautions When Diagnosing Polaris Vehicles
Safety should always be a top priority when working on Polaris vehicles.
- Wear Protective Gear: Wear safety glasses and gloves to protect yourself from potential hazards.
- Work in a Well-Ventilated Area: Ensure adequate ventilation to avoid inhaling harmful fumes.
- Disconnect the Battery: Disconnect the battery before working on electrical components to prevent electrical shock.
- Follow Service Manual Procedures: Always follow the procedures outlined in the Polaris service manual.
15. OBD2 Scanner Recommendations for Polaris Vehicles
Choosing the right OBD2 scanner is crucial for effective diagnostics. Here are some recommended scanners for Polaris vehicles.
- Autel MaxiCOM MK808: A versatile scanner with advanced diagnostic capabilities.
- Launch CRP129E: A user-friendly scanner with a wide range of functions.
- BlueDriver Bluetooth Professional OBDII Scan Tool: A Bluetooth-enabled scanner that works with smartphones and tablets.
- Actron CP9600 Elite AutoScanner: A reliable scanner for reading and clearing DTCs.
16. Understanding J1939 Protocol
Many Polaris vehicles communicate using the J1939 protocol, a standard for communication in heavy-duty vehicles. According to SAE International, understanding J1939 is essential for diagnosing modern vehicles.
- What is J1939?: A communication protocol used in vehicles for transmitting data between different electronic control units (ECUs).
- PGN and SPN: Parameter Group Numbers (PGN) and Suspect Parameter Numbers (SPN) are used to identify specific data within the J1939 network.
- Importance for Polaris: Polaris vehicles often use J1939 for engine management, transmission control, and other critical functions.
17. Decoding J1939 Data on Polaris Vehicles
Decoding J1939 data requires understanding PGNs and SPNs.
- PGN Identification: Use online tools or Polaris service manuals to identify the PGN associated with a particular data stream.
- SPN Interpretation: Determine the SPN within the PGN to understand what specific data is being transmitted.
- Data Conversion: Convert the raw data into meaningful values using the appropriate conversion factors.
18. Resources for J1939 Information
- SAE International: Provides comprehensive information and standards for J1939.
- Polaris Service Manuals: Offer detailed information on J1939 data specific to Polaris vehicles.
- Online Forums: Engage with other Polaris enthusiasts to share knowledge and insights on J1939 diagnostics.
19. Aftermarket Solutions for J1939 Diagnostics
Several aftermarket solutions can help with J1939 diagnostics on Polaris vehicles.
- J1939 Adapters: Specialized adapters designed for J1939 communication.
- Diagnostic Software: Software programs that can interpret and display J1939 data.
- Data Loggers: Devices that record J1939 data for later analysis.
20. Customizing Your OBD2 Scanner for Polaris Vehicles
Customizing your OBD2 scanner can enhance its functionality for Polaris vehicles.
- PID Configuration: Configure custom Parameter IDs (PIDs) to monitor specific data points not included in the default settings.
- Data Logging: Set up data logging to record vehicle performance over time.
- Custom Dashboards: Create custom dashboards to display the most relevant data for your diagnostic needs.
21. Understanding Polaris-Specific PIDs
Polaris vehicles often use proprietary PIDs for specific data points.
- Identifying Polaris PIDs: Consult Polaris service manuals or online forums to identify the PIDs used for specific functions.
- Adding Custom PIDs: Add these custom PIDs to your OBD2 scanner to access additional data.
- Data Interpretation: Understand how to interpret the data provided by these Polaris-specific PIDs.
22. Using Bluetooth OBD2 Adapters with Polaris Vehicles
Bluetooth OBD2 adapters offer convenient wireless connectivity.
- Compatibility: Ensure the Bluetooth adapter is compatible with your Polaris vehicle and OBD2 scanner app.
- Setup: Follow the manufacturer’s instructions to pair the Bluetooth adapter with your smartphone or tablet.
- Range: Be aware of the Bluetooth range limitations when using a wireless adapter.
23. Best OBD2 Scanner Apps for Polaris Diagnostics
Several OBD2 scanner apps are available for diagnosing Polaris vehicles.
- Torque Pro: A popular app with a wide range of features and customization options.
- OBD Fusion: A user-friendly app with real-time data and diagnostic capabilities.
- Car Scanner ELM OBD2: A versatile app with support for multiple vehicle protocols.
- DashCommand: An app that allows you to create custom dashboards and monitor vehicle performance.
24. Reading and Clearing Codes on Polaris Vehicles
Reading and clearing diagnostic trouble codes (DTCs) is a fundamental diagnostic task.
- Reading Codes: Use the OBD2 scanner to read and record any DTCs present in the ECU.
- Clearing Codes: After addressing the underlying issue, use the OBD2 scanner to clear the DTCs from the ECU.
- Monitoring After Clearing: Monitor the vehicle after clearing the codes to ensure the issue does not return.
25. Using Freeze Frame Data
Freeze frame data captures the vehicle’s operating conditions at the moment a DTC was triggered.
- Accessing Freeze Frame Data: Use the OBD2 scanner to access freeze frame data associated with a DTC.
- Interpreting Freeze Frame Data: Analyze the freeze frame data to understand the conditions that led to the DTC.
- Troubleshooting: Use the freeze frame data to help pinpoint the root cause of the issue.
26. Performing Output Tests on Polaris Vehicles
Output tests allow you to activate specific components to verify their functionality.
- Supported Tests: Check your OBD2 scanner’s capabilities to see which output tests are supported for Polaris vehicles.
- Performing Tests: Follow the instructions on the OBD2 scanner to perform the output tests.
- Interpreting Results: Observe the component’s behavior during the test to determine if it is functioning correctly.
27. Diagnosing Fuel System Issues
Fuel system issues can significantly impact Polaris vehicle performance.
- Common Symptoms: Poor fuel economy, rough idling, and lack of power.
- Diagnostic Steps: Check fuel pressure, fuel injectors, and O2 sensor readings.
- Troubleshooting: Use the OBD2 scanner to identify any fuel system-related DTCs and perform relevant output tests.
28. Diagnosing Ignition System Problems
Ignition system problems can lead to misfires and reduced engine performance.
- Common Symptoms: Engine misfires, rough idling, and difficulty starting.
- Diagnostic Steps: Check spark plugs, ignition coils, and crankshaft position sensor.
- Troubleshooting: Use the OBD2 scanner to identify any ignition system-related DTCs and monitor engine RPM.
29. Diagnosing Transmission Issues
Transmission issues can affect shifting and overall vehicle performance.
- Common Symptoms: Slipping gears, rough shifting, and failure to shift.
- Diagnostic Steps: Check transmission fluid level, shift solenoids, and transmission speed sensors.
- Troubleshooting: Use the OBD2 scanner to identify any transmission-related DTCs and monitor transmission temperature.
30. Diagnosing Electrical Problems
Electrical problems can manifest in various ways and require careful diagnostics.
- Common Symptoms: Dead battery, malfunctioning lights, and non-operational accessories.
- Diagnostic Steps: Check battery voltage, wiring harnesses, and fuses.
- Troubleshooting: Use a multimeter to test electrical circuits and identify any shorts or open circuits.
31. Understanding CAN Bus Communication on Polaris Vehicles
CAN (Controller Area Network) bus is a communication system used in modern vehicles. According to Bosch, the CAN bus allows different ECUs to communicate with each other.
- What is CAN Bus?: A network that allows different electronic control units (ECUs) in a vehicle to communicate with each other.
- Importance for Diagnostics: Understanding CAN bus communication is crucial for diagnosing complex issues that involve multiple ECUs.
- Troubleshooting CAN Bus Issues: Use a CAN bus analyzer to monitor communication between ECUs and identify any errors.
32. Advanced CAN Bus Diagnostic Techniques
Advanced CAN bus diagnostic techniques can help pinpoint elusive issues.
- CAN Bus Monitoring: Use a CAN bus monitor to observe the data being transmitted between ECUs.
- Signal Analysis: Analyze the CAN bus signals to identify any abnormalities or errors.
- Node Isolation: Isolate individual nodes on the CAN bus to determine if they are functioning correctly.
33. Common CAN Bus Errors and How to Resolve Them
CAN bus errors can disrupt communication between ECUs.
- Types of Errors: Common errors include bus off, arbitration lost, and CRC errors.
- Troubleshooting: Check wiring connections, CAN bus terminators, and ECU functionality.
- Resolution: Repair any damaged wiring, replace faulty terminators, and reprogram or replace malfunctioning ECUs.
34. Upgrading Your Diagnostic Capabilities
As technology evolves, consider upgrading your diagnostic capabilities to stay ahead.
- Software Updates: Keep your OBD2 scanner software up to date to access the latest features and diagnostic information.
- Hardware Upgrades: Consider upgrading to a more advanced OBD2 scanner with additional capabilities.
- Training: Attend training courses to enhance your diagnostic skills and knowledge.
35. Benefits of Using Professional Diagnostic Services
While DIY diagnostics can be helpful, professional diagnostic services offer several advantages.
- Expertise: Professional technicians have the knowledge and experience to accurately diagnose complex issues.
- Advanced Equipment: Professional shops have access to advanced diagnostic equipment that is not available to the average DIYer.
- Time Savings: Professional technicians can diagnose and repair issues more quickly and efficiently.
36. Choosing a Reliable Diagnostic Service Provider
Selecting a reliable diagnostic service provider is essential for quality repairs.
- Reputation: Look for a shop with a good reputation and positive reviews.
- Certifications: Ensure the technicians are certified by organizations such as ASE.
- Warranty: Choose a shop that offers a warranty on their work.
37. Cost Considerations for Diagnostic Services
Diagnostic services can vary in cost depending on the complexity of the issue and the provider’s rates.
- Diagnostic Fee: Most shops charge a diagnostic fee to assess the problem.
- Repair Costs: Repair costs will vary depending on the parts and labor required.
- Obtain Estimates: Get estimates from multiple shops to compare prices.
38. Preventing Future Diagnostic Issues
Preventive maintenance can help minimize future diagnostic issues.
- Regular Maintenance: Follow the recommended maintenance schedule in your Polaris owner’s manual.
- Fluid Checks: Regularly check and top off fluids such as oil, coolant, and brake fluid.
- Visual Inspections: Perform regular visual inspections to identify any potential issues before they become major problems.
39. Staying Updated with Polaris Diagnostic Technology
Staying informed about the latest diagnostic technology is crucial for effective repairs.
- Industry Publications: Read industry publications and online resources to stay up to date on the latest trends.
- Training Courses: Attend training courses to learn about new diagnostic techniques and tools.
- Online Forums: Participate in online forums to share knowledge and insights with other technicians and enthusiasts.
40. Where to Buy OBD2 to 8 Pin Adapters
OBD2 to 8-pin adapters are available from various sources.
- Online Retailers: Websites like Amazon and eBay offer a wide selection of adapters.
- Automotive Parts Stores: Local auto parts stores may carry OBD2 to 8-pin adapters.
- Polaris Dealerships: Polaris dealerships are a reliable source for OEM adapters.
- Specialty Diagnostic Tool Suppliers: Suppliers that specialize in diagnostic tools often carry a variety of adapters.
By understanding the intricacies of OBD2 to 8-pin diagnostic adapters for Polaris vehicles, you can ensure accurate diagnostics, efficient troubleshooting, and optimal performance for your machine. Armed with the knowledge and tools provided by OBD2-SCANNER.EDU.VN, you’re well-equipped to tackle any diagnostic challenge that comes your way.
Want to learn more about how to use OBD2 scanners effectively or need assistance with diagnosing your Polaris vehicle? Contact us today at OBD2-SCANNER.EDU.VN, located at 123 Main Street, Los Angeles, CA 90001, United States, or reach us via WhatsApp at +1 (641) 206-8880. Let our expert team help you keep your Polaris running smoothly.
 Polaris Diagnostic Port
41. Understanding the Role of Oxygen Sensors in Polaris Diagnostics
Oxygen sensors (O2 sensors) are critical components in modern Polaris vehicles, playing a vital role in monitoring the exhaust gases and ensuring optimal engine performance. According to a study by the Environmental Protection Agency (EPA), properly functioning O2 sensors can improve fuel efficiency by up to 15%.
- Function of O2 Sensors: Oxygen sensors measure the amount of oxygen in the exhaust gases, providing feedback to the ECU to adjust the air-fuel mixture.
- Types of O2 Sensors: There are two main types of O2 sensors: upstream (before the catalytic converter) and downstream (after the catalytic converter).
- Importance for Diagnostics: O2 sensor readings can indicate a variety of issues, such as lean or rich conditions, faulty catalytic converters, and exhaust leaks.
42. How to Interpret Oxygen Sensor Readings on Your OBD2 Scanner
Interpreting O2 sensor readings requires understanding the voltage ranges and their implications.
- Voltage Ranges: O2 sensors typically operate in a voltage range of 0.1 to 0.9 volts.
- Lean Condition: A low voltage (around 0.1 volts) indicates a lean condition, meaning there is too much oxygen in the exhaust.
- Rich Condition: A high voltage (around 0.9 volts) indicates a rich condition, meaning there is not enough oxygen in the exhaust.
- Fluctuations: The O2 sensor voltage should fluctuate rapidly between 0.1 and 0.9 volts, indicating that the ECU is actively adjusting the air-fuel mixture.
43. Troubleshooting Common Oxygen Sensor Problems
Several issues can affect O2 sensor performance.
- Contamination: O2 sensors can become contaminated by oil, coolant, or silicone.
- Wiring Issues: Damaged wiring or connectors can disrupt the O2 sensor signal.
- Sensor Failure: O2 sensors can fail over time due to age and exposure to high temperatures.
44. Using a Multimeter to Test Oxygen Sensors
A multimeter can be used to test the O2 sensor’s voltage and resistance.
- Voltage Test: Measure the O2 sensor voltage with the engine running to see if it falls within the normal range.
- Resistance Test: Measure the O2 sensor resistance to check for internal damage.
45. Understanding Fuel Trim Values and Their Significance
Fuel trim values indicate how much the ECU is adjusting the air-fuel mixture.
- Short-Term Fuel Trim (STFT): Short-term fuel trim values reflect immediate adjustments to the air-fuel mixture.
- Long-Term Fuel Trim (LTFT): Long-term fuel trim values reflect long-term adjustments to the air-fuel mixture.
- Normal Range: Fuel trim values should ideally be close to 0%.
- Positive Values: Positive fuel trim values indicate that the ECU is adding fuel to compensate for a lean condition.
- Negative Values: Negative fuel trim values indicate that the ECU is reducing fuel to compensate for a rich condition.
46. Diagnosing Vacuum Leaks Using Fuel Trim Data
Vacuum leaks can cause a lean condition and affect fuel trim values.
- Symptoms of Vacuum Leaks: Rough idling, poor acceleration, and high fuel trim values.
- Using Fuel Trim Data: Monitor fuel trim values at idle and under load to identify vacuum leaks.
- Smoke Testing: Use a smoke machine to introduce smoke into the intake system and identify the source of the vacuum leak.
47. Common Causes of Lean and Rich Conditions in Polaris Vehicles
Understanding the common causes of lean and rich conditions can help narrow down the diagnostic process.
- Lean Conditions: Vacuum leaks, faulty O2 sensors, low fuel pressure, and clogged fuel injectors.
- Rich Conditions: Faulty O2 sensors, high fuel pressure, leaking fuel injectors, and a malfunctioning mass airflow (MAF) sensor.
48. The Role of the Mass Airflow (MAF) Sensor in Diagnostics
The mass airflow (MAF) sensor measures the amount of air entering the engine.
- Function of MAF Sensor: The MAF sensor provides data to the ECU to calculate the correct air-fuel mixture.
- Importance for Diagnostics: A faulty MAF sensor can cause lean or rich conditions, poor engine performance, and DTCs.
- Testing the MAF Sensor: Use an OBD2 scanner to monitor the MAF sensor readings and compare them to specifications.
49. How to Clean a Mass Airflow (MAF) Sensor
Cleaning a MAF sensor can sometimes resolve performance issues.
- Cleaning Procedure: Use a specialized MAF sensor cleaner to gently clean the sensor element.
- Precautions: Avoid touching the sensor element and allow it to dry completely before reinstalling.
50. Understanding Throttle Position Sensor (TPS) Readings
The throttle position sensor (TPS) monitors the position of the throttle plate.
- Function of TPS: The TPS provides data to the ECU to control fuel delivery and ignition timing.
- Importance for Diagnostics: A faulty TPS can cause poor throttle response, erratic idling, and DTCs.
- Testing the TPS: Use an OBD2 scanner to monitor the TPS readings and ensure they change smoothly as the throttle is opened and closed.
51. Diagnosing Issues with the Idle Air Control (IAC) Valve
The idle air control (IAC) valve regulates the amount of air entering the engine at idle.
- Function of IAC Valve: The IAC valve maintains a stable idle speed regardless of engine load.
- Importance for Diagnostics: A faulty IAC valve can cause rough idling, stalling, and DTCs.
- Testing the IAC Valve: Use an OBD2 scanner to monitor the IAC valve position and perform output tests to verify its functionality.
52. Diagnosing Misfires on Polaris Vehicles
Misfires occur when one or more cylinders fail to fire properly.
- Common Causes of Misfires: Faulty spark plugs, ignition coils, fuel injectors, and low compression.
- Using OBD2 Scanner for Misfire Diagnosis: Use the OBD2 scanner to identify which cylinder is misfiring and access freeze frame data.
- Troubleshooting Steps: Check the spark plug, ignition coil, and fuel injector for the misfiring cylinder.
53. Performing Compression Tests to Diagnose Engine Health
Compression tests measure the pressure within each cylinder.
- Purpose of Compression Test: A compression test can reveal issues such as worn piston rings, damaged valves, and cylinder head gasket leaks.
- Procedure: Remove the spark plugs and use a compression tester to measure the pressure in each cylinder.
- Interpreting Results: Compare the compression readings to the manufacturer’s specifications and look for significant variations between cylinders.
54. Diagnosing Cooling System Problems
Cooling system problems can lead to overheating and engine damage.
- Common Symptoms: Overheating, coolant leaks, and a malfunctioning temperature gauge.
- Diagnostic Steps: Check coolant level, radiator cap, thermostat, and water pump.
- Troubleshooting: Use an OBD2 scanner to monitor coolant temperature and identify any cooling system-related DTCs.
55. Using Infrared Thermometers for Diagnostic Purposes
Infrared thermometers can be used to measure the temperature of various components.
- Applications: Check the temperature of exhaust components, catalytic converters, and cooling system components.
- Advantages: Non-contact measurement, quick readings, and the ability to measure hard-to-reach areas.
56. Diagnosing Brake System Issues
Brake system issues can compromise safety and vehicle performance.
- Common Symptoms: Squealing brakes, spongy brake pedal, and reduced braking power.
- Diagnostic Steps: Check brake pads, rotors, calipers, and brake lines.
- Troubleshooting: Use an OBD2 scanner to diagnose ABS (Anti-lock Braking System) issues and monitor wheel speed sensors.
57. Understanding ABS (Anti-Lock Braking System) Diagnostics
ABS diagnostics require specialized tools and knowledge.
- ABS Components: Wheel speed sensors, ABS control module, and hydraulic control unit.
- Diagnostic Steps: Use an OBD2 scanner to read ABS-related DTCs and monitor wheel speed sensor data.
- Troubleshooting: Check wiring connections, wheel speed sensors, and ABS control module.
58. Diagnosing Suspension System Problems
Suspension system problems can affect ride quality and handling.
- Common Symptoms: Rough ride, excessive bouncing, and uneven tire wear.
- Diagnostic Steps: Check shocks, struts, springs, and control arms.
- Troubleshooting: Inspect suspension components for damage and wear.
59. Diagnosing Tire Pressure Monitoring System (TPMS) Issues
TPMS monitors tire pressure and alerts the driver to low-pressure conditions.
- TPMS Components: Tire pressure sensors, TPMS control module, and warning light.
- Diagnostic Steps: Use an OBD2 scanner to read TPMS-related DTCs and monitor tire pressure readings.
- Troubleshooting: Check tire pressure sensors, TPMS control module, and wiring connections.
60. Battery and Charging System Diagnostics
Proper battery and charging system function are essential for reliable vehicle operation.
- Common Symptoms: Dead battery, slow cranking, and dimming lights.
- Diagnostic Steps: Check battery voltage, charging system output, and parasitic draws.
- Troubleshooting: Use a multimeter to test battery voltage and charging system output.
By diving deep into these advanced diagnostic topics, you’re better prepared to handle complex issues on Polaris vehicles. OBD2-SCANNER.EDU.VN is committed to providing the knowledge and resources you need to excel in diagnostics and repairs.
Do you need expert advice on diagnosing your Polaris vehicle or require assistance with advanced diagnostic techniques? Contact us today at OBD2-SCANNER.EDU.VN, located at 123 Main Street, Los Angeles, CA 90001, United States, or reach us via WhatsApp at +1 (641) 206-8880. Our team of experienced technicians is ready to help you keep your Polaris running at its best.