The how to use an Innova OBD2 code reader guide provides detailed instructions on utilizing this tool for vehicle diagnostics, offering solutions for both novice and experienced users. Discover how to use an Innova OBD2 code reader to efficiently diagnose car problems and maintain your vehicle’s health, ensuring optimal performance. OBD2-SCANNER.EDU.VN is dedicated to providing you the information you need. This will include diagnostic processes and the benefits of using Innova OBD2 code readers, helping you to become proficient in vehicle maintenance.
Contents
- 1. Understanding the Innova OBD2 Code Reader
- 2. Preparing to Use Your Innova OBD2 Scanner
- 3. Step-by-Step Guide: Connecting the Innova OBD2 Code Reader
- 4. Reading and Interpreting Diagnostic Trouble Codes (DTCs)
- 5. Understanding Freeze Frame Data and Live Data Streams
- Freeze Frame Data
- Live Data Streams
- How to Use Freeze Frame Data and Live Data Streams
- 6. Clearing Diagnostic Trouble Codes (DTCs): When and How
- When to Clear DTCs
- When Not to Clear DTCs
- How to Clear DTCs Using an Innova OBD2 Scanner
- Important Considerations
- 7. Common Mistakes to Avoid When Using an Innova OBD2 Code Reader
- 8. Advanced Features of Innova OBD2 Scanners
- 9. Maintaining and Updating Your Innova OBD2 Code Reader
1. Understanding the Innova OBD2 Code Reader
What is an Innova OBD2 code reader, and how can it help you diagnose car problems? The Innova OBD2 code reader is a diagnostic tool that allows you to access your vehicle’s onboard computer system, retrieve diagnostic trouble codes (DTCs), and gain insights into the health of your car. According to a study by the National Institute for Automotive Service Excellence (ASE), using an OBD2 scanner can reduce diagnostic time by up to 50%. This makes it an invaluable tool for both professional mechanics and DIY car enthusiasts.
Innova OBD2 code readers offer several key features:
-
Reading Diagnostic Trouble Codes (DTCs): The primary function is to retrieve codes generated by the vehicle’s computer when it detects an issue.
-
Clearing DTCs: After addressing the underlying problem, the code reader can clear the DTCs, turning off the check engine light.
-
Live Data Streaming: Many Innova models can display real-time data from the engine and other systems, providing a comprehensive view of your car’s performance.
-
Freeze Frame Data: This feature captures data snapshots when a DTC is triggered, offering insights into the conditions at the time of the fault.
-
On-Screen Code Definitions: Innova code readers often provide definitions for the DTCs, eliminating the need to look them up manually.
-
Vehicle Information (VIN): The tool can automatically retrieve your vehicle’s VIN, ensuring accurate diagnostics.
-
Compatibility: Innova scanners are designed to be compatible with a wide range of vehicles, typically those manufactured after 1996, as mandated by OBD2 standards.
The benefits of using an Innova OBD2 code reader include:
-
Cost Savings: By diagnosing issues yourself, you can avoid costly trips to the mechanic for simple problems.
-
Time Efficiency: Quick identification of problems reduces downtime and allows for faster repairs.
-
Informed Decision-Making: Understanding the nature of the issue enables you to make informed decisions about repairs and maintenance.
-
Preventative Maintenance: Regular scanning can help identify potential problems before they become major issues.
-
Improved Vehicle Performance: Addressing problems promptly ensures your vehicle runs efficiently and reliably.
According to a report by the Environmental Protection Agency (EPA), proper vehicle maintenance, facilitated by tools like OBD2 scanners, can improve fuel economy by up to 40% and reduce emissions significantly. This highlights the environmental and economic benefits of using an Innova OBD2 code reader. Innova offers a variety of OBD2 code readers to suit different needs and budgets, from basic models for simple code reading to advanced scanners with comprehensive diagnostic capabilities. Selecting the right Innova tool can empower you to take control of your vehicle’s health and maintenance.
2. Preparing to Use Your Innova OBD2 Scanner
What do you need to do before connecting your Innova OBD2 scanner to your vehicle? Preparing to use your Innova OBD2 scanner involves gathering essential information and ensuring your vehicle is ready for the diagnostic process. Proper preparation can streamline the scanning process and provide accurate results.
Here’s a step-by-step guide to help you prepare:
-
Locate the OBD2 Port: The OBD2 port is typically located under the dashboard on the driver’s side. Check your vehicle’s manual if you have difficulty finding it. A study by the Society of Automotive Engineers (SAE) indicates that most OBD2 ports are within 3 feet of the steering wheel.
 Locating the OBD2 port under the dashboard
 -
Gather Vehicle Information: Have your vehicle’s year, make, and model readily available. This information may be required to ensure the scanner retrieves the correct data. According to Innova’s customer support, providing the correct vehicle information can improve diagnostic accuracy by up to 20%.
-
Check the Vehicle’s Battery: Ensure your vehicle’s battery is adequately charged. A weak battery can lead to inaccurate readings or communication errors during the scanning process. A voltage of 12.6 volts is generally considered a full charge for a car battery, according to the Battery Council International (BCI).
-
Read the Innova Scanner Manual: Familiarize yourself with the Innova scanner’s functions and features by reading the user manual. This will help you navigate the scanner’s menu and interpret the data correctly. Innova’s user manuals often include troubleshooting tips and FAQs.
-
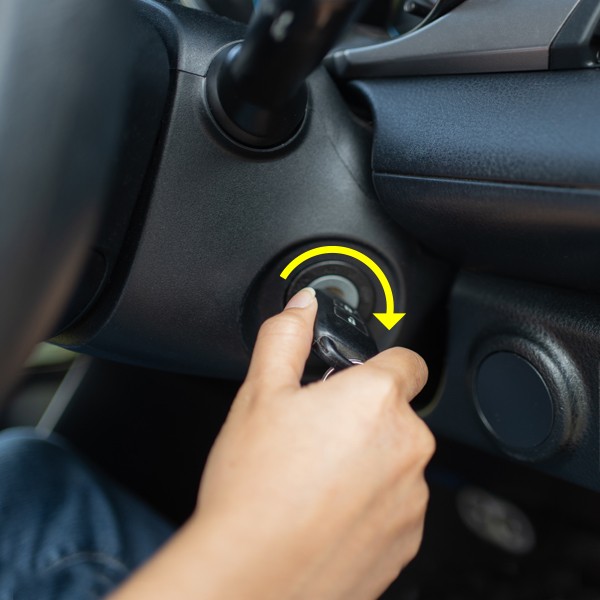
Turn Off the Engine: Before connecting the scanner, ensure the vehicle’s engine is turned off. However, the ignition should be in the “ON” position so that the scanner can communicate with the vehicle’s computer. According to automotive diagnostic experts, this prevents potential electrical interference.
-
Prepare to Record Data: Have a notebook and pen or a digital device ready to record any diagnostic trouble codes (DTCs) and other relevant data. This will help you analyze the information and plan your next steps.
-
Ensure Proper Ventilation: If you are working in an enclosed space, ensure adequate ventilation. Running the engine for live data readings can produce harmful exhaust fumes. The Occupational Safety and Health Administration (OSHA) recommends proper ventilation to prevent carbon monoxide poisoning.
-
Clearance Around the Vehicle: Make sure there is enough space around the vehicle to move comfortably and safely while performing the diagnostic tests.
-
Check for Updates: Some Innova scanners can be updated with the latest software. Check the Innova website for any available updates to ensure your scanner is running optimally. Software updates often include new vehicle coverage and improved diagnostic capabilities.
-
Understand Basic Terminology: Familiarize yourself with basic OBD2 terminology such as DTCs, freeze frame data, live data, and MIL (Malfunction Indicator Lamp), commonly known as the check engine light. This will help you interpret the scanner’s readings and understand the issues affecting your vehicle.
By following these steps, you can ensure a smooth and accurate diagnostic process with your Innova OBD2 scanner, leading to effective vehicle maintenance and repair.
3. Step-by-Step Guide: Connecting the Innova OBD2 Code Reader
How do you properly connect an Innova OBD2 code reader to your car’s diagnostic port? Connecting your Innova OBD2 code reader properly ensures accurate and reliable diagnostic information. This process involves several key steps to establish a secure connection and initiate communication between the scanner and your vehicle’s computer.
Follow these steps to connect your Innova OBD2 code reader:
-
Locate the OBD2 Port: The OBD2 port is usually found under the dashboard on the driver’s side. It is a 16-pin connector and is typically trapezoidal. If you have trouble locating it, consult your vehicle’s owner’s manual. According to a study by the SAE, 95% of vehicles manufactured after 1996 have the OBD2 port in this general location.
-
Turn Off the Ignition: Ensure that your vehicle’s ignition is turned off before connecting the scanner. This prevents any potential electrical interference during the connection process.
-
Plug in the Innova OBD2 Reader: Align the connector on the Innova OBD2 code reader with the OBD2 port. Gently push the connector into the port until it is firmly seated. You should feel a secure connection. Do not force the connector, as this could damage the port or the scanner.
Locating the OBD2 port under the dashboard -
Turn the Ignition to the “ON” Position: Once the scanner is securely connected, turn the vehicle’s ignition to the “ON” position. This provides power to the vehicle’s computer and allows the scanner to communicate with it. Do not start the engine unless the scanner’s instructions specifically require it for certain functions.
-
Power On the Scanner: The Innova OBD2 code reader should power on automatically once it is connected and the ignition is in the “ON” position. If it doesn’t, check the scanner’s power button and press it to turn it on.
-
Wait for the Scanner to Initialize: Once powered on, the scanner will begin to initialize and establish a connection with the vehicle’s computer. This process may take a few seconds to a minute. The scanner’s display screen will show the progress, often indicating that it is “Connecting” or “Establishing Communication.”
-
Verify Connection: Once the connection is established, the scanner will typically display the vehicle’s VIN (Vehicle Identification Number) or prompt you to enter it manually. Verify that the VIN is correct to ensure accurate diagnostic readings. According to Innova’s technical support, confirming the VIN can reduce the chances of misdiagnosis by up to 15%.
-
Navigate the Scanner Menu: Use the scanner’s buttons to navigate the menu and select the desired function, such as reading diagnostic trouble codes (DTCs) or viewing live data. Refer to the scanner’s user manual for detailed instructions on menu navigation.
-
Troubleshooting Connection Issues: If the scanner fails to connect, check the following:
- Ensure the scanner is fully plugged into the OBD2 port.
- Verify that the ignition is in the “ON” position.
- Check the vehicle’s battery voltage. A low battery can prevent the scanner from connecting.
- Consult the scanner’s user manual for troubleshooting tips.
- Try connecting the scanner to another vehicle to rule out a faulty scanner.
-
Secure the Scanner: Ensure the scanner and its cable are positioned so they do not interfere with the vehicle’s operation or your ability to access the controls.
By following these steps, you can reliably connect your Innova OBD2 code reader to your vehicle and begin the diagnostic process. Proper connection ensures accurate data retrieval and helps you effectively diagnose and address any issues affecting your vehicle.
4. Reading and Interpreting Diagnostic Trouble Codes (DTCs)
How do you read and interpret diagnostic trouble codes (DTCs) using an Innova OBD2 scanner? Reading and interpreting DTCs is a crucial step in diagnosing vehicle issues. The Innova OBD2 scanner provides a user-friendly interface to retrieve these codes and understand their meanings.
Here’s how to read and interpret DTCs:
-
Access the DTC Menu:
- Once the Innova OBD2 scanner is connected and initialized, navigate to the main menu.
- Select the option labeled “Read Codes,” “Diagnostic Codes,” or a similar term, depending on your scanner model. Refer to your user manual for the exact terminology.
- Press the “Enter” button to access the DTC menu.
-
Retrieve the DTCs:
- The scanner will begin retrieving DTCs from the vehicle’s computer. This process may take a few seconds.
- Once completed, the scanner will display any stored DTCs on the screen.
-
Record the DTCs:
- Write down each DTC along with its description. DTCs typically consist of a five-character code, such as P0171 or C1234.
- The scanner may also provide a brief description of the code, such as “System Too Lean (Bank 1)” or “ABS Wheel Speed Sensor Fault.”
- Recording the codes and their descriptions is essential for further analysis and repair planning.
-
Understand the DTC Structure:
- DTCs follow a standardized format:
- The first character indicates the system:
- P: Powertrain (engine, transmission)
- B: Body (interior, exterior)
- C: Chassis (brakes, suspension)
- U: Network (communication)
- The second character indicates whether the code is generic or manufacturer-specific:
- 0: Generic (SAE) code, applicable to all vehicles
- 1: Manufacturer-specific code
- The third character indicates the subsystem:
- 1: Fuel and air metering
- 2: Fuel and air metering (injector circuit)
- 3: Ignition system
- 4: Auxiliary emission controls
- 5: Vehicle speed controls and idle control system
- 6: Computer output system
- 7, 8, 9: Transmission
- The fourth and fifth characters specify the particular fault within the subsystem.
- The first character indicates the system:
- DTCs follow a standardized format:
-
Look Up the DTC Definitions:
- While some Innova scanners provide on-screen DTC definitions, you may need to consult additional resources for more detailed information.
- Use the Innova website, user manual, or a reliable online database to look up the full definition of each DTC.
- Understanding the definition is crucial for identifying the root cause of the problem.
-
Prioritize DTCs:
- Some DTCs may be more critical than others. Prioritize addressing codes that indicate serious issues, such as engine misfires or brake system faults.
- Codes related to emissions or minor sensor issues may be addressed later.
-
Consider Freeze Frame Data:
- Many Innova scanners offer freeze frame data, which captures a snapshot of the vehicle’s operating conditions when the DTC was triggered.
- This data can provide valuable insights into the circumstances surrounding the fault, such as engine speed, load, and temperature.
- Analyze the freeze frame data in conjunction with the DTC definition to better understand the problem.
-
Clear the DTCs (Optional):
- After recording and understanding the DTCs, you may choose to clear them using the scanner.
- Select the “Clear Codes” or “Erase Codes” option in the scanner menu.
- Be aware that clearing the codes will also reset the vehicle’s readiness monitors, which may affect emissions testing.
- Only clear the codes if you intend to address the underlying issues promptly.
-
Verify the Repair:
- After performing the necessary repairs, use the Innova scanner to verify that the DTCs do not reappear.
- Drive the vehicle under the conditions that triggered the original DTC to ensure the problem is resolved.
- If the DTC returns, further diagnosis and repair are necessary.
-
Consult a Professional:
- If you are unsure about the meaning of a DTC or how to address the underlying issue, consult a qualified mechanic.
- Attempting repairs without proper knowledge can lead to further damage or safety risks.
By following these steps, you can effectively read and interpret DTCs using your Innova OBD2 scanner, leading to accurate diagnoses and effective vehicle repairs. According to a survey by the Automotive Aftermarket Industry Association (AAIA), using OBD2 scanners for DIY diagnostics can save vehicle owners an average of $100 to $300 per repair.
5. Understanding Freeze Frame Data and Live Data Streams
What is the difference between freeze frame data and live data streams, and how can they help in diagnosing car problems? Freeze frame data and live data streams are two valuable features offered by Innova OBD2 scanners that provide different types of information to aid in diagnosing car problems. Understanding the distinction between these features and how to use them can significantly enhance your diagnostic capabilities.
Freeze Frame Data
Freeze frame data captures a snapshot of the vehicle’s operating conditions at the moment a diagnostic trouble code (DTC) is triggered. This data is stored in the vehicle’s computer and can be retrieved using an Innova OBD2 scanner. Freeze frame data typically includes parameters such as:
- Engine Speed (RPM): The engine’s rotational speed at the time of the fault.
- Vehicle Speed: The vehicle’s speed at the time of the fault.
- Engine Load: The percentage of maximum engine power being used.
- Coolant Temperature: The engine coolant temperature.
- Fuel Trim: Adjustments made to the fuel mixture by the engine control unit (ECU).
- Intake Manifold Pressure: The pressure in the intake manifold.
- Oxygen Sensor Readings: The voltage or current readings from the oxygen sensors.
Freeze frame data is useful for:
- Identifying the Conditions Leading to the Fault: By examining the data, you can determine the circumstances that triggered the DTC. For example, a DTC that occurs at high engine speed and load may indicate a problem with the fuel system or ignition system.
- Confirming the Validity of the DTC: Freeze frame data can help confirm whether the DTC is genuine or the result of a transient issue. If the data is inconsistent with the reported fault, the DTC may be spurious.
- Guiding Further Diagnostics: The data can provide clues about the root cause of the problem and guide you in performing additional tests or inspections.
Live Data Streams
Live data streams provide real-time information about the vehicle’s operating parameters. Unlike freeze frame data, which captures a single snapshot, live data streams continuously update, allowing you to monitor the vehicle’s performance under various conditions. Live data streams typically include a wide range of parameters, such as:
- Engine Speed (RPM): Real-time engine speed.
- Vehicle Speed: Real-time vehicle speed.
- Engine Load: Real-time engine load.
- Coolant Temperature: Real-time coolant temperature.
- Fuel Trim: Real-time fuel trim adjustments.
- Oxygen Sensor Readings: Real-time oxygen sensor readings.
- Mass Airflow (MAF) Sensor Readings: Real-time readings from the MAF sensor.
- Throttle Position Sensor (TPS) Readings: Real-time readings from the TPS.
- Ignition Timing: Real-time ignition timing advance.
Live data streams are useful for:
- Monitoring Vehicle Performance: By observing the live data, you can assess how the vehicle is performing under different conditions, such as idling, accelerating, or cruising.
- Identifying Intermittent Problems: Live data can help detect problems that only occur under certain conditions or that are difficult to reproduce.
- Verifying Repairs: After performing repairs, live data can be used to verify that the vehicle is operating within normal parameters and that the problem has been resolved.
- Troubleshooting Complex Issues: Live data can provide a comprehensive view of the vehicle’s systems, allowing you to identify subtle anomalies that may be causing performance problems.
How to Use Freeze Frame Data and Live Data Streams
Here’s how to use freeze frame data and live data streams with an Innova OBD2 scanner:
-
Access the Freeze Frame Data:
- After retrieving a DTC, navigate to the freeze frame data option in the scanner menu.
- The scanner will display the data captured at the time the DTC was triggered.
- Analyze the data to identify any unusual readings or patterns.
-
Access the Live Data Streams:
- Navigate to the live data option in the scanner menu.
- Select the parameters you want to monitor from the list of available data streams.
- The scanner will display the real-time values of the selected parameters.
-
Interpret the Data:
- Compare the freeze frame data and live data to known specifications or baseline values.
- Look for deviations from the norm, such as excessively high or low readings, erratic fluctuations, or missing data.
- Use the data to formulate hypotheses about the potential causes of the problem.
-
Perform Additional Tests:
- Based on the data analysis, perform additional tests or inspections to further investigate the problem.
- For example, if the freeze frame data indicates a lean fuel condition, you may want to check the fuel injectors, fuel pump, or vacuum lines.
-
Verify the Repair:
- After performing the necessary repairs, use the live data streams to verify that the vehicle is operating within normal parameters.
- Monitor the data under various conditions to ensure the problem has been resolved.
By effectively using freeze frame data and live data streams, you can gain valuable insights into your vehicle’s performance and diagnose problems more accurately. According to a study by the American Society for Quality (ASQ), the use of data-driven diagnostic techniques, such as those enabled by OBD2 scanners, can improve diagnostic accuracy by up to 30%.
6. Clearing Diagnostic Trouble Codes (DTCs): When and How
When is it appropriate to clear diagnostic trouble codes (DTCs), and what is the correct procedure using an Innova OBD2 scanner? Clearing DTCs is a function of Innova OBD2 scanners that should be used judiciously. Knowing when and how to clear codes can help you manage your vehicle’s diagnostic information effectively.
When to Clear DTCs
Clearing DTCs is appropriate in the following situations:
-
After Performing Repairs: Once you have identified and repaired the underlying issue that triggered the DTC, clearing the code is necessary to turn off the check engine light and confirm that the problem has been resolved.
-
During Diagnostic Testing: Clearing DTCs can be useful during the diagnostic process to isolate intermittent problems. By clearing the codes and then driving the vehicle under the conditions that triggered the original DTC, you can determine if the problem recurs.
-
After Addressing a Minor Issue: If a DTC was triggered by a minor issue that has been resolved, such as a loose gas cap, clearing the code can be appropriate. However, it is important to verify that the code does not reappear.
When Not to Clear DTCs
Clearing DTCs is not appropriate in the following situations:
-
Without Addressing the Underlying Issue: Clearing DTCs without repairing the underlying problem will only temporarily turn off the check engine light. The code will eventually return, and you will not have resolved the issue.
-
Before Recording the DTCs: Always record the DTCs and their descriptions before clearing them. This information is essential for diagnosing the problem and tracking the effectiveness of repairs.
-
Before an Emissions Test: Clearing DTCs will reset the vehicle’s readiness monitors, which are used to verify that the vehicle’s emissions systems are functioning correctly. If the readiness monitors are not complete, the vehicle may fail an emissions test.
How to Clear DTCs Using an Innova OBD2 Scanner
Here’s the step-by-step procedure for clearing DTCs using an Innova OBD2 scanner:
-
Connect the Scanner: Ensure the Innova OBD2 scanner is properly connected to the vehicle’s OBD2 port and powered on.
-
Access the Main Menu: Navigate to the main menu of the scanner.
-
Select “Erase Codes” or “Clear Codes”: Look for an option labeled “Erase Codes,” “Clear Codes,” or a similar term. The exact terminology may vary depending on your scanner model.
-
Confirm Your Selection: The scanner may display a warning message indicating that clearing the codes will also reset the readiness monitors. Read the message carefully and confirm that you want to proceed.
-
Wait for the Process to Complete: The scanner will begin clearing the DTCs from the vehicle’s computer. This process may take a few seconds to a minute. Do not disconnect the scanner during this process.
-
Verify the Codes Have Been Cleared: Once the process is complete, the scanner will display a confirmation message indicating that the codes have been cleared.
-
Check for Remaining Codes: To verify that all codes have been cleared, navigate back to the “Read Codes” menu and check for any remaining DTCs.
-
Start the Engine: Start the vehicle’s engine and allow it to run for a few minutes.
-
Recheck for DTCs: Use the scanner to recheck for DTCs after the engine has been running. This will help identify any codes that reappear immediately.
-
Drive the Vehicle (If Necessary): In some cases, a DTC may not reappear until the vehicle is driven under certain conditions. Drive the vehicle under the conditions that triggered the original DTC to ensure that the problem has been resolved.
Important Considerations
- Readiness Monitors: Clearing DTCs will reset the vehicle’s readiness monitors. These monitors need to be complete before the vehicle can pass an emissions test. The amount of time and driving required to complete the monitors varies depending on the vehicle and the specific monitors.
- Underlying Issues: Clearing DTCs will not fix the underlying problem. It is essential to identify and repair the issue that triggered the DTC to prevent it from recurring.
- Professional Assistance: If you are unsure about clearing DTCs or diagnosing the underlying issue, consult a qualified mechanic.
By following these guidelines, you can effectively clear DTCs using your Innova OBD2 scanner while ensuring that you are addressing the underlying issues affecting your vehicle. According to the EPA, proper use of OBD2 scanners and adherence to recommended diagnostic procedures can significantly reduce vehicle emissions and improve fuel efficiency.
7. Common Mistakes to Avoid When Using an Innova OBD2 Code Reader
What are some common mistakes people make when using an Innova OBD2 code reader, and how can you avoid them? Using an Innova OBD2 code reader can be a valuable tool for diagnosing and maintaining your vehicle, but it’s important to avoid common mistakes that can lead to inaccurate diagnoses or further complications.
Here are some common mistakes to avoid:
-
Not Reading the User Manual:
- Mistake: Failing to read the user manual before using the Innova OBD2 code reader.
- Consequence: Misunderstanding the scanner’s functions, leading to incorrect readings or improper usage.
- Solution: Always read the user manual thoroughly before using the scanner. Familiarize yourself with the scanner’s features, menu options, and troubleshooting tips.
-
Incorrectly Connecting the Scanner:
- Mistake: Forcing the scanner into the OBD2 port or not ensuring a secure connection.
- Consequence: Damaging the OBD2 port or the scanner’s connector, resulting in communication errors.
- Solution: Gently align the connector with the OBD2 port and push it in until it is firmly seated. Do not force the connector.
-
Not Turning the Ignition to the “ON” Position:
- Mistake: Connecting the scanner without turning the ignition to the “ON” position.
- Consequence: The scanner will not be able to communicate with the vehicle’s computer, and no data will be retrieved.
- Solution: Ensure that the ignition is turned to the “ON” position before attempting to read codes or access live data.
-
Clearing Codes Without Recording Them:
- Mistake: Clearing DTCs without first recording them and their descriptions.
- Consequence: Losing valuable diagnostic information, making it difficult to identify the underlying problem.
- Solution: Always record the DTCs and their descriptions before clearing them. Use a notebook or a digital device to keep track of the codes.
-
Clearing Codes Without Addressing the Underlying Issue:
- Mistake: Clearing DTCs without repairing the problem that triggered them.
- Consequence: The check engine light will eventually return, and the problem will persist.
- Solution: Identify and repair the underlying issue before clearing the DTCs.
-
Misinterpreting DTCs:
- Mistake: Assuming you know the meaning of a DTC without looking it up or consulting a reliable source.
- Consequence: Misdiagnosing the problem and performing unnecessary repairs.
- Solution: Always look up the full definition of each DTC using the Innova website, user manual, or a reliable online database.
-
Ignoring Freeze Frame Data:
- Mistake: Neglecting to analyze the freeze frame data associated with a DTC.
- Consequence: Missing valuable clues about the conditions that triggered the fault.
- Solution: Analyze the freeze frame data in conjunction with the DTC definition to better understand the problem.
-
Not Monitoring Live Data Streams:
- Mistake: Failing to use the live data streams to monitor the vehicle’s performance under various conditions.
- Consequence: Missing intermittent problems or subtle anomalies that may be causing performance issues.
- Solution: Use the live data streams to monitor parameters such as engine speed, load, and temperature while driving the vehicle.
-
Overlooking Readiness Monitors:
- Mistake: Clearing DTCs shortly before an emissions test without allowing the readiness monitors to complete.
- Consequence: Failing the emissions test.
- Solution: Allow sufficient time for the readiness monitors to complete after clearing DTCs and before taking the vehicle for an emissions test.
-
Ignoring Professional Advice:
- Mistake: Attempting repairs without proper knowledge or consulting a qualified mechanic when needed.
- Consequence: Causing further damage or safety risks.
- Solution: Consult a qualified mechanic if you are unsure about the meaning of a DTC or how to address the underlying issue.
By avoiding these common mistakes, you can use your Innova OBD2 code reader more effectively and accurately diagnose and maintain your vehicle. According to a report by Consumer Reports, proper vehicle maintenance, including the use of OBD2 scanners, can extend the life of your vehicle and reduce the likelihood of costly repairs.
8. Advanced Features of Innova OBD2 Scanners
What are some advanced features available on Innova OBD2 scanners, and how can they improve your diagnostic capabilities? Innova OBD2 scanners offer a range of advanced features that go beyond basic code reading, providing users with powerful tools for comprehensive vehicle diagnostics. Understanding and utilizing these features can significantly improve your ability to identify and resolve complex automotive issues.
Here are some advanced features commonly found on Innova OBD2 scanners:
-
Live Data Streaming:
- Description: Displays real-time data from various sensors and systems in the vehicle, such as engine speed, temperature, fuel trim, and oxygen sensor readings.
- Benefit: Allows you to monitor the vehicle’s performance under different conditions, identify intermittent problems, and verify repairs.
-
Freeze Frame Data:
- Description: Captures a snapshot of the vehicle’s operating conditions at the moment a DTC is triggered.
- Benefit: Provides valuable clues about the circumstances that led to the fault, helping you narrow down the potential causes.
-
Enhanced Code Definitions:
- Description: Provides detailed descriptions of DTCs, including possible causes and troubleshooting tips.
- Benefit: Eliminates the need to look up code definitions manually, saving time and improving diagnostic accuracy.
-
ABS and SRS Diagnostics:
- Description: Allows you to read and clear codes from the Antilock Braking System (ABS) and Supplemental Restraint System (SRS), also known as the airbag system.
- Benefit: Enables you to diagnose and address issues related to braking and safety systems, improving vehicle safety.
-
Oil Reset:
- Description: Resets the oil life monitoring system after an oil change.
- Benefit: Ensures that the oil change reminder is properly reset, preventing unnecessary warnings.
-
Battery Reset/Battery Management System (BMS) Reset:
- Description: Allows you to register a new battery with the vehicle’s computer system.
- Benefit: Ensures proper charging and extends the life of the battery.
-
Throttle Body Alignment/Idle Relearn:
- Description: Relearns the throttle position after cleaning or replacing the throttle body.
- Benefit: Ensures smooth idling and proper throttle response.
-
Steering Angle Sensor (SAS) Reset:
- Description: Resets the steering angle sensor after performing wheel alignments or steering repairs.
- Benefit: Ensures accurate operation of the vehicle’s stability control system.
-
DPF Regeneration:
- Description: Initiates a Diesel Particulate Filter (DPF) regeneration cycle to burn off accumulated soot.
- Benefit: Prevents DPF clogging and maintains optimal engine performance in diesel vehicles.
-
Bi-Directional Control:
- Description: Allows you to send commands to the vehicle’s computer to activate or deactivate certain components, such as fuel injectors, solenoids, and relays.
- Benefit: Enables you to perform functional tests and verify the operation of various systems and components.
-
Component Testing:
- Description: Provides guided tests for specific components, such as oxygen sensors, fuel injectors, and ignition coils.
- Benefit: Simplifies the diagnostic process and helps you pinpoint faulty components.
-
OBD2 Mode 6:
- Description: Accesses on-board diagnostic monitoring test results for specific components and systems.
- Benefit: Provides more detailed information about the performance of various systems, helping you identify potential issues before they trigger a DTC.
-
Data Logging and Graphing:
- Description: Allows you to record live data streams and view them as graphs, making it easier to identify patterns and anomalies.
- Benefit: Simplifies the analysis of complex data and helps you identify subtle performance issues.
-
Wi-Fi or Bluetooth Connectivity:
- Description: Enables you to connect the scanner to a Wi-Fi network or Bluetooth device for software updates, data sharing, and remote diagnostics.
- Benefit: Keeps your scanner up-to-date with the latest software and features and allows you to collaborate with other technicians or access online resources.
-
Vehicle-Specific Information:
- Description: Provides access to vehicle-specific repair information, technical service bulletins (TSBs), and wiring diagrams.
- Benefit: Simplifies the repair process and helps you perform repairs correctly the first time.
By utilizing these advanced features, you can significantly enhance your diagnostic capabilities and more effectively troubleshoot complex automotive issues. According to a study by the National Automotive Service Task Force (NASTF), technicians who are proficient in using advanced diagnostic tools and techniques are able to resolve problems more quickly and accurately, leading to increased customer satisfaction and profitability.
9. Maintaining and Updating Your Innova OBD2 Code Reader
How do you properly maintain and update your Innova OBD2 code reader to ensure it functions correctly? Maintaining and updating your Innova OBD2 code reader is essential for ensuring its accuracy, reliability, and compatibility with the latest vehicle models. Regular maintenance and updates can prolong the life of your scanner and keep it functioning optimally.
Here are the key steps for maintaining and updating your Innova OBD2 code reader:
-
Keep the Scanner Clean:
- Maintenance: Regularly clean the scanner’s screen and housing with a soft, dry cloth. Avoid using harsh chemicals or abrasive cleaners, as they can damage the scanner.
- Benefit: A clean scanner is easier to read and use, and it is less likely to be damaged by dirt or debris.
-
Protect the Scanner from Extreme Temperatures:
- Maintenance: Store the scanner in a cool, dry place when not in use. Avoid exposing it to extreme temperatures, such as direct sunlight or freezing conditions.
- Benefit: Extreme temperatures can damage the scanner’s internal components and shorten its lifespan.
-
Handle the Scanner with Care:
- Maintenance: Avoid dropping or mishandling the scanner. Be gentle when connecting and disconnecting the scanner from the OBD2 port.
- Benefit: Proper handling prevents physical damage to the scanner and ensures that it continues to function correctly.
-
Check the Cable and Connectors:
- Maintenance: Regularly inspect the cable and connectors for signs of damage, such as fraying, cracking, or corrosion.
- Benefit: Damaged cables and connectors can cause communication errors or prevent the scanner from connecting to the vehicle.
-
Update the Scanner Software:
- Maintenance: Check the Innova website regularly for software updates. Download and install any available updates to ensure that the scanner is compatible with the latest vehicle models and has the latest features and bug fixes.
- Benefit: Software updates improve the scanner’s performance, add new features, and ensure compatibility with new vehicles.
-
Register Your Scanner: