Equus Obd2 Codes are standardized codes used to diagnose vehicle problems, and understanding them is crucial for car owners and technicians alike. At OBD2-SCANNER.EDU.VN, we provide the tools and knowledge necessary to accurately interpret these codes and resolve issues efficiently, ensuring your vehicle runs smoothly and reliably. With our guidance, you’ll gain the expertise to handle diagnostic tasks effectively, saving time and money.
Contents
- 1. What Are Equus OBD2 Codes?
- 1.1. History and Evolution of OBD2 Codes
- 1.2. Significance of OBD2 in Modern Vehicles
- 1.3. Common Misconceptions About OBD2 Codes
- 2. Identifying Equus OBD2 Codes
- 2.1. Step-by-Step Guide to Retrieve OBD2 Codes
- 2.2. Understanding the Structure of OBD2 Codes
- 2.3. Using OBD2 Scanners Effectively
- 3. Interpreting Common Equus OBD2 Codes
- 3.1. P0300 Series: Misfire Codes
- 3.2. P0171 and P0174: Lean Condition Codes
- 3.3. P0420: Catalyst System Efficiency Below Threshold
- 3.4. P0401: Exhaust Gas Recirculation (EGR) Flow Insufficient Detected
- 3.5. ABS and Airbag Codes
- 4. Diagnosing Equus OBD2 Codes: A Systematic Approach
- 4.1. Verify the Code
- 4.2. Visual Inspection
- 4.3. Component Testing
- 4.4. Using Live Data
- 4.5. Consult Repair Information
- 5. Repairing Issues Related to Equus OBD2 Codes
- 5.1. Common Repairs for Misfire Codes (P0300 Series)
- 5.2. Addressing Lean Condition Codes (P0171 and P0174)
- 5.3. Resolving Catalyst System Efficiency Issues (P0420)
- 5.4. Repairing EGR System Issues (P0401)
- 5.5. Addressing ABS and Airbag System Issues
- 6. Preventing Future Equus OBD2 Code Issues
- 6.1. Regular Vehicle Maintenance
- 6.2. Monitoring Vehicle Performance
- 6.3. Using Quality Parts and Fluids
- 6.4. Addressing Issues Promptly
- 6.5. Regular OBD2 Scanning
- 7. Advanced Equus OBD2 Code Diagnostics
- 7.1. Using Oscilloscopes
- 7.2. Performing Advanced Component Tests
- 7.3. Analyzing Fuel Trims in Detail
- 7.4. Diagnosing Intermittent Issues
- 7.5. Using Factory Scan Tools
- 8. Equus OBD2 Code FAQs
1. What Are Equus OBD2 Codes?
Equus OBD2 codes are diagnostic trouble codes (DTCs) used in vehicles, and they indicate a problem within the car’s systems. These codes are part of the On-Board Diagnostics II (OBD2) system, which is standard in most vehicles manufactured after 1996. Knowing what these codes mean can help you diagnose and fix automotive issues more effectively.
The OBD2 system monitors various components and systems in your vehicle, including the engine, transmission, and emissions systems. When a problem is detected, the system generates a specific code, such as P0300 (random misfire detected) or P0171 (system too lean, bank 1). These codes provide valuable information about the nature and location of the issue, enabling you to take appropriate action.
1.1. History and Evolution of OBD2 Codes
The evolution of OBD systems has been significant, and they have transitioned from basic monitoring to comprehensive diagnostics. According to the Environmental Protection Agency (EPA), OBD2 was standardized in 1996 to ensure all vehicles met certain emissions standards. These standards were set to reduce pollution and improve air quality.
Early OBD systems were manufacturer-specific and lacked standardization, making it difficult for technicians to diagnose issues across different makes and models. The introduction of OBD2 brought a universal set of codes and diagnostic procedures, streamlining the repair process. Today, OBD2 systems continue to evolve with advancements in automotive technology, incorporating more sensors and sophisticated monitoring capabilities.
1.2. Significance of OBD2 in Modern Vehicles
OBD2 plays a critical role in modern vehicle maintenance by providing real-time data and diagnostic information. A study by the National Institute for Automotive Service Excellence (ASE) found that proper use of OBD2 scanners can reduce diagnostic time by up to 50%. This efficiency translates to cost savings for both vehicle owners and repair shops.
The OBD2 system not only helps identify current problems but also aids in preventative maintenance. By monitoring key parameters such as engine temperature, fuel efficiency, and sensor readings, you can detect potential issues before they lead to major breakdowns. This proactive approach can extend the life of your vehicle and prevent costly repairs.
1.3. Common Misconceptions About OBD2 Codes
There are several common misconceptions about OBD2 codes that can lead to incorrect diagnoses and unnecessary repairs. One of the most frequent mistakes is assuming that a specific code directly indicates a specific part failure. For example, a P0420 code (catalyst system efficiency below threshold) doesn’t always mean the catalytic converter is bad; it could be due to other issues like exhaust leaks or faulty oxygen sensors.
Another misconception is that clearing the OBD2 codes will fix the underlying problem. Clearing codes without addressing the root cause will only temporarily turn off the check engine light, and the problem will likely return. It’s essential to diagnose the issue thoroughly and perform the necessary repairs before clearing the codes.
2. Identifying Equus OBD2 Codes
Identifying Equus OBD2 codes accurately is the first step in diagnosing and resolving vehicle issues. The process involves using an OBD2 scanner to retrieve the stored codes from the vehicle’s computer system. Understanding how to use the scanner and interpret the codes is essential for effective troubleshooting.
The OBD2 scanner connects to the vehicle’s diagnostic port, typically located under the dashboard. Once connected, the scanner communicates with the vehicle’s computer and retrieves any stored DTCs. These codes are usually displayed on the scanner’s screen along with a brief description of the issue.
2.1. Step-by-Step Guide to Retrieve OBD2 Codes
Retrieving OBD2 codes is a straightforward process that can be done with a basic OBD2 scanner. Here’s a step-by-step guide:
- Locate the OBD2 Port: The OBD2 port is usually located under the dashboard on the driver’s side. It is a 16-pin connector and should be easily accessible.
- Connect the OBD2 Scanner: Plug the scanner into the OBD2 port. Make sure it is securely connected.
- Turn on the Ignition: Turn the ignition key to the “on” position without starting the engine. This provides power to the vehicle’s computer.
- Power on the Scanner: Turn on the OBD2 scanner. It should automatically connect to the vehicle’s computer.
- Retrieve the Codes: Follow the scanner’s instructions to retrieve the diagnostic trouble codes (DTCs). The codes will be displayed on the screen along with a brief description.
- Record the Codes: Write down the codes and their descriptions for further analysis.
2.2. Understanding the Structure of OBD2 Codes
OBD2 codes are structured in a specific format, which provides information about the system and component affected. The code consists of five characters: one letter followed by four numbers.
-
First Character: Indicates the system the code relates to:
- P: Powertrain (engine, transmission)
- B: Body (airbags, power windows)
- C: Chassis (ABS, suspension)
- U: Network (communication systems)
-
Second Character: Indicates whether the code is generic or manufacturer-specific:
- 0: Generic (SAE) code
- 1, 2, or 3: Manufacturer-specific code
-
Third Character: Indicates the subsystem:
- 1: Fuel and air metering
- 2: Fuel and air metering (injector circuit)
- 3: Ignition system or misfire
- 4: Auxiliary emission controls
- 5: Vehicle speed control and idle control system
- 6: Computer output system
- 7: Transmission
- 8: Transmission
-
Fourth and Fifth Characters: Specify the particular fault within the subsystem.
For example, the code P0300 indicates a generic powertrain code related to ignition or misfire, specifically indicating a random or multiple cylinder misfire.
2.3. Using OBD2 Scanners Effectively
To use OBD2 scanners effectively, it’s essential to understand their capabilities and limitations. Here are some tips:
- Choose the Right Scanner: Select a scanner that meets your needs. Basic scanners are sufficient for reading and clearing codes, while advanced scanners offer features like live data streaming, component testing, and access to manufacturer-specific codes.
- Read the Manual: Familiarize yourself with the scanner’s features and functions by reading the user manual.
- Update the Software: Keep the scanner’s software updated to ensure compatibility with the latest vehicle models and access to the most current code definitions.
- Use Live Data: Utilize the live data feature to monitor sensor readings and identify abnormal values. This can help pinpoint intermittent problems that may not trigger a code.
- Perform Component Tests: Use the component testing feature to check the functionality of individual sensors and actuators.
- Consult Repair Information: Refer to repair manuals and online databases for detailed information about the codes and recommended diagnostic procedures.
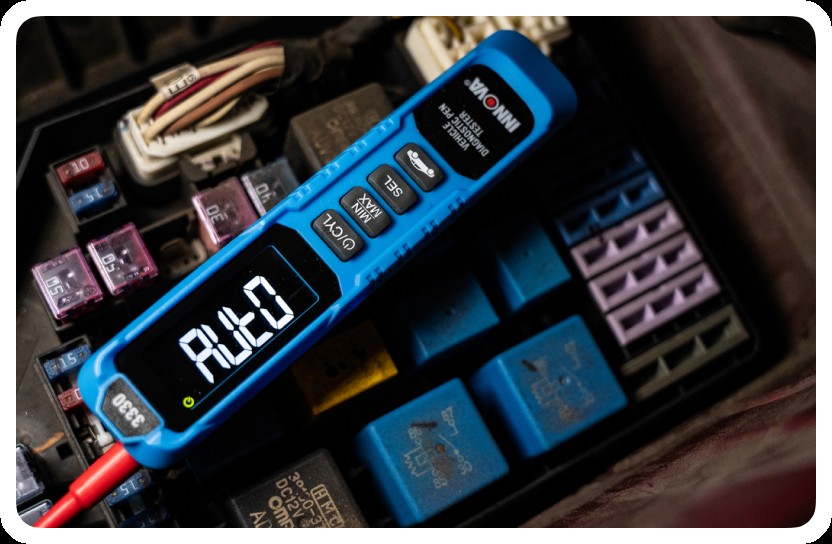 OBD2 Scanner
3. Interpreting Common Equus OBD2 Codes
Interpreting Equus OBD2 codes accurately is crucial for diagnosing and resolving vehicle issues effectively. While some codes may seem straightforward, others require a deeper understanding of the vehicle’s systems and components. Here, we’ll discuss some common OBD2 codes and their potential causes.
Understanding the meaning behind these codes can save you time and money by directing you to the most likely source of the problem. It’s also important to consider the context in which the code appears, as multiple codes can sometimes be related and point to a common issue.
3.1. P0300 Series: Misfire Codes
The P0300 series codes indicate a misfire in one or more cylinders. A misfire occurs when one or more cylinders in the engine fail to ignite the air-fuel mixture properly. This can lead to reduced engine power, poor fuel economy, and increased emissions.
-
P0300: Random/Multiple Cylinder Misfire Detected
- Possible Causes: Faulty spark plugs, ignition coils, fuel injectors, vacuum leaks, low compression, or a faulty crankshaft position sensor.
-
P0301-P0312: Cylinder Specific Misfire (e.g., P0301 – Cylinder 1 Misfire Detected)
- Possible Causes: Similar to P0300, but specific to the indicated cylinder. This helps narrow down the problem to a particular component, such as a spark plug or ignition coil.
According to a study by AAA, misfires are a common cause of check engine lights, and addressing them promptly can prevent further damage to the engine. It’s important to diagnose the root cause of the misfire rather than simply replacing the spark plugs, as other underlying issues may be present.
3.2. P0171 and P0174: Lean Condition Codes
P0171 and P0174 codes indicate that the engine is running lean, meaning there is too much air and not enough fuel in the air-fuel mixture. This can lead to engine damage if left unaddressed.
-
P0171: System Too Lean (Bank 1)
- Possible Causes: Vacuum leaks, faulty oxygen sensor, dirty or failing mass airflow (MAF) sensor, low fuel pressure, or a clogged fuel filter.
-
P0174: System Too Lean (Bank 2)
- Possible Causes: Similar to P0171, but affecting the engine bank 2.
Vacuum leaks are a common cause of lean condition codes. According to a report by the Car Care Council, regularly inspecting and replacing worn vacuum hoses can prevent these issues. Additionally, ensuring the MAF sensor is clean and functioning correctly is crucial for maintaining the proper air-fuel mixture.
3.3. P0420: Catalyst System Efficiency Below Threshold
The P0420 code indicates that the catalytic converter is not functioning efficiently. The catalytic converter is responsible for reducing harmful emissions by converting pollutants into less harmful substances.
-
P0420: Catalyst System Efficiency Below Threshold (Bank 1)
- Possible Causes: Faulty catalytic converter, exhaust leaks, faulty oxygen sensors, or engine running too rich or too lean.
While the P0420 code often leads to the replacement of the catalytic converter, it’s important to rule out other potential causes first. Exhaust leaks can allow unburnt fuel to reach the catalytic converter, causing it to overheat and fail prematurely. Faulty oxygen sensors can also provide incorrect readings, leading to inefficient operation of the catalytic converter.
3.4. P0401: Exhaust Gas Recirculation (EGR) Flow Insufficient Detected
The P0401 code indicates that the exhaust gas recirculation (EGR) system is not functioning correctly. The EGR system reduces emissions by recirculating a portion of the exhaust gas back into the engine’s intake manifold.
-
P0401: Exhaust Gas Recirculation (EGR) Flow Insufficient Detected
- Possible Causes: Clogged EGR valve, faulty EGR valve position sensor, vacuum leaks in the EGR system, or a clogged EGR tube.
A clogged EGR valve is a common cause of the P0401 code. According to a study by the University of California, cleaning or replacing the EGR valve can restore proper EGR flow and resolve the issue. Additionally, checking for vacuum leaks in the EGR system and ensuring the EGR valve position sensor is functioning correctly can help prevent this code from recurring.
3.5. ABS and Airbag Codes
In addition to engine-related codes, OBD2 scanners can also retrieve codes related to the anti-lock braking system (ABS) and airbag system. These codes are crucial for ensuring the safety of the vehicle.
-
ABS Codes (e.g., C0035 – Front Right Wheel Speed Sensor Circuit)
- Possible Causes: Faulty wheel speed sensor, wiring issues, or a malfunctioning ABS control module.
-
Airbag Codes (e.g., B0001 – Driver Front Stage 1 Deployment Control)
- Possible Causes: Faulty airbag sensor, wiring issues, or a malfunctioning airbag control module.
ABS and airbag codes should be addressed immediately to ensure the safety systems are functioning correctly. A faulty wheel speed sensor can affect the performance of the ABS system, while issues with the airbag system can prevent the airbags from deploying in the event of a collision.
4. Diagnosing Equus OBD2 Codes: A Systematic Approach
Diagnosing Equus OBD2 codes requires a systematic approach to accurately identify the root cause of the problem. A haphazard approach can lead to unnecessary repairs and wasted time. Here’s a structured method to follow:
Following this systematic approach ensures that you consider all potential causes and address the issue efficiently. It also helps prevent misdiagnosis, which can lead to further complications and unnecessary expenses.
4.1. Verify the Code
Before beginning any diagnostic work, it’s essential to verify the code. This involves using an OBD2 scanner to confirm that the code is present and not a false alarm.
- Check for Multiple Codes: Note all the codes present, as multiple codes can sometimes be related and point to a common issue.
- Research the Code: Consult repair manuals, online databases, and manufacturer technical service bulletins (TSBs) for detailed information about the code and its potential causes.
- Check Freeze Frame Data: Examine the freeze frame data, which captures the engine conditions at the time the code was set. This data can provide valuable clues about the issue.
Verifying the code and gathering information is a critical first step in the diagnostic process. It ensures that you are addressing a real problem and provides a solid foundation for further investigation.
4.2. Visual Inspection
A visual inspection is a crucial step in diagnosing OBD2 codes, and it involves carefully examining the affected systems and components for any obvious signs of damage or wear.
- Check for Vacuum Leaks: Inspect vacuum hoses for cracks, leaks, or disconnections. Use a vacuum gauge to check for proper vacuum levels.
- Inspect Wiring and Connectors: Look for damaged, corroded, or loose wiring and connectors. Repair or replace any damaged components.
- Check for Fluid Leaks: Inspect for fluid leaks, such as oil, coolant, or fuel. Identify the source of the leak and repair accordingly.
- Examine Mechanical Components: Check belts, pulleys, and other mechanical components for wear or damage.
A thorough visual inspection can often reveal the cause of the problem without the need for advanced diagnostic tools. It’s a simple but effective way to identify common issues and prevent further damage.
4.3. Component Testing
Component testing involves using specialized tools to check the functionality of individual sensors and actuators. This helps determine whether a component is functioning correctly or needs to be replaced.
- Test Sensors: Use a multimeter or oscilloscope to check the voltage, resistance, and signal output of sensors such as oxygen sensors, MAF sensors, and temperature sensors.
- Test Actuators: Use a scan tool or multimeter to activate and test actuators such as fuel injectors, EGR valves, and solenoids.
- Perform Compression Test: Use a compression tester to check the compression of each cylinder. Low compression can indicate issues such as worn piston rings or valves.
- Perform Fuel Pressure Test: Use a fuel pressure gauge to check the fuel pressure at the fuel rail. Low fuel pressure can indicate a faulty fuel pump or fuel filter.
Component testing is an essential step in diagnosing OBD2 codes, as it helps pinpoint the exact source of the problem. By systematically testing each component, you can avoid unnecessary replacements and ensure that the correct repair is performed.
4.4. Using Live Data
Live data, also known as streaming data, is real-time information from the vehicle’s sensors and systems. This data can be accessed using an OBD2 scanner and provides valuable insights into the operation of the engine and other components.
- Monitor Sensor Readings: Observe sensor readings such as oxygen sensor voltage, MAF sensor flow rate, and engine temperature. Look for abnormal values or fluctuations.
- Analyze Fuel Trims: Monitor short-term and long-term fuel trims to identify lean or rich conditions. High positive fuel trims indicate a lean condition, while high negative fuel trims indicate a rich condition.
- Check Engine Load: Observe the engine load value to determine how hard the engine is working. High engine load can indicate issues such as vacuum leaks or restricted exhaust.
- Monitor Ignition Timing: Check the ignition timing to ensure it is within the specified range. Incorrect ignition timing can cause misfires and reduced engine performance.
Using live data is a powerful diagnostic tool that can help identify intermittent problems and provide valuable clues about the cause of OBD2 codes. By carefully analyzing the data, you can pinpoint the exact source of the issue and perform the necessary repairs.
4.5. Consult Repair Information
Consulting repair information is a crucial step in diagnosing OBD2 codes. Repair manuals, online databases, and manufacturer technical service bulletins (TSBs) provide detailed information about the codes and recommended diagnostic procedures.
- Refer to Repair Manuals: Consult repair manuals for specific information about the vehicle’s systems and components.
- Search Online Databases: Use online databases such as ALLDATA and Mitchell OnDemand to access repair information, wiring diagrams, and diagnostic tips.
- Check Technical Service Bulletins (TSBs): Review TSBs issued by the vehicle manufacturer for known issues and recommended repairs.
- Seek Expert Advice: Consult with experienced technicians or online forums for advice and guidance on diagnosing complex issues.
Consulting repair information ensures that you have access to the most accurate and up-to-date information about the vehicle’s systems and components. It also helps you avoid common mistakes and perform the repairs correctly.
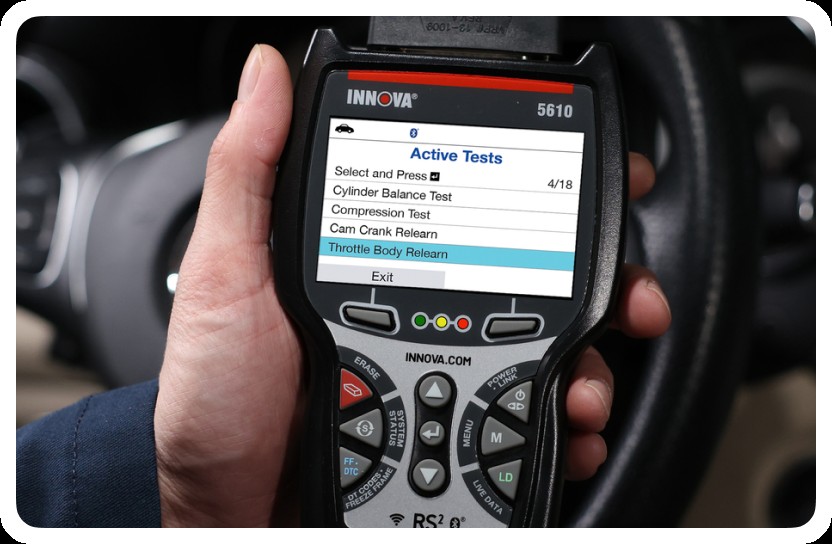 Diagnosing OBD2 Codes
5. Repairing Issues Related to Equus OBD2 Codes
Repairing issues related to Equus OBD2 codes involves addressing the root cause of the problem and performing the necessary repairs to restore the vehicle’s performance. The specific repairs will vary depending on the code and the underlying issue.
It’s essential to follow proper repair procedures and use high-quality parts to ensure that the repairs are effective and long-lasting. Neglecting to address the root cause of the problem can lead to recurring issues and further damage to the vehicle.
5.1. Common Repairs for Misfire Codes (P0300 Series)
Misfire codes (P0300 series) can be caused by a variety of issues, and the specific repairs will depend on the underlying cause. Here are some common repairs for misfire codes:
- Replace Spark Plugs: Faulty or worn spark plugs are a common cause of misfires. Replace the spark plugs with new ones that meet the vehicle manufacturer’s specifications.
- Replace Ignition Coils: Faulty ignition coils can also cause misfires. Test the ignition coils using a multimeter and replace any that are not functioning correctly.
- Clean or Replace Fuel Injectors: Clogged or faulty fuel injectors can disrupt the fuel supply to the cylinders, causing misfires. Clean the fuel injectors using a fuel injector cleaner or replace them if necessary.
- Repair Vacuum Leaks: Vacuum leaks can cause misfires by disrupting the air-fuel mixture. Locate and repair any vacuum leaks using a vacuum gauge and sealant.
- Check Compression: Low compression can indicate issues such as worn piston rings or valves. Perform a compression test and repair any issues as needed.
Addressing misfire codes promptly is crucial for preventing further damage to the engine. Ignoring misfires can lead to catalytic converter damage and other costly repairs.
5.2. Addressing Lean Condition Codes (P0171 and P0174)
Lean condition codes (P0171 and P0174) indicate that the engine is running with too much air and not enough fuel. Here are some common repairs for lean condition codes:
- Repair Vacuum Leaks: Vacuum leaks are a common cause of lean conditions. Locate and repair any vacuum leaks using a vacuum gauge and sealant.
- Clean or Replace MAF Sensor: A dirty or faulty MAF sensor can provide incorrect readings, leading to a lean condition. Clean the MAF sensor using a MAF sensor cleaner or replace it if necessary.
- Replace Oxygen Sensors: Faulty oxygen sensors can provide incorrect readings, leading to a lean condition. Replace the oxygen sensors with new ones that meet the vehicle manufacturer’s specifications.
- Check Fuel Pressure: Low fuel pressure can cause a lean condition. Check the fuel pressure at the fuel rail using a fuel pressure gauge and repair any issues with the fuel pump or fuel filter.
Addressing lean condition codes promptly is crucial for preventing engine damage. Running the engine lean can cause overheating and detonation, which can lead to serious engine damage.
5.3. Resolving Catalyst System Efficiency Issues (P0420)
The P0420 code indicates that the catalytic converter is not functioning efficiently. Here are some common repairs for P0420:
- Replace Catalytic Converter: If the catalytic converter is faulty, it will need to be replaced. Use a high-quality catalytic converter that meets the vehicle manufacturer’s specifications.
- Repair Exhaust Leaks: Exhaust leaks can allow unburnt fuel to reach the catalytic converter, causing it to overheat and fail prematurely. Locate and repair any exhaust leaks using a smoke machine or visual inspection.
- Replace Oxygen Sensors: Faulty oxygen sensors can provide incorrect readings, leading to inefficient operation of the catalytic converter. Replace the oxygen sensors with new ones that meet the vehicle manufacturer’s specifications.
- Address Engine Issues: Issues such as misfires or lean conditions can cause the catalytic converter to fail prematurely. Address any underlying engine issues before replacing the catalytic converter.
While replacing the catalytic converter is often necessary, it’s important to rule out other potential causes first. Addressing underlying engine issues and repairing exhaust leaks can prevent the catalytic converter from failing again.
5.4. Repairing EGR System Issues (P0401)
The P0401 code indicates that the exhaust gas recirculation (EGR) system is not functioning correctly. Here are some common repairs for P0401:
- Clean or Replace EGR Valve: A clogged EGR valve is a common cause of the P0401 code. Clean the EGR valve using a carburetor cleaner or replace it if necessary.
- Check EGR Valve Position Sensor: A faulty EGR valve position sensor can provide incorrect readings, leading to the P0401 code. Test the EGR valve position sensor using a multimeter and replace it if necessary.
- Repair Vacuum Leaks: Vacuum leaks in the EGR system can disrupt the flow of exhaust gas. Locate and repair any vacuum leaks using a vacuum gauge and sealant.
- Clean EGR Tube: A clogged EGR tube can restrict the flow of exhaust gas. Clean the EGR tube using a wire brush or pipe cleaner.
Maintaining the EGR system is crucial for reducing emissions and ensuring proper engine performance. Addressing EGR system issues promptly can prevent further damage to the engine and emissions system.
5.5. Addressing ABS and Airbag System Issues
ABS and airbag system issues require specialized knowledge and tools. Here are some common repairs for ABS and airbag codes:
- Replace Wheel Speed Sensors: Faulty wheel speed sensors can affect the performance of the ABS system. Replace the wheel speed sensors with new ones that meet the vehicle manufacturer’s specifications.
- Repair Wiring Issues: Damaged or corroded wiring can cause ABS and airbag system issues. Repair or replace any damaged wiring.
- Replace ABS Control Module: A malfunctioning ABS control module can cause ABS system issues. Replace the ABS control module with a new one that meets the vehicle manufacturer’s specifications.
- Replace Airbag Sensors: Faulty airbag sensors can prevent the airbags from deploying in the event of a collision. Replace the airbag sensors with new ones that meet the vehicle manufacturer’s specifications.
ABS and airbag system repairs should be performed by qualified technicians with the necessary training and equipment. These systems are critical for the safety of the vehicle and should be handled with care.
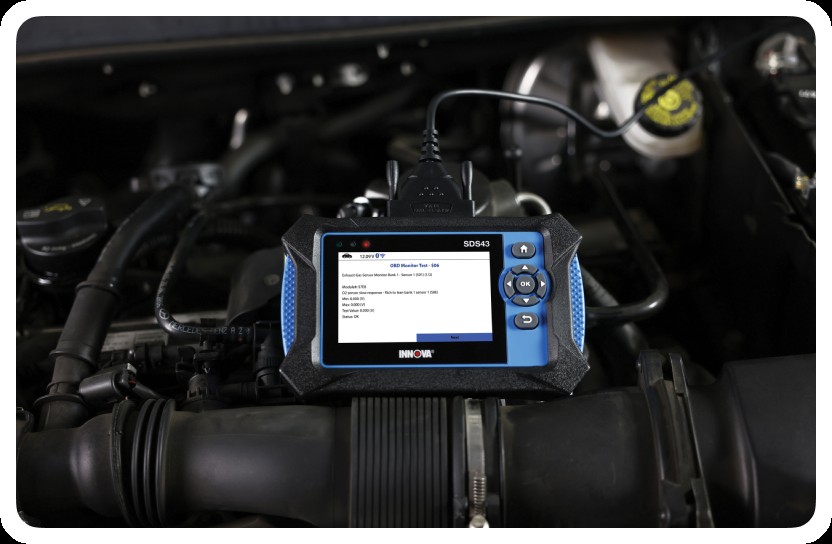 Repairing OBD2 Issues
6. Preventing Future Equus OBD2 Code Issues
Preventing future Equus OBD2 code issues involves implementing proactive maintenance practices and addressing potential problems before they lead to more significant issues. Regular maintenance and careful attention to the vehicle’s systems can help prevent many common OBD2 code issues.
A proactive approach to vehicle maintenance can save you time and money in the long run. By addressing potential problems early, you can prevent costly repairs and extend the life of your vehicle.
6.1. Regular Vehicle Maintenance
Regular vehicle maintenance is essential for preventing OBD2 code issues. Following the vehicle manufacturer’s recommended maintenance schedule can help ensure that the vehicle’s systems are functioning correctly.
- Oil Changes: Regular oil changes are crucial for maintaining engine lubrication and preventing engine damage.
- Fluid Checks: Check and top off all fluids, including coolant, brake fluid, power steering fluid, and transmission fluid.
- Filter Replacements: Replace air filters, fuel filters, and cabin air filters according to the manufacturer’s recommendations.
- Spark Plug Replacement: Replace spark plugs according to the manufacturer’s recommendations to ensure proper ignition.
- Belt and Hose Inspection: Inspect belts and hoses for cracks, wear, or damage and replace them as needed.
Regular vehicle maintenance can help prevent many common OBD2 code issues and extend the life of your vehicle. Following the manufacturer’s recommended maintenance schedule is a simple but effective way to keep your vehicle running smoothly.
6.2. Monitoring Vehicle Performance
Monitoring vehicle performance can help identify potential issues before they trigger OBD2 codes. Paying attention to the vehicle’s behavior and addressing any unusual symptoms can prevent more significant problems.
- Listen for Unusual Noises: Pay attention to any unusual noises coming from the engine, transmission, or other systems.
- Watch for Changes in Performance: Note any changes in engine power, fuel economy, or handling.
- Monitor Gauges and Indicators: Keep an eye on the vehicle’s gauges and indicators, such as the temperature gauge, oil pressure gauge, and check engine light.
- Check for Leaks: Inspect for fluid leaks under the vehicle.
Monitoring vehicle performance can help identify potential issues early, allowing you to address them before they lead to more significant problems. By being attentive to your vehicle’s behavior, you can prevent costly repairs and extend its life.
6.3. Using Quality Parts and Fluids
Using quality parts and fluids is essential for preventing OBD2 code issues. Low-quality parts and fluids can fail prematurely, leading to performance problems and triggering OBD2 codes.
- Use OEM Parts: Whenever possible, use original equipment manufacturer (OEM) parts to ensure compatibility and reliability.
- Use High-Quality Fluids: Use high-quality fluids that meet the vehicle manufacturer’s specifications.
- Avoid Aftermarket Parts: Be cautious when using aftermarket parts, as some may not meet the same standards as OEM parts.
Using quality parts and fluids can help prevent premature failures and extend the life of your vehicle. Investing in high-quality components is a smart way to avoid costly repairs down the road.
6.4. Addressing Issues Promptly
Addressing issues promptly is crucial for preventing OBD2 code issues. Ignoring minor problems can lead to more significant issues and costly repairs.
- Investigate Check Engine Light: If the check engine light comes on, investigate the issue promptly.
- Address Unusual Symptoms: Address any unusual symptoms, such as noises, leaks, or performance changes, as soon as possible.
- Follow Diagnostic Procedures: Follow proper diagnostic procedures to accurately identify the root cause of the problem.
- Perform Necessary Repairs: Perform the necessary repairs to restore the vehicle’s performance.
Addressing issues promptly can prevent minor problems from turning into major repairs. By being proactive and addressing potential issues early, you can save time and money in the long run.
6.5. Regular OBD2 Scanning
Regular OBD2 scanning can help identify potential issues before they trigger the check engine light. Scanning the vehicle’s computer for stored codes can reveal problems that are not yet apparent.
- Scan for Codes Regularly: Use an OBD2 scanner to scan the vehicle’s computer for stored codes at least once a month.
- Investigate Pending Codes: Investigate any pending codes, which are codes that have not yet triggered the check engine light.
- Monitor Live Data: Use the live data feature of the OBD2 scanner to monitor sensor readings and identify abnormal values.
- Address Potential Issues: Address any potential issues identified by the OBD2 scanner promptly.
Regular OBD2 scanning is a simple but effective way to prevent OBD2 code issues. By identifying potential problems early, you can address them before they lead to more significant repairs.
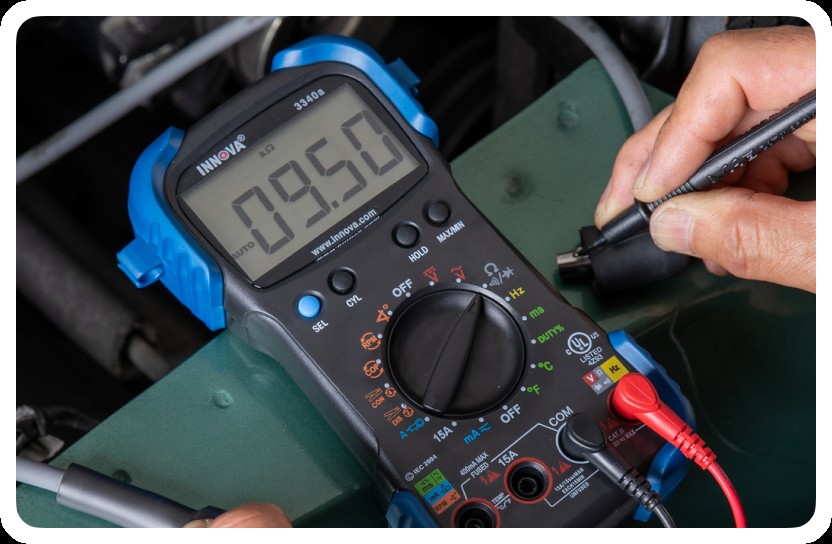 Preventing OBD2 Code Issues
7. Advanced Equus OBD2 Code Diagnostics
Advanced Equus OBD2 code diagnostics involves using specialized tools and techniques to diagnose complex issues that may not be easily identified with basic OBD2 scanning. These advanced techniques require a deeper understanding of the vehicle’s systems and components.
Advanced diagnostics are often necessary for resolving intermittent problems, manufacturer-specific codes, and issues that involve multiple systems. These techniques can help pinpoint the exact source of the problem and ensure that the correct repairs are performed.
7.1. Using Oscilloscopes
Oscilloscopes are powerful diagnostic tools that can display electrical signals as waveforms. They are used to analyze the voltage, frequency, and timing of signals from sensors and actuators.
- Analyze Sensor Signals: Use an oscilloscope to analyze the signals from sensors such as oxygen sensors, MAF sensors, and crankshaft position sensors.
- Check Actuator Signals: Use an oscilloscope to check the signals from actuators such as fuel injectors, EGR valves, and solenoids.
- Identify Intermittent Problems: Oscilloscopes can capture intermittent signal dropouts or anomalies that may not be visible with a multimeter.
- Compare Waveforms: Compare waveforms to known good signals to identify deviations and potential problems.
Using oscilloscopes is an advanced diagnostic technique that can help pinpoint electrical issues that may be difficult to identify with other tools. They provide a detailed view of the electrical signals in the vehicle’s systems, allowing for more accurate diagnoses.
7.2. Performing Advanced Component Tests
Advanced component tests involve using specialized tools and techniques to check the functionality of individual sensors and actuators. These tests go beyond basic voltage and resistance checks and provide more detailed information about the component’s performance.
- Fuel Injector Balance Test: Use a fuel injector balance tester to measure the flow rate of each fuel injector and identify any that are not functioning correctly.
- Compression Leakage Test: Use a compression leakage tester to measure the amount of air leaking from each cylinder and identify any issues with the valves or piston rings.
- Vacuum Decay Test: Use a vacuum decay tester to measure the rate at which vacuum is lost in the intake manifold and identify any vacuum leaks.
- Cylinder Leak Down Test: Use a cylinder leak down tester to introduce compressed air into each cylinder and identify the source of any leaks.
Performing advanced component tests can help pinpoint the exact source of the problem and ensure that the correct repairs are performed. These tests provide more detailed information about the component’s performance than basic tests, allowing for more accurate diagnoses.
7.3. Analyzing Fuel Trims in Detail
Analyzing fuel trims in detail involves using an OBD2 scanner to monitor short-term and long-term fuel trims and identify the underlying causes of any deviations. Fuel trims are adjustments made by the engine control unit (ECU) to compensate for variations in the air-fuel mixture.
- Monitor Short-Term Fuel Trim (STFT): STFT is a temporary adjustment made by the ECU to maintain the proper air-fuel mixture.
- Monitor Long-Term Fuel Trim (LTFT): LTFT is a long-term adjustment made by the ECU to compensate for consistent variations in the air-fuel mixture.
- Identify Lean or Rich Conditions: High positive fuel trims indicate a lean condition, while high negative fuel trims indicate a rich condition.
- Analyze Fuel Trim Patterns: Analyze fuel trim patterns to identify the underlying causes of any deviations. For example, high fuel trims at idle may indicate a vacuum leak, while high fuel trims at high speeds may indicate a restricted fuel filter.
Analyzing fuel trims in detail can help identify the underlying causes of lean or rich conditions and ensure that the correct repairs are performed. By understanding the patterns and trends in the fuel trims, you can pinpoint the exact source of the problem.
7.4. Diagnosing Intermittent Issues
Diagnosing intermittent issues can be challenging, as the problem may not be present when the vehicle is being diagnosed. However, there are several techniques that can be used to identify intermittent issues.
- Use a Data Logger: Use a data logger to record sensor readings and other data over a period of time. This can help capture intermittent events that may not be visible during a live scan.
- Perform a Wiggle Test: Perform a wiggle test by wiggling wiring harnesses and connectors to see if this triggers the problem.
- Check for Loose Connections: Check for loose connections and corroded terminals in the wiring harnesses and connectors.
- Use a Heat Gun or Cold Spray: Use a heat gun or cold spray to change the temperature of components and see if this triggers the problem.
Diagnosing intermittent issues requires patience and persistence. By using a combination of diagnostic techniques and carefully analyzing the data, you can identify the underlying cause of the problem and perform the necessary repairs.
7.5. Using Factory Scan Tools
Factory scan tools are diagnostic tools that are specifically designed for use with a particular vehicle manufacturer’s vehicles. These tools provide access to manufacturer-specific codes, data, and diagnostic procedures that may not be available with generic OBD2 scanners.
- Access Manufacturer-Specific Codes: Factory scan tools can access manufacturer-specific codes that provide more detailed information about the problem.
- Perform Advanced Diagnostics: Factory scan tools can perform advanced diagnostic procedures, such as component testing and system programming.
- Access Repair Information: Factory scan tools often provide access to repair information, wiring diagrams, and diagnostic tips.
- Update Software: Factory scan tools can be used to update the software in the vehicle’s control modules.
Using factory scan tools can greatly improve the accuracy and efficiency of the diagnostic process. These tools provide access to the same information and capabilities that are used by the vehicle manufacturer’s technicians.
At OBD2-SCANNER.EDU.VN, we understand the challenges of diagnosing and repairing modern vehicles. That’s why we offer a range of advanced diagnostic tools and resources to help you resolve even the most complex issues. Whether you’re a professional technician or a DIY enthusiast, we have the tools and knowledge you need to keep your vehicle running smoothly.
8. Equus OBD2 Code FAQs
Here are some frequently asked questions (FAQs) about Equus OBD2 codes:
What is an OBD2 scanner?
An OBD2 scanner is a diagnostic tool used to retrieve diagnostic trouble codes (DTCs) from a vehicle’s computer system, helping identify and resolve automotive issues.
How do I use an OBD2 scanner?
Connect the scanner to the OBD2 port, turn on the ignition, power on the scanner, retrieve the codes, and record them for analysis.
Can I clear OBD2 codes myself?
Yes, you can clear OBD2 codes using an OBD2 scanner, but it’s essential to address the underlying issue before clearing the codes to prevent the problem from recurring.
What does the check engine light mean?
The check engine light indicates that the vehicle’s computer has detected a problem within one or more of its systems.
What are common causes of a check engine light?
Common causes include a loose gas cap, faulty oxygen sensor, catalytic converter issues, or a misfiring engine.
How do I find the OBD2 port in my car?
The OBD2 port is usually located under the dashboard on the driver’s side.
What do I do after I get an OBD2 code?
Research the code, perform a visual inspection, test components, and consult repair information to diagnose and resolve the issue.
Are all OBD2 scanners the same?
No, OBD2 scanners vary in features and capabilities, with basic scanners reading and clearing codes, while advanced scanners offer live data and