The Obd2 Honda Distributor plays a crucial role in your vehicle’s engine management system, specifically related to ignition timing and fuel delivery; OBD2-SCANNER.EDU.VN can help you diagnose issues with your distributor and provide effective solutions. By leveraging resources on engine diagnostics, you’re better equipped to troubleshoot common problems related to your Honda’s distributor, ensuring optimal performance and longevity. This involves understanding distributor functionality, troubleshooting techniques, and leveraging diagnostic tools.
1. What Is an OBD2 Honda Distributor?
The OBD2 (On-Board Diagnostics II) Honda distributor is a key component in older Honda vehicles responsible for distributing high-voltage electricity from the ignition coil to the spark plugs in the correct firing order. The distributor also houses sensors like the Crank Angle Sensor (CAS), Cylinder Position Sensor (CYP), and Top Dead Center (TDC) sensor, which provide crucial data to the Engine Control Unit (ECU) for precise ignition and fuel injection timing.
The distributor ensures that each cylinder fires at the precise moment needed for optimal combustion, contributing to engine performance, fuel efficiency, and emissions control. According to a study by the Society of Automotive Engineers (SAE), precise ignition timing can improve fuel efficiency by up to 5%.
2. What Are the Main Components of an OBD2 Honda Distributor?
The OBD2 Honda distributor comprises several key components, each serving a vital function:
- Distributor Cap: This cap is made of durable plastic and has terminals corresponding to each cylinder’s spark plug.
- Rotor: The rotor spins inside the distributor cap, directing the high-voltage current to the correct terminal.
- Ignition Coil: While not always part of the distributor assembly, it is closely associated, providing the high-voltage spark.
- Crank Angle Sensor (CAS): This sensor measures the crankshaft’s position, providing timing information to the ECU.
- Cylinder Position Sensor (CYP): This sensor identifies which cylinder is ready to fire.
- Top Dead Center (TDC) Sensor: This sensor indicates when the piston in the first cylinder is at its highest point.
Alt text: A detailed view of the OBD2 Honda distributor, highlighting the distributor cap, rotor, and various sensors like CAS, CYP, and TDC.
3. How Does the OBD2 Honda Distributor Work?
The OBD2 Honda distributor operates through a synchronized process:
- Crankshaft Rotation: As the engine crankshaft rotates, it drives the distributor shaft.
- Sensor Data: The CAS, CYP, and TDC sensors send signals to the ECU, providing data on the crankshaft’s position and cylinder status.
- ECU Processing: The ECU uses this information to determine the precise moment for each cylinder to fire.
- Coil Activation: The ECU signals the ignition coil to generate a high-voltage spark.
- Distributor Routing: The distributor rotor spins inside the cap, directing the spark to the appropriate terminal.
- Spark Plug Ignition: The spark travels through the spark plug wire to the spark plug, igniting the air-fuel mixture in the cylinder.
4. Why Is the OBD2 Honda Distributor Important for Engine Performance?
The OBD2 Honda distributor is critical for several reasons:
- Precise Ignition Timing: Accurate timing ensures optimal combustion, maximizing power output and fuel efficiency.
- Fuel Efficiency: Correct timing helps the engine burn fuel more efficiently, reducing fuel consumption.
- Emissions Control: Proper combustion reduces harmful emissions, helping the vehicle meet environmental standards.
- Smooth Engine Operation: The distributor ensures each cylinder fires at the right time, resulting in smoother engine performance and reduced vibrations.
5. What Are Common Symptoms of a Failing OBD2 Honda Distributor?
A failing OBD2 Honda distributor can manifest in various symptoms:
- Engine Misfires: Misfires occur when one or more cylinders fail to fire correctly, leading to rough idling and reduced power.
- Rough Idling: The engine may idle erratically, causing vibrations and stalling.
- Difficulty Starting: A faulty distributor can prevent the engine from starting or cause prolonged cranking.
- Reduced Fuel Efficiency: Inefficient combustion can lead to increased fuel consumption.
- Check Engine Light: The ECU may trigger the check engine light and store diagnostic trouble codes (DTCs) related to distributor issues.
- Stalling: The engine may stall unexpectedly, especially when idling or decelerating.
- Hesitation During Acceleration: The engine may hesitate or stumble when accelerating.
6. What OBD2 Codes Are Associated with the Honda Distributor?
Several OBD2 codes can indicate problems with the Honda distributor or its related components. Some common codes include:
| Code | Description | Possible Causes |
|---|---|---|
| P0325 | Knock Sensor 1 Circuit Malfunction | Faulty knock sensor, wiring issues, or ECU problem. |
| P0335 | Crankshaft Position Sensor “A” Circuit Malfunction | Faulty crankshaft position sensor, wiring issues, or ECU problem. |
| P0336 | Crankshaft Position Sensor “A” Circuit Range/Performance | Faulty crankshaft position sensor, wiring issues, or ECU problem. |
| P0340 | Camshaft Position Sensor “A” Circuit Malfunction | Faulty camshaft position sensor, wiring issues, or ECU problem. |
| P0341 | Camshaft Position Sensor “A” Circuit Range/Performance | Faulty camshaft position sensor, wiring issues, or ECU problem. |
| P0344 | Camshaft Position Sensor “A” Circuit Intermittent | Faulty camshaft position sensor, wiring issues, or ECU problem. |
| P1381 | CYP Sensor Intermittent Interruption | Faulty CYP sensor, wiring issues, or ECU problem. |
| P1382 | CYP Sensor No Signal | Faulty CYP sensor, wiring issues, or ECU problem. |
| P0339 | Crankshaft Position Sensor “A” Circuit Intermittent | Faulty crankshaft position sensor, wiring issues, or ECU problem. |
| P0351 – P0356 | Ignition Coil Primary/Secondary Circuit Malfunction | Faulty ignition coil, wiring issues, or ECU problem. |
7. How Can I Diagnose a Faulty OBD2 Honda Distributor?
Diagnosing a faulty OBD2 Honda distributor involves several steps:
- Visual Inspection: Check the distributor cap for cracks, corrosion, or damage. Inspect the rotor for wear or burning. Examine the wiring for any breaks or loose connections.
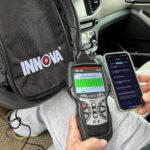
- OBD2 Scanner: Use an OBD2 scanner to retrieve any stored DTCs related to the distributor or its sensors.
- Multimeter Testing: Test the distributor’s sensors (CAS, CYP, TDC) using a multimeter to check for proper voltage and resistance. Refer to the vehicle’s service manual for specific testing procedures and values.
- Oscilloscope Testing: An oscilloscope can be used to analyze the waveforms of the distributor’s sensors, providing a more detailed assessment of their performance.
- Spark Test: Perform a spark test to check if the distributor is delivering a spark to each cylinder. Use a spark tester and follow safety precautions.
8. What Tools Do I Need to Diagnose and Repair an OBD2 Honda Distributor?
To diagnose and repair an OBD2 Honda distributor, you will need the following tools:
- OBD2 Scanner: To read and clear diagnostic trouble codes (DTCs).
- Multimeter: To test voltage, resistance, and continuity.
- Oscilloscope: For advanced waveform analysis of sensor signals.
- Spark Tester: To check for spark at the spark plugs.
- Timing Light: To verify and adjust ignition timing.
- Socket Set: For removing and installing the distributor and related components.
- Wrench Set: For tightening and loosening bolts and nuts.
- Screwdrivers: Both flathead and Phillips head screwdrivers.
- Pliers: For gripping and manipulating wires and connectors.
- Wire Stripper/Crimper: For repairing or replacing wiring.
- Service Manual: For specific repair procedures and torque specifications.
9. How Do I Replace an OBD2 Honda Distributor?
Replacing an OBD2 Honda distributor involves the following steps:
- Disconnect the Battery: Disconnect the negative battery terminal to prevent electrical shorts.
- Remove the Distributor Cap: Remove the distributor cap and set it aside with the spark plug wires still attached.
- Disconnect Wiring: Disconnect any wiring connectors attached to the distributor.
- Remove the Distributor: Remove the bolts holding the distributor in place and carefully remove the distributor from the engine.
- Install the New Distributor: Install the new distributor, aligning it correctly with the engine.
- Connect Wiring: Connect the wiring connectors to the new distributor.
- Install the Distributor Cap: Reinstall the distributor cap and ensure it is securely fastened.
- Reconnect the Battery: Reconnect the negative battery terminal.
- Verify Timing: Use a timing light to verify and adjust the ignition timing according to the vehicle’s specifications.
- Test Drive: Test drive the vehicle to ensure the issue is resolved and the engine is running smoothly.
10. What Are Common Mistakes to Avoid When Working on an OBD2 Honda Distributor?
When working on an OBD2 Honda distributor, avoid these common mistakes:
- Ignoring Safety Precautions: Always disconnect the battery before working on the electrical system.
- Incorrect Timing: Incorrect timing can lead to poor engine performance and damage. Always verify and adjust the timing after replacing the distributor.
- Forgetting to Label Wires: Label all wires before disconnecting them to ensure they are reconnected correctly.
- Using Incorrect Parts: Ensure you are using the correct distributor and components for your vehicle.
- Over-tightening Bolts: Over-tightening bolts can damage the distributor or engine. Use a torque wrench and follow the manufacturer’s specifications.
11. What Are the Differences Between Different Types of Honda Distributors?
Honda distributors have evolved over the years, with variations in design and functionality. Here are some key differences:
- OBD0 vs. OBD1 vs. OBD2: OBD0 systems are older and less sophisticated, while OBD1 and OBD2 systems offer more advanced diagnostics and control.
- Internal vs. External Coil: Some distributors have an internal ignition coil, while others use an external coil.
- Sensor Configuration: Different distributors may have varying sensor configurations, such as CAS, CYP, and TDC sensors.
- Mechanical vs. Electronic Advance: Older distributors use mechanical advance mechanisms, while newer ones use electronic advance controlled by the ECU.
Understanding these differences is crucial for selecting the correct replacement parts and performing accurate diagnoses.
12. How Does the Crank Fluctuation Sensor (CKF) Relate to the Honda Distributor?
The Crank Fluctuation Sensor (CKF) is used in some OBD2 Honda vehicles to aid in misfire detection. According to a study by the California Air Resources Board, misfire detection is critical for reducing emissions. The CKF sensor has the same waveform as the Crankshaft Position (CKP) sensor, providing additional data to the ECU.
In some B-series engines, the CKF sensor is driven off a 12-tooth wheel mounted on the oil pump. Some H-series engines use a similar setup, with the CKP signal coming from an oil pump-mounted gear. The CKF sensor provides a more direct and accurate reading of the crankshaft position, reducing potential errors.
Alt text: A close-up view of the Crank Fluctuation Sensor (CKF) mounted on a Honda engine, showing its location and connection to the oil pump.
13. What Is the Significance of the Oil Pump in Relation to the CKF Sensor?
In many OBD2 Honda engines, the CKF sensor is mounted on the oil pump. This arrangement provides a direct connection to the crankshaft, allowing for more accurate readings. The “newer” B-series oil pump for 98+ vehicles can be fitted on earlier vehicles to add CKF functionality. It is generally recommended to use a new oil pump, but the other components (bracketry, sensor, etc.) can often be sourced from a junkyard.
14. How Can I Retrofit a CKF Sensor to an Older Honda Engine?
Retrofitting a CKF sensor to an older Honda engine involves several steps:
- Obtain the Necessary Parts: Acquire a newer B-series oil pump (98+) with the CKF sensor and associated bracketry.
- Install the Oil Pump: Install the new oil pump on the engine, ensuring it is properly aligned and secured.
- Connect the CKF Sensor: Connect the CKF sensor wiring to the ECU. This may require modifying the wiring harness.
- ECU Configuration: Configure the ECU to recognize the CKF sensor signal. This may require a custom ECU tune.
15. What Are the Benefits of Using a CKF Sensor?
Using a CKF sensor offers several benefits:
- Improved Misfire Detection: The CKF sensor provides additional data to the ECU, allowing for more accurate misfire detection.
- More Accurate Timing: The direct connection to the crankshaft provides more accurate timing information.
- Enhanced Engine Performance: Improved timing and misfire detection can lead to better engine performance and fuel efficiency.
16. How Does the Distributor Affect Fuel Injection Timing?
While the distributor primarily controls ignition timing, it also plays a crucial role in fuel injection timing. The CAS, CYP, and TDC sensors within the distributor provide the ECU with the necessary information to synchronize fuel injection with the engine’s firing order. According to research from Bosch, precise synchronization between ignition and fuel injection is essential for optimal combustion.
The ECU uses the distributor’s sensor data to determine when to activate the fuel injectors, ensuring that fuel is injected into the cylinders at the correct moment. This synchronization is critical for maximizing fuel efficiency, reducing emissions, and ensuring smooth engine operation.
17. What Role Does the ECU Play in Distributor Functionality?
The Engine Control Unit (ECU) is the brain of the engine management system. It receives data from the distributor’s sensors (CAS, CYP, TDC) and uses this information to control ignition timing and fuel injection. The ECU adjusts these parameters based on various factors, such as engine speed, load, and temperature, to optimize performance and efficiency.
The ECU also monitors the distributor’s performance and stores diagnostic trouble codes (DTCs) if any issues are detected. These DTCs can be retrieved using an OBD2 scanner, helping technicians diagnose and repair distributor-related problems.
18. What Are the Advantages of Electronic Ignition Systems Over Traditional Distributors?
Electronic ignition systems offer several advantages over traditional distributors:
- Improved Reliability: Electronic systems have fewer moving parts, reducing the risk of mechanical failure.
- More Precise Timing: Electronic systems offer more precise timing control, resulting in better engine performance and fuel efficiency.
- Reduced Maintenance: Electronic systems require less maintenance compared to traditional distributors.
- Better Emissions Control: Electronic systems can optimize combustion for reduced emissions.
19. How Can I Convert My Honda to a Distributorless Ignition System?
Converting a Honda to a distributorless ignition system (DIS) involves replacing the distributor with individual ignition coils for each cylinder. This conversion can offer improved performance and reliability. The conversion process typically involves:
- Installing Individual Coils: Install individual ignition coils on each cylinder, typically mounted directly on the spark plugs.
- Wiring Modifications: Modify the wiring harness to connect the individual coils to the ECU.
- ECU Configuration: Configure the ECU to control the individual coils. This may require a custom ECU tune.
- Removing the Distributor: Remove the distributor and replace it with a block-off plate.
20. What Is the Role of the Ignition Coil in the Distributor System?
The ignition coil is a critical component in the distributor system. It is responsible for generating the high-voltage spark that ignites the air-fuel mixture in the cylinders. The ignition coil receives a low-voltage signal from the ECU and transforms it into a high-voltage pulse, which is then sent to the distributor. The distributor routes the high-voltage spark to the appropriate spark plug.
A faulty ignition coil can cause misfires, rough idling, and difficulty starting. It is essential to test the ignition coil as part of the distributor diagnostic process.
21. How Do I Test the Ignition Coil in a Honda Distributor System?
Testing the ignition coil involves checking its primary and secondary resistance. Here’s how:
- Disconnect the Coil: Disconnect the ignition coil from the distributor and wiring harness.
- Primary Resistance: Use a multimeter to measure the resistance between the primary terminals of the coil. Refer to the vehicle’s service manual for the correct resistance value.
- Secondary Resistance: Measure the resistance between the secondary terminal (spark plug wire connection) and one of the primary terminals. Again, refer to the service manual for the correct value.
If the resistance values are outside the specified range, the ignition coil may be faulty and need replacement.
22. What Are the Symptoms of a Bad Ignition Coil?
A bad ignition coil can cause several symptoms:
- Engine Misfires: The most common symptom is engine misfires, especially under load.
- Rough Idling: The engine may idle roughly due to inconsistent spark.
- Difficulty Starting: A weak spark can make it difficult to start the engine.
- Reduced Fuel Efficiency: Misfires can lead to decreased fuel economy.
- Check Engine Light: The ECU may trigger the check engine light and store DTCs related to ignition coil issues.
23. How Can an OBD2 Scanner Help Diagnose Distributor Issues?
An OBD2 scanner is an invaluable tool for diagnosing distributor issues. It can retrieve diagnostic trouble codes (DTCs) stored in the ECU, providing clues about the nature and location of the problem. Some common DTCs related to the distributor include codes for the CAS, CYP, TDC sensors, and ignition coil.
The OBD2 scanner can also provide live data, such as engine speed, sensor readings, and ignition timing. This data can help technicians identify intermittent problems and verify the operation of the distributor system.
24. What Live Data Should I Monitor When Diagnosing Distributor Problems?
When diagnosing distributor problems with an OBD2 scanner, monitor the following live data parameters:
- Engine Speed (RPM): Verify that the engine speed reading is accurate and stable.
- Crankshaft Position Sensor (CAS) Reading: Check the CAS reading for proper signal and consistency.
- Cylinder Position Sensor (CYP) Reading: Monitor the CYP reading to ensure it is providing accurate cylinder identification.
- Top Dead Center (TDC) Sensor Reading: Verify the TDC sensor reading for correct timing information.
- Ignition Timing Advance: Monitor the ignition timing advance to see if it is within the specified range.
- Misfire Counts: Check for misfire counts on each cylinder, which can indicate ignition or fuel delivery problems.
25. How Do I Adjust the Ignition Timing on a Honda Distributor?
Adjusting the ignition timing on a Honda distributor involves the following steps:
- Warm Up the Engine: Allow the engine to reach its normal operating temperature.
- Locate the Timing Marks: Locate the timing marks on the crankshaft pulley and the timing scale on the engine block.
- Connect a Timing Light: Connect a timing light to the spark plug wire of the first cylinder.
- Loosen the Distributor Bolts: Loosen the bolts holding the distributor in place.
- Adjust the Distributor: Rotate the distributor to align the timing marks according to the vehicle’s specifications.
- Tighten the Distributor Bolts: Tighten the distributor bolts and recheck the timing.
- Verify the Adjustment: Verify the adjustment with a timing light and make any necessary fine-tuning adjustments.
26. What Is the Importance of Proper Ignition Timing?
Proper ignition timing is crucial for optimal engine performance, fuel efficiency, and emissions control. When the ignition timing is correct, the air-fuel mixture in the cylinders ignites at the precise moment needed for maximum combustion. This results in:
- Increased Power Output: Correct timing maximizes the power output of the engine.
- Improved Fuel Efficiency: Efficient combustion reduces fuel consumption.
- Reduced Emissions: Proper combustion minimizes harmful emissions.
- Smooth Engine Operation: Correct timing ensures smooth engine performance and reduced vibrations.
27. What Happens If the Ignition Timing Is Too Advanced?
If the ignition timing is too advanced (i.e., the spark occurs too early), it can lead to several problems:
- Engine Knocking: Advanced timing can cause the engine to knock or ping, which can damage the pistons and other engine components.
- Reduced Power: Advanced timing can actually reduce power output in some cases.
- Overheating: Advanced timing can cause the engine to overheat.
28. What Happens If the Ignition Timing Is Too Retarded?
If the ignition timing is too retarded (i.e., the spark occurs too late), it can also cause problems:
- Reduced Power: Retarded timing can significantly reduce power output.
- Poor Fuel Efficiency: Inefficient combustion can lead to decreased fuel economy.
- Overheating: Retarded timing can cause the exhaust system to overheat.
- Rough Idling: Retarded timing can cause the engine to idle roughly.
29. How Often Should I Replace My Honda Distributor?
The lifespan of a Honda distributor can vary depending on several factors, such as driving conditions, maintenance practices, and the quality of the distributor itself. As a general guideline, it’s recommended to inspect the distributor every 50,000 to 75,000 miles and replace it if any signs of wear or damage are present.
However, if you notice any of the symptoms of a failing distributor (e.g., engine misfires, rough idling, difficulty starting), it’s best to have it inspected and potentially replaced as soon as possible. Regular maintenance and timely replacements can help ensure optimal engine performance and prevent more costly repairs down the road.
30. What Are the Best Practices for Maintaining a Honda Distributor?
To prolong the life of your Honda distributor and ensure optimal performance, follow these best practices:
- Regular Inspections: Inspect the distributor cap, rotor, and wiring for any signs of wear, damage, or corrosion.
- Keep It Clean: Keep the distributor cap and rotor clean and free of dirt and debris.
- Check the Timing: Periodically check and adjust the ignition timing as needed.
- Replace Worn Parts: Replace worn or damaged components, such as the distributor cap, rotor, and spark plug wires, promptly.
- Use Quality Parts: Use high-quality replacement parts that meet or exceed the original manufacturer’s specifications.
- Follow Service Intervals: Adhere to the manufacturer’s recommended service intervals for the distributor and related components.
31. What Are the Potential Consequences of Ignoring Distributor Problems?
Ignoring distributor problems can lead to a variety of negative consequences:
- Reduced Engine Performance: A failing distributor can cause a significant drop in engine power and responsiveness.
- Decreased Fuel Efficiency: Inefficient combustion can lead to increased fuel consumption.
- Increased Emissions: Improper combustion can result in higher levels of harmful emissions.
- Engine Damage: Severe distributor problems can cause engine damage, such as piston damage or cylinder head damage.
- Stalling and Breakdowns: A faulty distributor can cause the engine to stall unexpectedly, leading to breakdowns and potentially dangerous situations.
32. How Much Does It Cost to Replace a Honda Distributor?
The cost to replace a Honda distributor can vary depending on several factors, such as the year and model of the vehicle, the type of distributor, and the labor rates in your area. On average, the cost to replace a Honda distributor can range from $200 to $500, including parts and labor.
The cost of the distributor itself can range from $100 to $300, depending on the brand and type. Labor costs can vary from $100 to $200, depending on the complexity of the job and the shop’s labor rates.
33. Can I Replace the Distributor Myself, or Should I Take It to a Mechanic?
Whether you can replace the distributor yourself depends on your mechanical skills and experience. If you have experience working on cars and are comfortable with basic mechanical tasks, you may be able to replace the distributor yourself. However, if you are not comfortable working on cars or have limited mechanical experience, it’s best to take it to a qualified mechanic.
Replacing the distributor involves several steps, including disconnecting wiring, removing and installing the distributor, and adjusting the ignition timing. If any of these steps are not performed correctly, it can lead to poor engine performance or even engine damage.
34. What Are the Best Brands of Honda Distributors?
When replacing a Honda distributor, it’s important to choose a high-quality brand that is known for reliability and performance. Some of the best brands of Honda distributors include:
- Honda (OEM): The original equipment manufacturer (OEM) distributor is always a reliable choice, as it is designed specifically for your vehicle.
- Hitachi: Hitachi is a well-known manufacturer of automotive parts and produces high-quality distributors for Honda vehicles.
- Cardone: Cardone is a reputable brand that offers both new and remanufactured distributors for Honda vehicles.
- AEM: AEM is a popular brand among performance enthusiasts and offers high-performance distributors for Honda vehicles.
35. What Are the Key Differences Between New and Remanufactured Distributors?
When replacing a Honda distributor, you have the option of choosing a new or remanufactured unit. Here are some key differences between the two:
- New Distributors: New distributors are brand new and have never been used. They typically come with a warranty and are guaranteed to meet the original manufacturer’s specifications.
- Remanufactured Distributors: Remanufactured distributors are used units that have been disassembled, cleaned, and reassembled with new or refurbished parts. They are typically less expensive than new distributors but may not offer the same level of reliability.
36. How Does Altitude Affect Distributor Performance?
Altitude can affect distributor performance due to changes in air density. At higher altitudes, the air is thinner, which means there is less oxygen available for combustion. This can lead to a richer air-fuel mixture and reduced engine performance.
To compensate for the effects of altitude, some vehicles are equipped with altitude compensators that adjust the ignition timing and fuel delivery based on altitude. However, older vehicles with distributors may not have this feature, which can lead to performance issues at higher altitudes.
37. What Role Do Spark Plug Wires Play in the Distributor System?
Spark plug wires play a crucial role in the distributor system. They are responsible for carrying the high-voltage spark from the distributor to the spark plugs. The spark plug wires must be in good condition to ensure a strong and consistent spark.
Worn or damaged spark plug wires can cause misfires, rough idling, and reduced power. It’s recommended to inspect the spark plug wires regularly and replace them if any signs of wear or damage are present.
38. How Often Should I Replace My Spark Plug Wires?
The lifespan of spark plug wires can vary depending on several factors, such as driving conditions, maintenance practices, and the quality of the wires themselves. As a general guideline, it’s recommended to replace the spark plug wires every 30,000 to 50,000 miles.
However, if you notice any of the symptoms of worn spark plug wires (e.g., engine misfires, rough idling, reduced power), it’s best to have them inspected and potentially replaced as soon as possible.
39. What Are the Symptoms of Worn Spark Plug Wires?
Worn spark plug wires can cause several symptoms:
- Engine Misfires: The most common symptom is engine misfires, especially under load.
- Rough Idling: The engine may idle roughly due to inconsistent spark.
- Reduced Power: A weak spark can lead to decreased power output.
- Poor Fuel Efficiency: Misfires can lead to decreased fuel economy.
- Check Engine Light: The ECU may trigger the check engine light and store DTCs related to misfires.
40. How Do I Test Spark Plug Wires?
Testing spark plug wires involves checking their resistance and inspecting them for any signs of damage. Here’s how:
- Visual Inspection: Inspect the spark plug wires for any cracks, cuts, or burns.
- Resistance Test: Use a multimeter to measure the resistance of each spark plug wire. Refer to the vehicle’s service manual for the correct resistance value.
If the resistance values are outside the specified range or if any damage is present, the spark plug wires should be replaced.
41. Can Moisture Affect Distributor Performance?
Yes, moisture can significantly affect distributor performance. Moisture inside the distributor cap can create a conductive path, causing the high-voltage spark to leak to ground instead of reaching the spark plugs. This can lead to misfires, rough idling, and difficulty starting.
To prevent moisture problems, ensure that the distributor cap is properly sealed and that the vent holes are clear. If moisture does get inside the distributor, you can try drying it out with a hairdryer or compressed air.
42. What Is the Role of the Vacuum Advance in the Distributor?
The vacuum advance is a mechanism used in older distributors to advance the ignition timing based on engine vacuum. When the engine is under light load or cruising at a steady speed, the engine vacuum is high, which pulls on a diaphragm in the vacuum advance unit. This diaphragm is connected to a plate inside the distributor that advances the timing.
The vacuum advance helps to improve fuel efficiency and reduce emissions during light load conditions. However, newer vehicles with electronic ignition systems typically do not use vacuum advance.
43. How Does Temperature Affect Distributor Performance?
Temperature can affect distributor performance in several ways. Extreme heat can cause the distributor cap and rotor to crack or warp, leading to spark leakage and misfires. Cold temperatures can make it harder for the engine to start, as the spark may not be strong enough to ignite the air-fuel mixture.
To minimize the effects of temperature, it’s important to use high-quality distributor components that are designed to withstand extreme temperatures. It’s also a good idea to inspect the distributor regularly for any signs of heat or cold damage.
44. What Is the Purpose of the Centrifugal Advance Mechanism?
The centrifugal advance mechanism is used in older distributors to advance the ignition timing based on engine speed (RPM). As the engine speed increases, centrifugal force causes weights inside the distributor to move outward, which advances the timing.
The centrifugal advance helps to improve engine performance at higher RPMs. However, newer vehicles with electronic ignition systems typically control timing electronically and do not use centrifugal advance.
45. How Can I Improve the Performance of My Honda Distributor?
There are several ways to improve the performance of your Honda distributor:
- Use High-Quality Components: Use high-quality distributor caps, rotors, spark plug wires, and ignition coils.
- Upgrade the Ignition Coil: Consider upgrading to a high-performance ignition coil for a stronger spark.
- Install an Aftermarket Distributor: Install an aftermarket distributor with improved timing control and durability.
- Convert to a Distributorless System: Convert to a distributorless ignition system for improved performance and reliability.
- Proper Maintenance: Follow the best practices for maintaining your distributor, such as regular inspections and timely replacements.
46. What Is a Distributorless Ignition System (DIS)?
A distributorless ignition system (DIS) is an ignition system that does not use a distributor to distribute the high-voltage spark to the spark plugs. Instead, each spark plug has its own ignition coil, which is controlled directly by the ECU.
DIS offers several advantages over traditional distributor systems, including improved reliability, more precise timing control, and reduced maintenance.
47. What Are the Advantages of Converting to a Distributorless Ignition System?
Converting to a distributorless ignition system offers several advantages:
- Improved Reliability: DIS has fewer moving parts, reducing the risk of mechanical failure.
- More Precise Timing: DIS offers more precise timing control, resulting in better engine performance and fuel efficiency.
- Reduced Maintenance: DIS requires less maintenance compared to traditional distributor systems.
- Better Emissions Control: DIS can optimize combustion for reduced emissions.
- Increased Power Output: DIS can provide a stronger spark, leading to increased power output.
48. What Is the Cost of Converting to a Distributorless Ignition System?
The cost of converting to a distributorless ignition system can vary depending on several factors, such as the year and model of the vehicle, the type of DIS kit, and the labor rates in your area. On average, the cost to convert to a DIS can range from $500 to $1500, including parts and labor.
49. How Can OBD2-SCANNER.EDU.VN Help Me with My Honda Distributor Problems?
OBD2-SCANNER.EDU.VN is your go-to resource for diagnosing and resolving Honda distributor problems. We offer a wealth of information, including:
- Detailed Guides: Step-by-step guides on diagnosing and repairing distributor issues.
- Troubleshooting Tips: Expert tips and tricks for identifying and fixing common distributor problems.
- OBD2 Code Information: Comprehensive information on OBD2 codes related to the distributor and its sensors.
- Product Recommendations: Recommendations for high-quality distributors, sensors, and tools.
50. How Do I Contact OBD2-SCANNER.EDU.VN for Further Assistance?
For further assistance with your Honda distributor problems, contact OBD2-SCANNER.EDU.VN today:
- Address: 123 Main Street, Los Angeles, CA 90001, United States
- WhatsApp: +1 (641) 206-8880
- Website: OBD2-SCANNER.EDU.VN
Don’t let distributor problems keep you off the road. Contact OBD2-SCANNER.EDU.VN now for expert advice and solutions, ensuring your Honda runs smoothly and efficiently.
Are you struggling with Honda distributor issues? Don’t hesitate to reach out to OBD2-SCANNER.EDU.VN for expert guidance and solutions. We are dedicated to helping you diagnose and resolve any problems you may be experiencing, ensuring your vehicle operates at its best. Contact us via WhatsApp at +1 (641) 206-8880 or visit our website OBD2-SCANNER.EDU.VN for prompt assistance. Let us help you keep your Honda running smoothly and reliably! Unlock optimal performance and efficiency today!