An OBD2 to OBD1 jumper harness is an adapter cable that allows you to connect an older OBD1 vehicle to a modern OBD2 scanning tool, and OBD2-SCANNER.EDU.VN provides the solutions for diagnosing your car’s performance efficiently, offering seamless compatibility and access to advanced diagnostic features. With the right adapter, reading trouble codes becomes more accessible, and you gain valuable insights into your vehicle’s engine management system. Discover the benefits of this essential tool and how it can simplify your automotive diagnostic processes.
Contents
- 1. Understanding OBD2 to OBD1 Jumper Harnesses
- 1.1. What is an OBD2 to OBD1 Jumper Harness?
- 1.2. Why Use an OBD2 to OBD1 Conversion Harness?
- 1.3. Key Features of a High-Quality OBD2 to OBD1 Jumper Harness
- 1.4. Common Applications of OBD2 to OBD1 Jumper Harnesses
- 2. Identifying Your Vehicle’s Diagnostic System
- 2.1. Determining if Your Vehicle is OBD1 or OBD2
- 2.2. Understanding OBD1 Diagnostic Systems
- 2.3. Key Differences Between OBD1 and OBD2
- 2.4. Common OBD1 Connectors and Their Pinouts
- 3. Selecting the Right OBD2 to OBD1 Jumper Harness
- 3.1. Compatibility Considerations
- 3.2. Types of OBD2 to OBD1 Jumper Harnesses
- 3.3. Key Features to Look For
- 3.4. Top Brands and Manufacturers
- 4. Step-by-Step Guide to Using an OBD2 to OBD1 Jumper Harness
- 4.1. Preparing for the Connection
- 4.2. Connecting the Jumper Harness
- 4.3. Using the OBD2 Scanner
- 4.4. Troubleshooting Connection Issues
- 5. Interpreting Diagnostic Trouble Codes (DTCs)
- 5.1. Understanding OBD2 DTCs
- 5.2. Common OBD2 Trouble Codes and Their Meanings
- 5.3. Using DTCs for Diagnosis and Repair
- 5.4. Limitations of DTCs
- 6. Advanced Diagnostic Techniques
- 6.1. Live Data Analysis
- 6.2. Performing Actuator Tests
- 6.3. Using a Multimeter
- 6.4. Vacuum Leak Testing
- 7. Maintaining and Caring for Your OBD2 to OBD1 Jumper Harness
- 7.1. Proper Storage Techniques
- 7.2. Inspecting for Damage
- 7.3. Cleaning and Repairing the Harness
- 7.4. When to Replace the Harness
- 8. Benefits of Using OBD2-SCANNER.EDU.VN for Your Diagnostic Needs
- 8.1. Comprehensive Diagnostic Solutions
- 8.2. Expert Advice and Support
- 8.3. High-Quality Products
- 8.4. Affordable Prices
- 8.5. Customer Satisfaction Guarantee
- 9. Frequently Asked Questions (FAQs)
- 9.1. What is the difference between OBD1 and OBD2?
- 9.2. Can I use an OBD2 scanner on an OBD1 vehicle?
- 9.3. How do I know which OBD2 to OBD1 jumper harness to use?
- 9.4. Where is the OBD1 connector located on my vehicle?
- 9.5. What are diagnostic trouble codes (DTCs)?
- 9.6. How do I read diagnostic trouble codes (DTCs)?
- 9.7. What do I do after I read the diagnostic trouble codes (DTCs)?
- 9.8. Can I clear the diagnostic trouble codes (DTCs) myself?
- 9.9. Is it safe to drive with the check engine light on?
- 9.10. Where can I get more information about OBD2 diagnostics?
- 10. Contact OBD2-SCANNER.EDU.VN Today
1. Understanding OBD2 to OBD1 Jumper Harnesses
1.1. What is an OBD2 to OBD1 Jumper Harness?
An OBD2 to OBD1 jumper harness is a conversion cable that allows you to connect an OBD2 (On-Board Diagnostics II) scanner to an OBD1 (On-Board Diagnostics I) vehicle. OBD1 was used in vehicles manufactured before 1996, while OBD2 became standard for all cars sold in the United States in 1996. The harness bridges the gap between the two systems, enabling you to read diagnostic trouble codes (DTCs) and access engine data on older vehicles using newer scanning equipment.
1.2. Why Use an OBD2 to OBD1 Conversion Harness?
There are several reasons why you might need an OBD2 to OBD1 conversion harness:
- Using Modern Diagnostic Tools: Newer OBD2 scanners often have more advanced features and broader compatibility than older OBD1 scanners. A conversion harness allows you to leverage these tools on older vehicles.
- Simplified Diagnostics: OBD2 scanners generally offer more user-friendly interfaces and more detailed diagnostic information than their OBD1 counterparts.
- Cost-Effectiveness: Instead of maintaining separate OBD1 and OBD2 scanning tools, a single OBD2 scanner with a conversion harness can cover a wider range of vehicles.
- Accessing Enhanced Data: Some OBD2 scanners can access more detailed engine data and perform advanced diagnostics that were not possible with OBD1 systems.
1.3. Key Features of a High-Quality OBD2 to OBD1 Jumper Harness
When selecting an OBD2 to OBD1 jumper harness, consider the following features to ensure compatibility and reliability:
- Quality Connectors: Look for harnesses with high-quality, durable connectors that fit snugly and securely into both the OBD1 port on your vehicle and the OBD2 port on your scanner.
- Proper Wiring: Ensure that the harness is correctly wired to match the pinouts of both OBD1 and OBD2 systems. Incorrect wiring can lead to inaccurate readings or damage to your vehicle’s computer.
- Durable Construction: The harness should be made from high-quality materials that can withstand the harsh conditions of an automotive environment, including temperature extremes, moisture, and exposure to chemicals.
- Shielded Cables: Shielded cables can help reduce interference and ensure accurate data transmission between the vehicle and the scanner.
- Compatibility: Verify that the harness is compatible with your specific vehicle make, model, and year. Some harnesses are designed for specific vehicles or OBD1 systems.
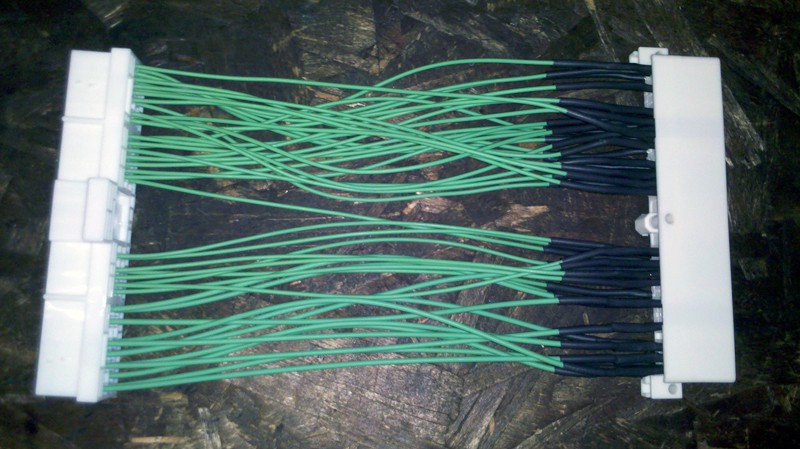 Prototype OBD2 to OBD1 Jumper Harness
1.4. Common Applications of OBD2 to OBD1 Jumper Harnesses
OBD2 to OBD1 jumper harnesses are commonly used in the following scenarios:
- Classic Car Restoration: Restoring classic cars often involves working with older OBD1 systems. A conversion harness can help diagnose engine problems and ensure proper performance.
- Engine Swaps: When performing engine swaps, particularly when installing a newer engine into an older vehicle, a conversion harness may be necessary to connect the engine’s computer to the car’s diagnostic system.
- Tuning and Performance Upgrades: Enthusiasts who tune or modify older vehicles may use a conversion harness to monitor engine performance and make adjustments using modern diagnostic tools.
- Professional Automotive Repair: Automotive technicians working in repair shops often need to diagnose a wide range of vehicles, including those with OBD1 systems. A conversion harness allows them to use their existing OBD2 scanners on these older cars.
2. Identifying Your Vehicle’s Diagnostic System
2.1. Determining if Your Vehicle is OBD1 or OBD2
The easiest way to determine if your vehicle is OBD1 or OBD2 is by checking the year it was manufactured. In the United States, all cars and light trucks manufactured after January 1, 1996, are required to be OBD2 compliant. However, some manufacturers began implementing OBD2 systems as early as 1994 or 1995.
Here are a few ways to identify your vehicle’s diagnostic system:
- Check the Vehicle’s Year: If your car was made in 1996 or later, it is likely OBD2. If it was made before 1996, it is likely OBD1.
- Inspect the Diagnostic Connector: OBD2 connectors are typically trapezoidal in shape and have 16 pins. They are usually located under the dashboard on the driver’s side. OBD1 connectors vary in shape and size and may have fewer pins. They can be found in various locations, such as under the hood or near the fuse box.
- Check the Vehicle’s Emissions Sticker: Many vehicles have an emissions sticker under the hood that indicates whether the vehicle is OBD2 compliant.
- Consult Your Vehicle’s Owner’s Manual: The owner’s manual should provide information about the vehicle’s diagnostic system.
2.2. Understanding OBD1 Diagnostic Systems
OBD1 systems were not standardized, meaning that each manufacturer used their own diagnostic connectors, communication protocols, and diagnostic trouble codes (DTCs). This lack of standardization made it more difficult to diagnose problems on OBD1 vehicles.
Key characteristics of OBD1 systems include:
- Proprietary Connectors: Each manufacturer used their own unique diagnostic connector, making it necessary to have different adapters for different vehicles.
- Limited Data: OBD1 systems typically provided less data than OBD2 systems, making it more challenging to diagnose complex engine problems.
- Flash Codes: Many OBD1 systems used “flash codes” to communicate DTCs. These codes were displayed as a series of flashes on the check engine light.
- Manual Retrieval: Retrieving DTCs from an OBD1 system often required manual procedures, such as counting flashes on the check engine light or using a specialized scan tool.
2.3. Key Differences Between OBD1 and OBD2
| Feature | OBD1 | OBD2 |
|---|---|---|
| Standardization | Not standardized | Standardized connector, communication protocol, and DTCs |
| Connector | Proprietary, varies by manufacturer | Standardized 16-pin trapezoidal connector |
| Data Available | Limited | More comprehensive, including live data parameters |
| Diagnostic Trouble Codes | Manufacturer-specific | Standardized DTCs |
| Retrieval Method | Flash codes, manual procedures | Scan tool required, standardized communication protocols |
| Year of Implementation | Before 1996 | 1996 and later (in the United States) |
| Emissions Monitoring | Limited monitoring of emissions components | Comprehensive monitoring of emissions components and system readiness |
2.4. Common OBD1 Connectors and Their Pinouts
Because OBD1 systems were not standardized, there were many different types of diagnostic connectors. Here are a few common examples:
- GM ALDL Connector: The Assembly Line Diagnostic Link (ALDL) connector was used on many General Motors vehicles. It typically had 12 pins, but not all pins were used.
- Ford EEC-IV Connector: The Electronic Engine Control (EEC) IV connector was used on many Ford vehicles. It had a varying number of pins, depending on the year and model.
- Chrysler SCI Connector: The Serial Communications Interface (SCI) connector was used on many Chrysler vehicles. It typically had 6 pins.
- Toyota Diagnostic Connector: Toyota used several different diagnostic connectors on their OBD1 vehicles, including a 2-pin connector and a multi-pin connector.
To use an OBD2 scanner on an OBD1 vehicle, you need to know the pinout of the OBD1 connector and match it to the corresponding pins on the OBD2 connector. This information is typically available in the vehicle’s service manual or online resources.
3. Selecting the Right OBD2 to OBD1 Jumper Harness
3.1. Compatibility Considerations
When choosing an OBD2 to OBD1 jumper harness, it’s crucial to ensure compatibility with your specific vehicle. Not all harnesses are created equal, and using the wrong one can lead to inaccurate readings or even damage to your vehicle’s computer.
Consider the following factors when selecting a harness:
- Vehicle Make, Model, and Year: The harness should be specifically designed for your vehicle’s make, model, and year. Some harnesses are universal, but these may not provide the same level of compatibility as a vehicle-specific harness.
- OBD1 Connector Type: Identify the type of OBD1 connector on your vehicle. As mentioned earlier, there were many different types of OBD1 connectors, so it’s essential to choose a harness that matches your vehicle’s connector.
- Scanner Compatibility: Ensure that the harness is compatible with your OBD2 scanner. Some scanners may not work with all conversion harnesses.
- Pinout Configuration: Verify that the harness is correctly wired to match the pinouts of both the OBD1 and OBD2 systems. Incorrect wiring can cause problems.
3.2. Types of OBD2 to OBD1 Jumper Harnesses
There are two main types of OBD2 to OBD1 jumper harnesses:
- Vehicle-Specific Harnesses: These harnesses are designed for specific vehicle makes, models, and years. They offer the best compatibility and are the easiest to use.
- Universal Harnesses: These harnesses are designed to work with a wide range of vehicles. They typically come with a set of adapter cables that allow you to connect to different types of OBD1 connectors. While universal harnesses can be more versatile, they may not provide the same level of compatibility as vehicle-specific harnesses.
3.3. Key Features to Look For
When selecting an OBD2 to OBD1 jumper harness, look for the following features:
- High-Quality Connectors: The harness should have high-quality connectors that fit snugly and securely into both the OBD1 port on your vehicle and the OBD2 port on your scanner.
- Durable Wiring: The harness should be made from durable wiring that can withstand the harsh conditions of an automotive environment.
- Shielded Cables: Shielded cables can help reduce interference and ensure accurate data transmission.
- Clear Labeling: The harness should be clearly labeled to indicate which pins on the OBD1 connector correspond to which pins on the OBD2 connector.
- Instructions: The harness should come with clear instructions that explain how to connect it to your vehicle and scanner.
3.4. Top Brands and Manufacturers
Several reputable brands and manufacturers offer high-quality OBD2 to OBD1 jumper harnesses. Some of the top brands include:
- NismoTronic: Known for their high-quality conversion harnesses for Nissan vehicles.
- AEM Electronics: A leading manufacturer of performance electronics, including OBD2 to OBD1 conversion harnesses.
- Boomslang Fabrication: Specializes in custom wiring harnesses, including OBD2 to OBD1 conversion harnesses.
- OBD2-SCANNER.EDU.VN: Provides comprehensive solutions for OBD diagnostics, including a variety of adapters and harnesses for different vehicle types.
4. Step-by-Step Guide to Using an OBD2 to OBD1 Jumper Harness
4.1. Preparing for the Connection
Before connecting the OBD2 to OBD1 jumper harness, take the following steps to prepare:
- Gather Your Tools: You will need an OBD2 scanner, an OBD2 to OBD1 jumper harness, and your vehicle’s service manual or online pinout information.
- Locate the OBD1 Connector: Find the OBD1 connector on your vehicle. Refer to your vehicle’s service manual or online resources to locate the connector.
- Turn Off the Ignition: Turn off the ignition to prevent electrical damage during the connection process.
- Inspect the Connectors: Inspect both the OBD1 connector on your vehicle and the OBD2 connector on your scanner for any damage or corrosion. Clean the connectors if necessary.
4.2. Connecting the Jumper Harness
Follow these steps to connect the OBD2 to OBD1 jumper harness:
- Connect the OBD1 End: Plug the OBD1 end of the jumper harness into the OBD1 connector on your vehicle. Make sure the connector is securely seated.
- Connect the OBD2 End: Plug the OBD2 end of the jumper harness into the OBD2 port on your scanner. Make sure the connector is securely seated.
- Verify the Connection: Double-check that all connections are secure and that the harness is properly wired.
4.3. Using the OBD2 Scanner
Once the jumper harness is connected, you can use the OBD2 scanner to read diagnostic trouble codes (DTCs) and access engine data.
- Turn On the Ignition: Turn on the ignition, but do not start the engine.
- Power On the Scanner: Turn on the OBD2 scanner.
- Select the Vehicle: Follow the scanner’s instructions to select the correct vehicle make, model, and year. You may need to manually enter this information since the scanner cannot automatically detect the vehicle’s information through the OBD1 system.
- Read Diagnostic Trouble Codes: Use the scanner to read any stored diagnostic trouble codes (DTCs). Record these codes for further diagnosis.
- Access Live Data: Use the scanner to access live engine data, such as engine speed, coolant temperature, and oxygen sensor readings. This data can help you diagnose engine problems.
- Clear Diagnostic Trouble Codes: After repairing any problems, use the scanner to clear the diagnostic trouble codes (DTCs).
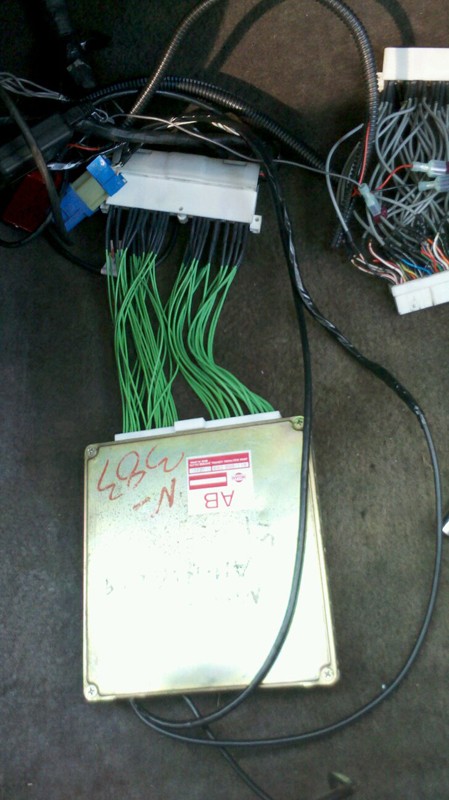 NismoTronic OBD2 to OBD1 Jumper Harness
4.4. Troubleshooting Connection Issues
If you encounter problems connecting the jumper harness or using the OBD2 scanner, try the following troubleshooting steps:
- Check the Connections: Make sure all connections are secure and that the harness is properly wired.
- Verify Compatibility: Verify that the harness is compatible with your vehicle and scanner.
- Check the Pinouts: Double-check the pinouts of both the OBD1 and OBD2 connectors to ensure that the harness is correctly wired.
- Test the Scanner: Test the OBD2 scanner on a known good OBD2 vehicle to ensure that it is functioning properly.
- Consult the Manuals: Refer to the manuals for both the jumper harness and the OBD2 scanner for troubleshooting information.
5. Interpreting Diagnostic Trouble Codes (DTCs)
5.1. Understanding OBD2 DTCs
OBD2 diagnostic trouble codes (DTCs) are standardized codes that indicate specific problems with a vehicle’s engine, transmission, or other systems. These codes are five characters long and consist of a letter followed by four numbers.
The first character indicates the system that the code refers to:
- P: Powertrain (engine, transmission)
- B: Body (interior, exterior)
- C: Chassis (brakes, suspension)
- U: Network (communication)
The second character indicates whether the code is generic or manufacturer-specific:
- 0: Generic (SAE) code
- 1: Manufacturer-specific code
The third character indicates the subsystem:
- 1: Fuel and air metering
- 2: Fuel and air metering (injector circuit)
- 3: Ignition system or misfire
- 4: Auxiliary emission controls
- 5: Vehicle speed controls and idle control system
- 6: Computer output circuit
- 7: Transmission
The last two characters indicate the specific fault within the subsystem.
5.2. Common OBD2 Trouble Codes and Their Meanings
Here are some common OBD2 trouble codes and their meanings:
| Code | Description | Possible Causes |
|---|---|---|
| P0101 | Mass Air Flow (MAF) Sensor Circuit Range/Performance Problem | Dirty or faulty MAF sensor, vacuum leak, intake air restrictions |
| P0113 | Intake Air Temperature Circuit High Input | Faulty IAT sensor, open circuit in IAT sensor wiring |
| P0171 | System Too Lean (Bank 1) | Vacuum leak, faulty oxygen sensor, low fuel pressure, faulty fuel injector |
| P0300 | Random/Multiple Cylinder Misfire Detected | Faulty spark plugs, ignition coils, fuel injectors, vacuum leak, low compression |
| P0420 | Catalyst System Efficiency Below Threshold (Bank 1) | Faulty catalytic converter, exhaust leak, faulty oxygen sensor |
5.3. Using DTCs for Diagnosis and Repair
Diagnostic trouble codes (DTCs) are a valuable tool for diagnosing and repairing vehicle problems. However, it’s important to remember that a DTC only indicates a problem; it doesn’t necessarily identify the root cause.
When using DTCs for diagnosis, follow these steps:
- Record the DTCs: Write down all DTCs that are present.
- Research the DTCs: Use online resources or a repair manual to research the meaning of each DTC.
- Inspect the Affected Components: Inspect the components and systems related to the DTCs. Look for obvious problems, such as damaged wires, loose connections, or leaking hoses.
- Test the Components: Use a multimeter or other diagnostic tools to test the components and systems related to the DTCs.
- Repair or Replace Faulty Components: Repair or replace any faulty components.
- Clear the DTCs: After repairing the problem, clear the DTCs and retest the system to ensure that the problem is resolved.
5.4. Limitations of DTCs
While DTCs can be a valuable tool, they also have limitations:
- DTCs Don’t Always Identify the Root Cause: A DTC may indicate a symptom of a problem, rather than the root cause.
- Multiple DTCs Can Be Confusing: Multiple DTCs can make it difficult to determine which problem is causing the others.
- DTCs May Be Inaccurate: DTCs can be inaccurate due to faulty sensors, wiring problems, or other issues.
- OBD1 DTCs Are Not Standardized: OBD1 DTCs are not standardized, making it more difficult to interpret them.
6. Advanced Diagnostic Techniques
6.1. Live Data Analysis
In addition to reading diagnostic trouble codes (DTCs), OBD2 scanners can also access live engine data. This data can provide valuable insights into engine performance and help you diagnose problems.
Common live data parameters include:
- Engine Speed (RPM)
- Coolant Temperature
- Intake Air Temperature
- Mass Air Flow (MAF)
- Oxygen Sensor Readings
- Fuel Trim
- Ignition Timing
- Throttle Position
By monitoring these parameters, you can identify problems such as vacuum leaks, faulty sensors, and fuel delivery issues.
6.2. Performing Actuator Tests
Some OBD2 scanners can perform actuator tests, which allow you to control various engine components and observe their response. This can be helpful for diagnosing problems with actuators, such as fuel injectors, solenoids, and relays.
Common actuator tests include:
- Fuel Injector Test: Allows you to activate individual fuel injectors to check for proper operation.
- Idle Air Control (IAC) Valve Test: Allows you to control the IAC valve to adjust the engine’s idle speed.
- Evaporative Emission (EVAP) System Test: Allows you to activate the EVAP system to check for leaks.
6.3. Using a Multimeter
A multimeter is an essential tool for diagnosing electrical problems on vehicles. It can be used to measure voltage, current, and resistance, which can help you identify problems such as short circuits, open circuits, and faulty sensors.
Common multimeter tests include:
- Voltage Drop Test: Measures the voltage drop across a circuit to identify areas of high resistance.
- Continuity Test: Checks for a complete circuit path.
- Resistance Test: Measures the resistance of a component or circuit.
6.4. Vacuum Leak Testing
Vacuum leaks can cause a variety of engine problems, such as rough idling, poor acceleration, and decreased fuel economy. A vacuum leak tester can help you identify vacuum leaks by introducing smoke into the intake manifold and observing where the smoke escapes.
7. Maintaining and Caring for Your OBD2 to OBD1 Jumper Harness
7.1. Proper Storage Techniques
To ensure that your OBD2 to OBD1 jumper harness remains in good condition, follow these storage techniques:
- Keep It Clean: Wipe down the harness with a clean, dry cloth after each use to remove any dirt, grease, or moisture.
- Store It in a Dry Place: Store the harness in a dry place to prevent corrosion.
- Avoid Extreme Temperatures: Avoid storing the harness in extreme temperatures, as this can damage the connectors and wiring.
- Coil the Cable Loosely: Coil the cable loosely to prevent kinks and strain on the connectors.
- Use a Storage Bag: Store the harness in a storage bag to protect it from dust and damage.
7.2. Inspecting for Damage
Regularly inspect your OBD2 to OBD1 jumper harness for damage. Look for the following:
- Cracked or Broken Connectors: Check the connectors for cracks or breaks.
- Loose or Corroded Pins: Check the pins for looseness or corrosion.
- Damaged Wiring: Check the wiring for cuts, abrasions, or exposed wires.
- Loose Connections: Check the connections between the connectors and the wiring for looseness.
7.3. Cleaning and Repairing the Harness
If you find any damage to your OBD2 to OBD1 jumper harness, take steps to repair it.
- Cleaning Connectors: Clean corroded connectors with a wire brush or contact cleaner.
- Repairing Wiring: Repair damaged wiring by splicing in new wire and using heat-shrink tubing to protect the connection.
- Replacing Connectors: Replace cracked or broken connectors with new ones.
7.4. When to Replace the Harness
If your OBD2 to OBD1 jumper harness is severely damaged or no longer provides a reliable connection, it’s time to replace it. Don’t risk damaging your vehicle’s computer or getting inaccurate readings by using a faulty harness.
8. Benefits of Using OBD2-SCANNER.EDU.VN for Your Diagnostic Needs
8.1. Comprehensive Diagnostic Solutions
OBD2-SCANNER.EDU.VN offers a wide range of diagnostic solutions to meet your needs, including OBD2 scanners, jumper harnesses, and diagnostic software.
8.2. Expert Advice and Support
Our team of experienced technicians can provide expert advice and support to help you diagnose and repair your vehicle. We can help you choose the right tools for your needs and provide guidance on using them effectively.
8.3. High-Quality Products
We only offer high-quality products from reputable brands, so you can be sure that you’re getting a reliable and effective solution.
8.4. Affordable Prices
We offer competitive prices on all of our products, so you can get the tools you need without breaking the bank.
8.5. Customer Satisfaction Guarantee
We stand behind our products and offer a customer satisfaction guarantee. If you’re not satisfied with your purchase, simply return it for a full refund.
9. Frequently Asked Questions (FAQs)
9.1. What is the difference between OBD1 and OBD2?
OBD1 was not standardized, meaning that each manufacturer used their own diagnostic connectors and communication protocols. OBD2 is a standardized system that was implemented in all cars and light trucks manufactured after January 1, 1996, in the United States.
9.2. Can I use an OBD2 scanner on an OBD1 vehicle?
Yes, you can use an OBD2 scanner on an OBD1 vehicle by using an OBD2 to OBD1 jumper harness.
9.3. How do I know which OBD2 to OBD1 jumper harness to use?
Choose a harness that is specifically designed for your vehicle’s make, model, and year.
9.4. Where is the OBD1 connector located on my vehicle?
The location of the OBD1 connector varies depending on the vehicle make, model, and year. Refer to your vehicle’s service manual or online resources to locate the connector.
9.5. What are diagnostic trouble codes (DTCs)?
Diagnostic trouble codes (DTCs) are standardized codes that indicate specific problems with a vehicle’s engine, transmission, or other systems.
9.6. How do I read diagnostic trouble codes (DTCs)?
You can read diagnostic trouble codes (DTCs) using an OBD2 scanner.
9.7. What do I do after I read the diagnostic trouble codes (DTCs)?
Research the meaning of the DTCs and inspect the affected components and systems. Repair or replace any faulty components and clear the DTCs.
9.8. Can I clear the diagnostic trouble codes (DTCs) myself?
Yes, you can clear the diagnostic trouble codes (DTCs) using an OBD2 scanner.
9.9. Is it safe to drive with the check engine light on?
It depends on the severity of the problem. If the check engine light is flashing, it indicates a serious problem that could damage your engine. In this case, you should stop driving and have your vehicle towed to a repair shop. If the check engine light is on but not flashing, it is generally safe to drive, but you should have the problem diagnosed and repaired as soon as possible.
9.10. Where can I get more information about OBD2 diagnostics?
You can get more information about OBD2 diagnostics from online resources, repair manuals, and automotive forums. You can also consult with a qualified automotive technician.
10. Contact OBD2-SCANNER.EDU.VN Today
Ready to take control of your vehicle’s diagnostics? Contact OBD2-SCANNER.EDU.VN today for expert advice, high-quality products, and affordable prices. Whether you’re a professional technician or a DIY enthusiast, we have the solutions you need to keep your vehicle running smoothly.
Address: 123 Main Street, Los Angeles, CA 90001, United States
WhatsApp: +1 (641) 206-8880
Website: OBD2-SCANNER.EDU.VN
Don’t let vehicle problems slow you down. Contact us now and experience the difference that OBD2-SCANNER.EDU.VN can make!