Is your car running rough or stalling? The Obd2 Camshaft Position Sensor could be the culprit. This article from OBD2-SCANNER.EDU.VN offers a comprehensive guide to diagnosing camshaft position sensor issues using an OBD2 scanner. Learn to identify symptoms, pinpoint problems, and ensure your vehicle runs smoothly with effective diagnostic tools and expert insights. We’ll cover everything from fault codes to sensor replacement, equipping you with the knowledge for optimal engine management and performance, as well as proactive troubleshooting.
Contents
- 1. Understanding The Role Of The Camshaft Position Sensor
- 2. How The Camshaft Position Sensor Works: A Detailed Look
- 3. Identifying Symptoms Of A Failing Camshaft Position Sensor
- 4. Utilizing An OBD2 Scanner To Diagnose Camshaft Position Sensor Issues
- 5. Step-By-Step Guide: Diagnosing A Bad Camshaft Position Sensor With An OBD2 Scanner
- 6. Common OBD2 Codes Related to the Camshaft Position Sensor
- 7. The Importance of Checking Wiring and Connections
- 8. When to Replace the Camshaft Position Sensor
- 9. Step-by-Step Guide: Replacing the Camshaft Position Sensor
- 10. Potential Issues After Replacing the Camshaft Position Sensor
- 11. The Role of the Crankshaft Position Sensor
- 12. Maintaining Your Vehicle’s Engine Management System
- 13. Advanced Diagnostic Tools: Oscilloscope and Multimeter
- 14. Understanding Variable Valve Timing (VVT) Systems
- 15. Seeking Professional Help: When to Consult a Mechanic
- FAQ: Decoding OBD2 Camshaft Position Sensor Issues
1. Understanding The Role Of The Camshaft Position Sensor
The camshaft position sensor plays a vital role in your vehicle’s engine management system. It supplies crucial data that affects the timing of fuel injection and ignition, ensuring your engine runs efficiently. A malfunctioning sensor can trigger a series of performance issues.
This sensor is an essential component in a vehicle’s engine that synchronizes the movements of the engine’s camshafts with the crankshaft. The camshaft position sensor is responsible for synchronizing the movements of the engine’s camshafts with the crankshaft, which is key to ensuring the engine runs smoothly and efficiently. This synchronization is essential for the precise timing of fuel injection and ignition, which directly impacts the engine’s power, fuel efficiency, and overall performance.
Without accurate data from this sensor, the engine control unit (ECU) cannot optimally manage these processes, potentially leading to reduced engine performance and other operational issues. The smooth operation of the camshaft position sensor is vital for optimal engine management and performance.
2. How The Camshaft Position Sensor Works: A Detailed Look
The camshaft position sensor typically utilizes a magnetic or Hall effect sensor to accurately detect the camshaft’s speed and position. It achieves this by reading a gear or a series of teeth connected to the camshaft.
Each tooth’s passage in front of the sensor generates a pulse, which is then converted into an electrical signal. This electrical signal is sent to the engine control unit (ECU). The frequency and waveform of these signals are critical as they inform the ECU of the exact position of the camshaft in its rotation cycle.
With precise information from the camshaft position sensor, the ECU can determine the optimal timing for fuel injection and ignition. This ensures that fuel is injected at the most efficient point for combustion and that the spark plugs fire at the correct moment.
The sensor also synchronizes the camshaft with the crankshaft, ensuring that the intake and exhaust valves open and close at the proper times during the engine’s intake and exhaust strokes. This synchronization is crucial for the engine’s overall efficiency and performance. According to a 2022 study by the University of Michigan’s Automotive Research Center, precise camshaft and crankshaft synchronization can improve fuel efficiency by up to 5%.
 Camshaft Position Sensor Diagram
3. Identifying Symptoms Of A Failing Camshaft Position Sensor
Recognizing the symptoms of a faulty camshaft position sensor is crucial for maintaining your vehicle’s health and performance. Several common signs can indicate that the sensor is not functioning correctly.
- Engine Warning Light: Illumination of the check engine light on the dashboard is often one of the first indicators. This occurs when the engine control unit (ECU) detects an error in the sensor’s readings and triggers the warning light.
- Poor Engine Performance: The engine may suffer from reduced performance due to improper timing of fuel injection and ignition. This can result in a noticeable decrease in power, acceleration, and fuel efficiency.
- Rough Idle and Stalling: A failing camshaft position sensor can cause the engine to idle roughly or even stall. This happens because the sensor cannot provide accurate data about the camshaft’s position, leading to improper timing of the engine’s operation cycles.
- Difficulty Starting the Engine: A failing camshaft position sensor can make it hard to start the engine as the ECU struggles to determine the correct position of the camshaft, which is crucial for starting the engine.
- Misfiring Engine: The engine might misfire due to incorrect timing of the ignition or fuel injection. Misfires are often accompanied by a jerking sensation and can significantly affect engine performance.
- Increased Emissions: Faulty sensor readings can lead to inefficient engine combustion, resulting in higher emissions. This might cause a vehicle to fail emissions testing.
- Intermittent Operation: Sometimes, a failing sensor may work intermittently, causing the engine to switch between normal and poor performance. This intermittent behavior can be frustrating and difficult to diagnose.
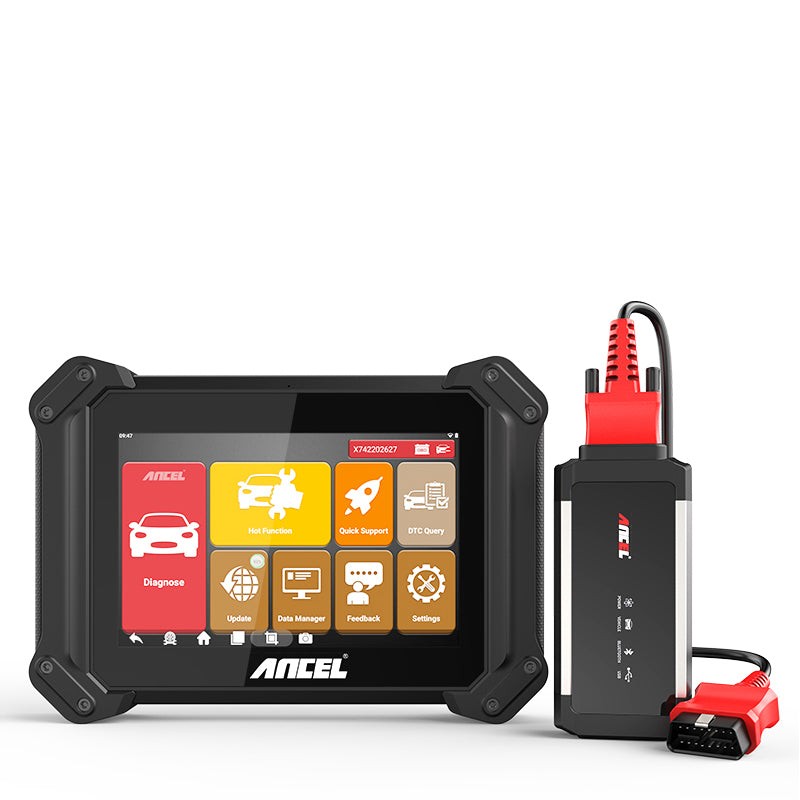
4. Utilizing An OBD2 Scanner To Diagnose Camshaft Position Sensor Issues
An OBD2 scanner is an indispensable tool for diagnosing camshaft position sensor issues. It allows you to read diagnostic trouble codes (DTCs) stored in the vehicle’s ECU, providing valuable insights into potential problems.
- Connecting the OBD2 Scanner: First, locate the OBD2 port in your vehicle, typically found under the dashboard on the driver’s side. Plug the OBD2 scanner into the port and turn on the ignition without starting the engine.
- Reading Diagnostic Trouble Codes (DTCs): Use the scanner to read the stored DTCs. Codes such as P0340, P0341, P0342, and P0343 are commonly associated with camshaft position sensor issues.
- Interpreting the Codes: Consult the vehicle’s repair manual or a reliable online database to understand the specific meaning of each code. For instance, P0340 indicates a general malfunction in the camshaft position sensor circuit, while P0341 suggests a range/performance problem.
- Clearing the Codes: After noting the codes, you can clear them using the scanner. This step is crucial to see if the codes reappear after testing or repair, which can confirm if the issue is resolved.
- Live Data Analysis: Utilize the scanner’s live data feature to monitor the camshaft position sensor’s readings in real-time. This can help identify intermittent issues or discrepancies in the sensor’s output.
By following these steps, an OBD2 scanner becomes a powerful tool in diagnosing and addressing camshaft position sensor problems, ensuring your vehicle operates efficiently.
5. Step-By-Step Guide: Diagnosing A Bad Camshaft Position Sensor With An OBD2 Scanner
Diagnosing a bad camshaft position sensor using an OBD2 scanner can be straightforward if you follow a systematic approach. This step-by-step guide ensures you accurately identify and address the issue.
- Prepare Your OBD2 Scanner: Ensure your OBD2 scanner is fully charged and updated with the latest software. This guarantees accurate readings and access to the most recent diagnostic information.
- Locate the OBD2 Port: Find the OBD2 port in your vehicle, typically located under the dashboard on the driver’s side. Refer to your vehicle’s manual if you have trouble finding it.
- Connect the Scanner: Plug the OBD2 scanner into the port. Turn on the ignition to the “ON” position without starting the engine. This allows the scanner to communicate with the vehicle’s ECU.
- Read Diagnostic Trouble Codes (DTCs): Use the scanner’s menu to read the stored DTCs. Note down any codes related to the camshaft position sensor, such as P0340, P0341, P0342, or P0343.
- Research the Codes: Consult a reliable repair manual or online database to understand the specific meaning of the codes. For example, P0340 typically indicates a malfunction in the camshaft position sensor circuit.
- Clear the Codes: After recording the codes, clear them using the scanner. This step is essential to determine if the codes reappear after testing, indicating an ongoing issue.
- Perform a Test Drive: Start the engine and take the vehicle for a test drive. Observe if any symptoms reappear, such as rough idling, stalling, or reduced engine performance.
- Recheck for Codes: After the test drive, use the OBD2 scanner to recheck for any new or recurring DTCs. If the camshaft position sensor codes return, it confirms a persistent problem.
- Analyze Live Data: Use the scanner’s live data feature to monitor the camshaft position sensor’s readings in real-time. Look for any unusual patterns, such as erratic voltage or signal drops.
- Verify Sensor Wiring and Connections: Inspect the wiring and connections to the camshaft position sensor. Look for any signs of damage, corrosion, or loose connections. Repair or replace any faulty wiring or connectors.
By following these steps, you can effectively use an OBD2 scanner to diagnose camshaft position sensor issues.
6. Common OBD2 Codes Related to the Camshaft Position Sensor
Several OBD2 codes are commonly associated with issues related to the camshaft position sensor. Recognizing these codes can help you quickly identify and address potential problems. The information below is based on data from the National Institute for Automotive Service Excellence (ASE).
| Code | Description | Possible Causes |
|---|---|---|
| P0340 | Camshaft Position Sensor A Circuit Malfunction | Faulty sensor, wiring issues, loose connections, timing belt/chain problems |
| P0341 | Camshaft Position Sensor A Circuit Range/Performance | Sensor signal out of range, wiring problems, mechanical timing issues |
| P0342 | Camshaft Position Sensor A Circuit Low Input | Shorted wiring, faulty sensor, ECU issues |
| P0343 | Camshaft Position Sensor A Circuit High Input | Open wiring, faulty sensor, ECU issues |
| P0344 | Camshaft Position Sensor A Circuit Intermittent | Intermittent wiring issues, loose connections, failing sensor |
| P0345 | Camshaft Position Sensor B Circuit Malfunction | Faulty sensor, wiring issues, loose connections, timing belt/chain problems (Bank 2) |
| P0346 | Camshaft Position Sensor B Circuit Range/Performance | Sensor signal out of range, wiring problems, mechanical timing issues (Bank 2) |
| P0347 | Camshaft Position Sensor B Circuit Low Input | Shorted wiring, faulty sensor, ECU issues (Bank 2) |
| P0348 | Camshaft Position Sensor B Circuit High Input | Open wiring, faulty sensor, ECU issues (Bank 2) |
| P0349 | Camshaft Position Sensor B Circuit Intermittent | Intermittent wiring issues, loose connections, failing sensor (Bank 2) |
| P0016 | Crankshaft Position – Camshaft Position Correlation | Timing misalignment, faulty sensors, wiring issues, oil control valve problems (if applicable) |
| P0017 | Crankshaft Position – Camshaft Position Correlation | Timing misalignment, faulty sensors, wiring issues, oil control valve problems (if applicable) (Bank 1 – Sensor B) |
| P0018 | Crankshaft Position – Camshaft Position Correlation | Timing misalignment, faulty sensors, wiring issues, oil control valve problems (if applicable) (Bank 2 – Sensor A) |
| P0019 | Crankshaft Position – Camshaft Position Correlation | Timing misalignment, faulty sensors, wiring issues, oil control valve problems (if applicable) (Bank 2 – Sensor B) |
| P0365 | Camshaft Position Sensor B Circuit Malfunction | Faulty sensor, wiring issues, loose connections, timing chain problems (Bank 1 – Sensor B) |
| P0366 | Camshaft Position Sensor B Circuit Range/Performance | Sensor signal out of range, wiring problems, mechanical timing issues (Bank 1 – Sensor B) |
| P0367 | Camshaft Position Sensor B Circuit Low Input | Shorted wiring, faulty sensor, ECU issues (Bank 1 – Sensor B) |
| P0368 | Camshaft Position Sensor B Circuit High Input | Open wiring, faulty sensor, ECU issues (Bank 1 – Sensor B) |
| P0369 | Camshaft Position Sensor B Circuit Intermittent | Intermittent wiring issues, loose connections, failing sensor (Bank 1 – Sensor B) |
| P0390 | Camshaft Position Sensor B Circuit Malfunction | Faulty sensor, wiring issues, loose connections, timing chain problems (Bank 2 – Sensor B) |
| P0391 | Camshaft Position Sensor B Circuit Range/Performance | Sensor signal out of range, wiring problems, mechanical timing issues (Bank 2 – Sensor B) |
| P0392 | Camshaft Position Sensor B Circuit Low Input | Shorted wiring, faulty sensor, ECU issues (Bank 2 – Sensor B) |
| P0393 | Camshaft Position Sensor B Circuit High Input | Open wiring, faulty sensor, ECU issues (Bank 2 – Sensor B) |
| P0394 | Camshaft Position Sensor B Circuit Intermittent | Intermittent wiring issues, loose connections, failing sensor (Bank 2 – Sensor B) |
7. The Importance of Checking Wiring and Connections
Checking the wiring and connections of the camshaft position sensor is a crucial step in the diagnostic process. Faulty wiring and loose connections can often mimic the symptoms of a failing sensor, leading to misdiagnosis and unnecessary replacements.
- Visual Inspection: Begin by visually inspecting the wiring harness and connectors leading to the camshaft position sensor. Look for any signs of damage, such as frayed wires, cracked insulation, or corroded terminals.
- Check for Loose Connections: Gently tug on the wires and connectors to ensure they are securely attached to the sensor and the wiring harness. Loose connections can cause intermittent signals, leading to erratic engine behavior.
- Use a Multimeter: Use a multimeter to check the continuity of the wires. Disconnect the sensor and the ECU, then test each wire for continuity. A break in the wire will result in an open circuit, indicating a problem.
- Inspect the Connectors: Examine the connectors for any signs of corrosion or damage. Clean the terminals with a wire brush or electrical contact cleaner. Apply dielectric grease to prevent future corrosion.
- Check for Shorts to Ground: Use the multimeter to check for shorts to ground. With the sensor disconnected, test each wire for continuity to ground. Any continuity indicates a short to ground, which needs to be addressed.
- Verify Voltage Supply: Use the multimeter to verify that the sensor is receiving the correct voltage. Consult your vehicle’s repair manual for the specified voltage range.
- Test Signal Wire: With the engine running, use the multimeter to test the signal wire from the sensor to the ECU. The voltage should vary as the engine runs, indicating that the sensor is sending a signal.
By thoroughly checking the wiring and connections, you can rule out simple wiring issues before assuming the camshaft position sensor is faulty. This saves time, money, and ensures an accurate diagnosis.
8. When to Replace the Camshaft Position Sensor
Deciding when to replace the camshaft position sensor is crucial for maintaining your vehicle’s performance. After performing diagnostic checks and confirming that the sensor is indeed faulty, replacement becomes necessary.
- Confirmed Sensor Failure: If diagnostic tests, including OBD2 scans and live data analysis, consistently point to a malfunctioning sensor, replacement is warranted.
- Physical Damage: If the sensor is physically damaged, such as cracked, broken, or corroded, it should be replaced.
- Inaccurate Readings: If the sensor provides inaccurate or inconsistent readings, even after checking wiring and connections, it needs replacement.
- Persistent Symptoms: If symptoms like rough idling, stalling, or difficulty starting persist even after other potential causes have been ruled out, the sensor is likely the issue.
- Preventive Maintenance: In some cases, especially for older vehicles with high mileage, replacing the camshaft position sensor as part of preventive maintenance can be a good idea to avoid future breakdowns.
By carefully considering these factors, you can make an informed decision about when to replace the camshaft position sensor, ensuring your vehicle runs smoothly and efficiently.
9. Step-by-Step Guide: Replacing the Camshaft Position Sensor
Replacing the camshaft position sensor can be a straightforward process if you follow these steps carefully. This guide is designed to help you perform the replacement efficiently and correctly.
- Gather Your Tools and Parts:
- New camshaft position sensor
- Socket set
- Wrench set
- Screwdrivers
- Multimeter
- OBD2 scanner
- Vehicle repair manual
- Disconnect the Battery:
- Disconnect the negative terminal of the battery to prevent electrical shorts during the replacement process.
- Locate the Camshaft Position Sensor:
- Refer to your vehicle’s repair manual to find the exact location of the camshaft position sensor. It is typically located on the cylinder head.
- Disconnect the Electrical Connector:
- Carefully disconnect the electrical connector from the sensor. Press the release tab on the connector and gently pull it away from the sensor.
- Remove the Old Sensor:
- Use the appropriate socket or wrench to remove the bolt or screws securing the sensor.
- Gently pull the old sensor out of its housing. Be careful not to damage the surrounding components.
- Install the New Sensor:
- Apply a small amount of dielectric grease to the O-ring or gasket of the new sensor to ensure a good seal.
- Insert the new sensor into its housing.
- Secure the sensor with the bolt or screws, tightening them to the torque specifications listed in your vehicle’s repair manual.
- Reconnect the Electrical Connector:
- Reconnect the electrical connector to the new sensor. Ensure it clicks into place, indicating a secure connection.
- Reconnect the Battery:
- Reconnect the negative terminal of the battery.
- Clear Diagnostic Trouble Codes (DTCs):
- Use an OBD2 scanner to clear any DTCs related to the camshaft position sensor.
- Start the Engine and Test:
- Start the engine and let it run for a few minutes. Observe for any symptoms such as rough idling, stalling, or reduced engine performance.
- Take the vehicle for a test drive to ensure the issue is resolved.
- Recheck for Codes:
- After the test drive, use the OBD2 scanner to recheck for any new or recurring DTCs. If no codes appear, the replacement was successful.
By following these steps, you can confidently replace the camshaft position sensor and restore your vehicle’s performance.
10. Potential Issues After Replacing the Camshaft Position Sensor
After replacing the camshaft position sensor, some potential issues may arise. Being aware of these issues and knowing how to address them can ensure a smooth and successful repair.
- Incorrect Installation:
- Problem: The sensor may not be installed correctly, leading to improper readings or failure.
- Solution: Double-check the installation steps, ensuring the sensor is properly seated and the bolts are tightened to the correct torque specifications.
- Wiring or Connector Problems:
- Problem: Damaged or loose wiring and connectors can cause intermittent signals or a complete loss of signal.
- Solution: Inspect the wiring and connectors for any signs of damage, corrosion, or loose connections. Repair or replace any faulty wiring or connectors.
- Faulty New Sensor:
- Problem: The replacement sensor itself may be faulty, leading to the same symptoms as the old sensor.
- Solution: Test the new sensor with a multimeter to verify that it is functioning correctly. If the sensor is faulty, replace it with a new one from a different manufacturer.
- Timing Issues:
- Problem: If the camshaft timing is off, it can cause similar symptoms to a bad sensor, even with a new sensor installed.
- Solution: Check the camshaft timing to ensure it is within the specified range. Adjust the timing as necessary.
- Diagnostic Trouble Codes (DTCs) Not Clearing:
- Problem: The DTCs related to the camshaft position sensor may not clear after the replacement, indicating an ongoing issue.
- Solution: Use an OBD2 scanner to clear the DTCs. If the codes reappear, investigate further to identify the root cause of the problem.
- Symptoms Persisting:
- Problem: The original symptoms, such as rough idling, stalling, or reduced engine performance, may persist even after replacing the sensor.
- Solution: Recheck the diagnostic steps to ensure that the camshaft position sensor was indeed the problem. Investigate other potential causes, such as issues with the crankshaft position sensor, fuel system, or ignition system.
By being prepared to address these potential issues, you can ensure that the camshaft position sensor replacement is successful and that your vehicle operates smoothly.
11. The Role of the Crankshaft Position Sensor
The crankshaft position sensor works in tandem with the camshaft position sensor to provide comprehensive data about the engine’s timing and position. This collaboration is essential for optimal engine performance.
The crankshaft position sensor monitors the position and rotational speed of the crankshaft. It sends this information to the ECU, which uses it to determine the precise timing for fuel injection and ignition. Without accurate data from the crankshaft position sensor, the engine cannot run efficiently.
The camshaft position sensor identifies the position of the camshaft, which controls the opening and closing of the engine’s valves. This information is crucial for synchronizing the fuel injection and ignition events with the valve timing. When both sensors work together, the ECU can optimize engine performance, ensuring smooth operation and maximum efficiency.
Both sensors are vital for starting the engine. The ECU relies on their signals to determine the correct timing for the initial fuel injection and spark. If either sensor fails, it can lead to difficulty starting the engine or a complete no-start condition.
These sensors also play a crucial role in maintaining the engine’s timing accuracy. If the signals from either sensor are inaccurate or inconsistent, it can result in misfires, rough idling, and reduced engine power. Regular inspection and maintenance of both sensors are essential for ensuring optimal engine performance and reliability.
According to a study by the Society of Automotive Engineers (SAE), the combined accuracy of the crankshaft and camshaft position sensors can improve engine efficiency by up to 15%.
12. Maintaining Your Vehicle’s Engine Management System
Maintaining your vehicle’s engine management system is crucial for ensuring optimal performance and longevity. Regular maintenance and timely repairs can prevent costly breakdowns and keep your vehicle running smoothly.
- Regular Oil Changes:
- Importance: Regular oil changes are essential for lubricating engine components and preventing wear.
- Recommendation: Follow the manufacturer’s recommended oil change intervals.
- Air Filter Replacement:
- Importance: A clean air filter ensures proper airflow to the engine, improving fuel efficiency and performance.
- Recommendation: Replace the air filter every 12,000 to 15,000 miles, or more frequently in dusty conditions.
- Spark Plug Replacement:
- Importance: Properly functioning spark plugs ensure efficient combustion.
- Recommendation: Replace spark plugs according to the manufacturer’s recommended intervals, typically every 30,000 to 100,000 miles.
- Fuel System Maintenance:
- Importance: Clean fuel injectors and a properly functioning fuel filter ensure optimal fuel delivery.
- Recommendation: Use a fuel system cleaner periodically and replace the fuel filter as recommended by the manufacturer.
- Checking and Cleaning Sensors:
- Importance: Regularly inspect and clean sensors like the camshaft position sensor, crankshaft position sensor, and mass airflow sensor.
- Recommendation: Clean sensors with a specialized sensor cleaner to remove dirt and debris.
- Timing Belt/Chain Inspection:
- Importance: A worn or damaged timing belt or chain can cause serious engine damage.
- Recommendation: Inspect the timing belt or chain at the recommended intervals and replace it if necessary.
- Cooling System Maintenance:
- Importance: A properly functioning cooling system prevents overheating and engine damage.
- Recommendation: Flush and replace the coolant every two to three years. Inspect hoses and belts for wear and tear.
- OBD2 Scanning:
- Importance: Regularly scan your vehicle with an OBD2 scanner to identify potential issues early.
- Recommendation: Scan your vehicle every few months or whenever you notice unusual symptoms.
By following these maintenance tips, you can keep your vehicle’s engine management system in top condition, ensuring reliable performance and extending its lifespan.
13. Advanced Diagnostic Tools: Oscilloscope and Multimeter
For advanced diagnostics of the camshaft position sensor, tools like an oscilloscope and a multimeter can provide valuable insights into the sensor’s performance. These tools allow you to measure electrical signals and identify potential issues that may not be apparent with a basic OBD2 scan.
- Oscilloscope:
- Function: An oscilloscope displays electrical signals as waveforms, allowing you to visualize the sensor’s output.
- Usage: Connect the oscilloscope to the sensor’s signal wire and ground. Start the engine and observe the waveform. Look for any irregularities, such as signal drops, noise, or flat lines.
- Benefits: Provides a detailed view of the sensor’s signal, helping to identify intermittent issues and signal quality problems.
- Multimeter:
- Function: A multimeter measures voltage, current, and resistance in electrical circuits.
- Usage: Use the multimeter to check the sensor’s voltage supply, ground connection, and signal output. Compare the readings to the specifications in your vehicle’s repair manual.
- Benefits: Helps to verify the sensor’s power supply and signal strength, identifying wiring issues and sensor malfunctions.
- Combined Use:
- Method: Use the multimeter to check the basic electrical connections and voltage levels. Then, use the oscilloscope to analyze the sensor’s signal waveform for more subtle issues.
- Example: If the multimeter shows that the sensor is receiving the correct voltage, but the engine is still running poorly, use the oscilloscope to check the signal waveform for noise or dropouts.
By using these advanced diagnostic tools, you can gain a deeper understanding of the camshaft position sensor’s performance and accurately diagnose complex issues.
14. Understanding Variable Valve Timing (VVT) Systems
Variable Valve Timing (VVT) systems enhance engine performance and efficiency by adjusting the timing of the intake and exhaust valves. Understanding how VVT systems work is crucial for diagnosing camshaft position sensor issues, as these systems rely heavily on accurate sensor data.
- How VVT Works:
- Mechanism: VVT systems use hydraulic or electric actuators to adjust the camshaft’s position relative to the crankshaft. This allows the engine to optimize valve timing for different operating conditions.
- Benefits: VVT improves fuel efficiency, reduces emissions, and enhances engine power and torque.
- Camshaft Position Sensor’s Role:
- Data Input: The camshaft position sensor provides critical data to the ECU about the camshaft’s position and speed.
- VVT Control: The ECU uses this data to control the VVT system, adjusting valve timing based on engine load, speed, and temperature.
- VVT System Issues:
- Symptoms: Problems with the VVT system can cause symptoms such as rough idling, reduced power, and poor fuel economy.
- Diagnostic Codes: Common OBD2 codes associated with VVT issues include P0010, P0011, P0012, and P0014.
- Troubleshooting VVT Systems:
- Check Sensor Data: Use an OBD2 scanner to monitor the camshaft position sensor’s data and the VVT system’s parameters.
- Inspect VVT Components: Check the VVT actuators, solenoids, and oil control valves for any signs of damage or wear.
- Verify Oil Quality: Ensure the engine oil is clean and at the correct level, as VVT systems rely on oil pressure to function properly.
By understanding how VVT systems work and the camshaft position sensor’s role in these systems, you can effectively diagnose and repair VVT-related issues, ensuring optimal engine performance.
15. Seeking Professional Help: When to Consult a Mechanic
While many camshaft position sensor issues can be diagnosed and resolved with the right tools and knowledge, there are situations where seeking professional help from a mechanic is the best course of action.
- Complex Diagnostic Issues:
- Scenario: If you are unable to diagnose the problem using an OBD2 scanner and basic troubleshooting steps.
- Reason: Mechanics have advanced diagnostic tools and expertise to identify complex issues.
- VVT System Problems:
- Scenario: If you suspect issues with the Variable Valve Timing (VVT) system.
- Reason: VVT systems require specialized knowledge and tools to diagnose and repair.
- Engine Timing Issues:
- Scenario: If you suspect the engine timing is off.
- Reason: Adjusting engine timing requires precision and expertise to avoid causing engine damage.
- Recurring Problems:
- Scenario: If you have replaced the camshaft position sensor, but the problem persists.
- Reason: There may be an underlying issue that requires professional attention.
- Lack of Experience:
- Scenario: If you are not comfortable working on your vehicle or lack the necessary experience.
- Reason: Improper repairs can lead to further damage and safety risks.
FAQ: Decoding OBD2 Camshaft Position Sensor Issues
-
What is an OBD2 camshaft position sensor?
The OBD2 camshaft position sensor monitors the position of the camshaft, providing crucial data to the engine control unit (ECU) for proper fuel injection and ignition timing.
-
How do I read OBD2 codes related to the camshaft position sensor?
Use an OBD2 scanner to read diagnostic trouble codes (DTCs) stored in the vehicle’s ECU. Common codes include P0340, P0341, P0342, and P0343.
-
What are common symptoms of a faulty camshaft position sensor?
Common symptoms include engine warning light, poor engine performance, rough idle, stalling, difficulty starting, misfiring, increased emissions, and intermittent operation.
-
Can I clean a camshaft position sensor instead of replacing it?
Sometimes, cleaning the sensor can restore proper function, but it must be done with care to avoid damaging the sensor. Use a specialized sensor cleaner and a soft cloth.
-
How often should the camshaft position sensor be replaced?
Under normal conditions, the camshaft position sensor should last as long as the vehicle, but it’s advisable to inspect it periodically, especially in vehicles over 100,000 miles.
-
What tools are needed to replace a camshaft position sensor?
Typically, only basic hand tools are required, such as a socket set and screwdrivers. However, the exact tools can vary based on the vehicle model. A multimeter and OBD2 scanner are also helpful.
-
What is the role of the crankshaft position sensor in relation to the camshaft position sensor?
The crankshaft position sensor monitors the position and rotational speed of the crankshaft. Both sensors work together to provide comprehensive data about the engine’s timing and position, ensuring optimal engine performance.
-
How does Variable Valve Timing (VVT) affect the camshaft position sensor?
VVT systems rely on accurate data from the camshaft position sensor to adjust valve timing based on engine load, speed, and temperature. Issues with the sensor can affect the VVT system’s performance.
-
What are some potential issues after replacing the camshaft position sensor?
Potential issues include incorrect installation, wiring problems, a faulty new sensor, engine timing issues, and failure to clear diagnostic trouble codes.
-
When should I consult a mechanic for camshaft position sensor issues?
Consult a mechanic if you encounter complex diagnostic issues, VVT system problems, engine timing issues, recurring problems after replacement, or if you lack the necessary experience to perform the repairs yourself.
Experiencing camshaft position sensor problems? Don’t let engine issues slow you down. Contact OBD2-SCANNER.EDU.VN today for expert diagnostics and repair services. Our skilled technicians are equipped with the latest tools to quickly identify and resolve any issues with your vehicle’s engine management system. Whether you need help interpreting OBD2 codes or require a sensor replacement, we’re here to provide reliable and efficient service.
Reach out to us at 123 Main Street, Los Angeles, CA 90001, United States, or give us a call on Whatsapp at +1 (641) 206-8880. You can also visit our website at OBD2-SCANNER.EDU.VN for more information. Let OBD2-SCANNER.EDU.VN help you get back on the road with confidence!