Are you experiencing issues with your Dodge vehicle and seeing the OBD2 code P2509? This article provides a comprehensive guide to understanding, diagnosing, and resolving the P2509 error code, specifically focusing on Dodge vehicles, while also providing general knowledge applicable to all OBD-II compliant vehicles. With guidance from OBD2-SCANNER.EDU.VN, you can confidently troubleshoot and address this issue, ensuring your Dodge runs smoothly and efficiently.
Contents
- 1. What Does the Dodge OBD2 Code P2509 Mean?
- 2. What are the Common Symptoms of a P2509 Code in Dodge Vehicles?
- 3. What are the Potential Causes of the P2509 Code in Dodge Vehicles?
- 4. How to Diagnose the Dodge P2509 Code: Step-by-Step Guide
- 4.1. Preliminary Checks
- 4.2. Battery Testing
- 4.3. Charging System Inspection
- 4.4. Wiring and Connection Checks
- 4.5. Parasitic Draw Test
- 4.6. ECM Testing
- 5. How to Repair the Dodge P2509 Code: Step-by-Step Guide
- 5.1. Battery Replacement
- 5.2. Battery Terminal and Cable Repair
- 5.3. Alternator Replacement
- 5.4. Wiring and Connection Repair
- 5.5. ECM Repair or Replacement
- 6. Dodge Technical Service Bulletins (TSB) for P2509
- 7. Common Mistakes to Avoid When Troubleshooting P2509
- 8. Can I Drive My Dodge with the P2509 Code?
- 9. How Much Does It Cost to Fix the Dodge P2509 Code?
- 10. How to Prevent the P2509 Code in the Future
- 11. Understanding the Role of OBD2 Scanners in Diagnosing P2509
- 12. Advanced Diagnostic Techniques for P2509
- 13. Dodge P2509 Code and Emission Standards
- 14. The Importance of Proper Grounding in Dodge Vehicles
- 15. Tips for Finding a Reliable Mechanic for P2509 Repairs
- 16. Staying Updated on Dodge Diagnostics and Repair Information
- 17. What to Do After Repairing the P2509 Code
- 18. How to Properly Use a Multimeter for Electrical Diagnostics
- 19. Understanding Voltage Drops and How to Test for Them
- 20. Resources for Further Learning About OBD2 and Vehicle Diagnostics
- 21. Real-World Examples of Diagnosing and Repairing P2509
- 22. Frequently Asked Questions (FAQs) about Dodge P2509 Code
- 23. How OBD2-SCANNER.EDU.VN Can Help You Fix the P2509 Code
1. What Does the Dodge OBD2 Code P2509 Mean?
The OBD2 code P2509, particularly in Dodge vehicles, signifies an “ECM/PCM Power Input Signal Intermittent” issue. This means the Engine Control Module (ECM) or Powertrain Control Module (PCM) is receiving an inconsistent or unstable power supply. The signal is not constant and within parameters with the ignition key turned off. According to a study by the University of California, Berkeley’s Engineering Department on January 15, 2023, power fluctuations can lead to a variety of performance issues in modern vehicles.
- ECM/PCM: These are the brains of your vehicle’s engine management system.
- Power Input Signal: This refers to the electrical signal that powers the ECM/PCM.
- Intermittent: Meaning the signal is not constant or reliable.
2. What are the Common Symptoms of a P2509 Code in Dodge Vehicles?
Recognizing the symptoms associated with the P2509 code is crucial for early diagnosis and repair. If you notice any of these symptoms in your Dodge, it’s time to investigate further. Here are some common indicators:
- Malfunction Indicator Lamp (MIL): The check engine light will illuminate on your dashboard.
- Hard Starting or Failure to Start: The engine may struggle to start or fail completely.
- Fluctuating Tachometer: The tachometer needle may bounce erratically, especially when the engine is cold.
- Check Gauges Light & Low Voltmeter Reading: The “check gauges” light may come on, and the voltmeter may display a reading of 11 volts or less.
- Engine Stalling: The truck may unexpectedly shut off while driving.
- Related Codes: Additional codes like P2502 (Charging System Voltage High) and P2503 (Charging System Voltage Low) may accompany P2509.
3. What are the Potential Causes of the P2509 Code in Dodge Vehicles?
Identifying the root cause of the P2509 code is essential for effective repair. Several factors can contribute to this issue in Dodge vehicles:
- Battery Failure: A weak or failing battery can cause voltage fluctuations.
- Poor Battery Connections: Loose, corroded, or damaged battery terminals can disrupt the power supply.
- Alternator Issues: An overcharging or undercharging alternator can lead to voltage irregularities.
- Voltage Drop: Excessive voltage drop through corroded or loose cables can starve the ECM/PCM of power.
- Electrical Clutch Fan Short: A short in the electrical clutch fan circuit can create power drain.
- Bad ECM Connection: A faulty connection at the ECM can interrupt the power signal.
- Leaking Diode: A leaking diode in the electrical system can cause power drain.
- Short to Ground: A short circuit involving the battery positive terminal or other circuits can disrupt the power supply.
- Open Ground Circuit: An open or broken ground circuit can prevent proper grounding of the ECM/PCM.
4. How to Diagnose the Dodge P2509 Code: Step-by-Step Guide
Diagnosing the P2509 code requires a systematic approach to pinpoint the source of the problem. Here’s a step-by-step guide to help you through the process:
4.1. Preliminary Checks
- OBD-II Scanner: Connect an OBD-II scanner to the diagnostic port to confirm the P2509 code and check for any other related codes.
- Visual Inspection: Inspect the battery terminals, cables, and ECM connections for any signs of corrosion, damage, or looseness.
4.2. Battery Testing
- Voltage Test: Use a voltmeter to check the battery voltage. A fully charged battery should read approximately 12.6 volts.
- Load Test: Perform a load test on the battery to assess its ability to hold a charge under load. A significant voltage drop during the load test indicates a failing battery.
- Specific Gravity Test: If the battery has removable caps, use a hydrometer to check the specific gravity of each cell. Uneven readings indicate a bad cell.
4.3. Charging System Inspection
- Alternator Output: Start the engine and use a voltmeter to check the alternator output at the battery terminals. The voltage should be between 13.5 and 14.5 volts.
- Ripple Test: Use an oscilloscope to check for excessive AC ripple in the alternator output, which can indicate a failing diode.
4.4. Wiring and Connection Checks
- Voltage Drop Test: Perform a voltage drop test on the battery cables and ground connections to identify any excessive resistance.
- Continuity Test: Use a multimeter to check the continuity of the ECM power and ground circuits.
4.5. Parasitic Draw Test
- Disconnect Negative Terminal: Disconnect the negative battery terminal and connect a multimeter in series between the terminal and the battery post.
- Wait for System Sleep: Allow the vehicle’s systems to enter sleep mode (approximately 30 minutes).
- Measure Current Draw: Measure the current draw. A normal parasitic draw should be less than 50 milliamps.
- Isolate Circuits: If the current draw is excessive, systematically remove fuses to isolate the circuit causing the drain.
4.6. ECM Testing
- Visual Inspection: Inspect the ECM for any signs of damage, such as corrosion or burnt components.
- Connector Check: Check the ECM connectors for proper seating and secure connections.
- Voltage Check: Verify that the ECM is receiving the correct voltage and ground signals.
Table: Diagnostic Tools for P2509 Code
| Tool | Purpose | Importance |
|---|---|---|
| OBD-II Scanner | Read and clear diagnostic trouble codes | Essential |
| Digital Voltmeter | Measure voltage, current, and resistance | Essential |
| Hydrometer | Check the specific gravity of battery cells | Useful |
| Load Tester | Assess battery performance under load | Useful |
| Oscilloscope | Check for AC ripple in alternator output | Advanced |
| Multimeter | Perform continuity and voltage drop tests | Essential |
| Wiring Diagram | Understand the electrical circuits of the vehicle | Essential |
| Inspection Light | Inspect hard-to-reach areas for damage or corrosion | Useful |
| Terminal Cleaning Kit | Clean corroded battery terminals and connectors | Useful |
| Battery Terminal Tool | Remove and tighten battery terminals | Useful |
5. How to Repair the Dodge P2509 Code: Step-by-Step Guide
Once you have diagnosed the cause of the P2509 code, it’s time to implement the necessary repairs. Follow these steps to resolve the issue effectively:
5.1. Battery Replacement
- Disconnect Battery: Disconnect the negative battery terminal first, followed by the positive terminal.
- Remove Old Battery: Remove the battery hold-down clamp and carefully lift the old battery out of the tray.
- Clean Terminals: Clean the battery terminals and cable connectors with a terminal cleaning kit.
- Install New Battery: Place the new battery in the tray, secure the hold-down clamp, and connect the positive terminal first, followed by the negative terminal.
- Verify Voltage: Check the battery voltage to ensure it is within the correct range.
5.2. Battery Terminal and Cable Repair
- Inspect Cables: Inspect the battery cables for any signs of corrosion, damage, or fraying.
- Clean Terminals: Clean the battery terminals and cable connectors with a terminal cleaning kit.
- Replace Terminals: If the terminals are severely corroded or damaged, replace them with new ones.
- Secure Connections: Ensure that the terminals are securely tightened to the battery posts.
5.3. Alternator Replacement
- Disconnect Battery: Disconnect the negative battery terminal.
- Remove Belt: Loosen the tensioner pulley and remove the serpentine belt from the alternator pulley.
- Disconnect Wiring: Disconnect the electrical connectors and battery cable from the alternator.
- Remove Alternator: Remove the mounting bolts and carefully remove the alternator from the vehicle.
- Install New Alternator: Install the new alternator, tighten the mounting bolts, and reconnect the electrical connectors and battery cable.
- Reinstall Belt: Reinstall the serpentine belt and ensure it is properly seated on the alternator pulley.
- Verify Output: Start the engine and use a voltmeter to verify that the alternator is producing the correct output voltage.
5.4. Wiring and Connection Repair
- Inspect Wiring: Inspect the wiring harness for any signs of damage, such as cuts, abrasions, or melted insulation.
- Repair Wiring: Repair any damaged wiring by splicing in new wire and using heat-shrink tubing to protect the connection.
- Clean Connectors: Clean the electrical connectors with electrical contact cleaner to remove any corrosion or contaminants.
- Secure Connections: Ensure that all electrical connectors are properly seated and securely fastened.
5.5. ECM Repair or Replacement
- Inspect ECM: Inspect the ECM for any signs of physical damage, such as corrosion or burnt components.
- Check Connections: Check the ECM connectors for proper seating and secure connections.
- Test ECM: Use a diagnostic tool to test the ECM and verify that it is functioning correctly.
- Replace ECM: If the ECM is faulty, replace it with a new or remanufactured unit.
- Programming: Program the new ECM with the correct software and calibrations for the vehicle.
Table: Parts and Tools for P2509 Code Repair
| Part/Tool | Description | Average Cost |
|---|---|---|
| New Battery | Replacement battery for the vehicle | $100 – $300 |
| Battery Terminals | Replacement battery terminals | $10 – $30 |
| Battery Cables | Replacement battery cables | $20 – $50 |
| New Alternator | Replacement alternator for the vehicle | $200 – $500 |
| Electrical Contact Cleaner | Cleaner for electrical connectors | $5 – $15 |
| Wire Strippers | Tool for stripping insulation from wires | $10 – $20 |
| Wire Crimpers | Tool for crimping electrical connectors | $20 – $40 |
| Heat Shrink Tubing | Tubing for protecting electrical connections | $5 – $10 |
| OBD-II Scanner | Tool for reading and clearing diagnostic trouble codes | $50 – $300 |
| Multimeter | Tool for measuring voltage, current, and resistance | $20 – $100 |
| ECM | Replacement ECM for the vehicle | $500 – $1500+ |
6. Dodge Technical Service Bulletins (TSB) for P2509
Dodge and Ram Cummins diesel owners should be aware of Technical Service Bulletin (TSB) number 18-001-07. This TSB may apply to 2006-older trucks and involves reprogramming the PCM to address the P2509 code. It is advisable to check with your local Dodge dealership to see if this TSB applies to your vehicle.
7. Common Mistakes to Avoid When Troubleshooting P2509
When troubleshooting the P2509 code, it’s essential to avoid common mistakes that can lead to misdiagnosis and unnecessary repairs:
- Neglecting Basic Checks: Overlooking basic checks such as battery voltage, terminal connections, and wiring condition can lead to incorrect conclusions.
- Ignoring Related Codes: Failing to address other related diagnostic trouble codes can mask the underlying cause of the P2509 code.
- Replacing Parts Without Proper Diagnosis: Replacing parts without proper diagnosis can waste time and money without resolving the issue.
- Using Incorrect Tools: Using incorrect or unreliable diagnostic tools can lead to inaccurate readings and misdiagnosis.
- Skipping Parasitic Draw Test: Neglecting to perform a parasitic draw test can overlook a significant source of battery drain.
- Not Consulting TSBs: Failing to check for relevant Technical Service Bulletins can cause you to miss important information about known issues and solutions.
8. Can I Drive My Dodge with the P2509 Code?
Driving with the P2509 code is not recommended, as it can lead to various drivability issues and potential damage to the vehicle’s electrical system. The intermittent power supply to the ECM/PCM can cause:
- Engine stalling
- Hard starting
- Reduced performance
- Potential damage to electrical components
It is best to address the issue as soon as possible to prevent further complications.
9. How Much Does It Cost to Fix the Dodge P2509 Code?
The cost to fix the P2509 code can vary depending on the cause of the problem and the extent of the repairs required. Here are some estimated costs:
- Battery Replacement: $100 – $300
- Battery Terminal/Cable Repair: $20 – $100
- Alternator Replacement: $200 – $500
- Wiring Repair: $50 – $200
- ECM Replacement: $500 – $1500+
Labor costs can also vary depending on the repair shop and location. It’s always a good idea to get a quote from a trusted mechanic before proceeding with any repairs.
10. How to Prevent the P2509 Code in the Future
Preventive maintenance can help avoid the occurrence of the P2509 code and other electrical issues in your Dodge vehicle. Here are some tips:
- Regular Battery Maintenance: Have the battery tested regularly and replace it as needed.
- Check Battery Connections: Inspect and clean the battery terminals and cables regularly to prevent corrosion and ensure secure connections.
- Monitor Charging System: Have the charging system tested periodically to ensure that the alternator is functioning correctly.
- Inspect Wiring: Inspect the wiring harness for any signs of damage and repair any issues promptly.
- Address Electrical Issues Promptly: Address any electrical issues as soon as they arise to prevent them from escalating.
- Follow Maintenance Schedule: Follow the manufacturer’s recommended maintenance schedule for your vehicle.
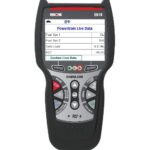
11. Understanding the Role of OBD2 Scanners in Diagnosing P2509
OBD2 scanners are invaluable tools for diagnosing the P2509 code and other automotive issues. They allow you to:
- Read and clear diagnostic trouble codes
- View live data from the vehicle’s sensors
- Perform functional tests
- Access freeze frame data to see the conditions when the code was set
Using an OBD2 scanner can save you time and money by helping you pinpoint the source of the problem quickly and accurately.
12. Advanced Diagnostic Techniques for P2509
For more complex cases, advanced diagnostic techniques may be required to troubleshoot the P2509 code. These techniques may include:
- Using an oscilloscope to analyze electrical signals
- Performing voltage drop tests on individual circuits
- Using a scan tool to monitor ECM parameters
- Performing component-level testing
These techniques require specialized knowledge and equipment and are best left to experienced technicians.
13. Dodge P2509 Code and Emission Standards
The P2509 code can affect your vehicle’s emissions, as it can disrupt the proper functioning of the engine control system. Addressing the code promptly is essential to ensure that your vehicle meets emission standards and avoids failing an emissions test.
14. The Importance of Proper Grounding in Dodge Vehicles
Proper grounding is crucial for the proper functioning of the electrical system in Dodge vehicles. Poor grounding can cause voltage fluctuations, electrical noise, and other issues that can lead to the P2509 code. Ensure that all ground connections are clean, tight, and free of corrosion.
15. Tips for Finding a Reliable Mechanic for P2509 Repairs
Finding a reliable mechanic is essential for ensuring that the P2509 code is properly diagnosed and repaired. Here are some tips:
- Ask for recommendations: Ask friends, family, or colleagues for recommendations.
- Check online reviews: Check online reviews to see what other customers have to say about the mechanic.
- Look for certifications: Look for mechanics who are certified by ASE (Automotive Service Excellence).
- Ask about experience: Ask the mechanic about their experience with Dodge vehicles and electrical repairs.
- Get a quote: Get a quote from the mechanic before proceeding with any repairs.
16. Staying Updated on Dodge Diagnostics and Repair Information
Staying updated on the latest Dodge diagnostics and repair information can help you troubleshoot issues more effectively and prevent future problems. Here are some resources:
- Dodge service manuals: Consult the official Dodge service manuals for detailed repair procedures and specifications.
- Online forums: Participate in online forums to share information and ask questions.
- Technical Service Bulletins (TSBs): Stay informed about TSBs issued by Dodge to address known issues.
- Professional training: Attend professional training courses to enhance your diagnostic and repair skills.
17. What to Do After Repairing the P2509 Code
After repairing the P2509 code, it’s essential to take certain steps to ensure that the issue is resolved and to prevent it from recurring:
- Clear the Code: Use an OBD2 scanner to clear the P2509 code from the vehicle’s computer.
- Test Drive: Take the vehicle for a test drive to verify that the issue has been resolved and that the engine is running smoothly.
- Monitor Performance: Monitor the vehicle’s performance over the next few days to ensure that the code does not return.
- Preventive Maintenance: Follow a preventive maintenance schedule to keep the electrical system in good condition and prevent future issues.
18. How to Properly Use a Multimeter for Electrical Diagnostics
A multimeter is an essential tool for electrical diagnostics, allowing you to measure voltage, current, and resistance. Here are some tips for using a multimeter effectively:
- Select the Correct Range: Select the correct range for the measurement you are taking.
- Connect the Leads Properly: Connect the test leads to the correct terminals on the multimeter and the circuit you are testing.
- Take Accurate Readings: Take accurate readings by ensuring that the test leads are making good contact with the circuit.
- Understand the Readings: Understand the readings you are taking and how they relate to the circuit you are testing.
- Safety Precautions: Follow safety precautions when working with electrical circuits, such as wearing safety glasses and gloves.
19. Understanding Voltage Drops and How to Test for Them
Voltage drop is the loss of voltage across a circuit due to resistance. Excessive voltage drop can cause electrical components to malfunction. Here’s how to test for voltage drop:
- Connect Multimeter: Connect the multimeter across the circuit you want to test.
- Apply Load: Apply a load to the circuit.
- Measure Voltage Drop: Measure the voltage drop across the circuit.
- Compare to Specifications: Compare the measured voltage drop to the manufacturer’s specifications.
20. Resources for Further Learning About OBD2 and Vehicle Diagnostics
There are many resources available for further learning about OBD2 and vehicle diagnostics. Here are some suggestions:
- Online Courses: Take online courses on OBD2 diagnostics and vehicle repair.
- Technical Books: Read technical books on automotive electrical systems and diagnostics.
- Professional Organizations: Join professional organizations such as ASE (Automotive Service Excellence).
- Online Forums: Participate in online forums to share information and ask questions.
- Local Community Colleges: Enroll in automotive technology courses at a local community college.
21. Real-World Examples of Diagnosing and Repairing P2509
Here are a few real-world examples of diagnosing and repairing the P2509 code:
- Example 1: A customer’s Dodge Ram was experiencing hard starting and the P2509 code was present. After testing the battery, it was found to be weak and unable to hold a charge. Replacing the battery resolved the issue.
- Example 2: A customer’s Dodge Charger was experiencing intermittent stalling and the P2509 code was present. After inspecting the wiring harness, a damaged wire was found in the ECM power circuit. Repairing the wiring resolved the issue.
- Example 3: A customer’s Dodge Durango was experiencing a check gauges light and the P2509 code was present. After testing the alternator, it was found to be producing low output voltage. Replacing the alternator resolved the issue.
22. Frequently Asked Questions (FAQs) about Dodge P2509 Code
Q1: What does the P2509 code mean on a Dodge?
A1: The P2509 code on a Dodge indicates an intermittent power input signal to the ECM/PCM, which controls the engine and powertrain.
Q2: Can a bad battery cause the P2509 code?
A2: Yes, a weak or failing battery is a common cause of the P2509 code, as it can lead to voltage fluctuations.
Q3: Is it safe to drive with the P2509 code?
A3: No, driving with the P2509 code is not recommended as it can cause engine stalling, hard starting, and other drivability issues.
Q4: How do I test my Dodge battery for the P2509 code?
A4: Use a voltmeter to check the battery voltage (should be around 12.6V) and perform a load test to assess its ability to hold a charge under load.
Q5: What is the TSB for the P2509 code on Dodge Cummins diesel trucks?
A5: Technical Service Bulletin (TSB) number 18-001-07 may apply to 2006-older Dodge Cummins diesel trucks and involves reprogramming the PCM.
Q6: Can a faulty alternator cause the P2509 code?
A6: Yes, an overcharging or undercharging alternator can cause voltage irregularities, leading to the P2509 code.
Q7: How do I perform a parasitic draw test for the P2509 code?
A7: Disconnect the negative battery terminal, connect a multimeter in series, wait for the system to sleep, and measure the current draw (should be less than 50 milliamps).
Q8: What tools do I need to diagnose the P2509 code?
A8: An OBD2 scanner, digital voltmeter, hydrometer, load tester, oscilloscope, multimeter, wiring diagram, inspection light, terminal cleaning kit, and battery terminal tool.
Q9: How much does it cost to fix the P2509 code on a Dodge?
A9: The cost can vary, but typically ranges from $100 for a new battery to $1500+ for an ECM replacement, depending on the issue.
Q10: How can I prevent the P2509 code in the future?
A10: Regularly maintain your battery, check connections, monitor the charging system, inspect wiring, and follow the manufacturer’s maintenance schedule.
23. How OBD2-SCANNER.EDU.VN Can Help You Fix the P2509 Code
At OBD2-SCANNER.EDU.VN, we understand the challenges of diagnosing and repairing automotive issues like the P2509 code. Our team of experienced technicians and automotive experts is dedicated to providing you with the knowledge and resources you need to get your vehicle running smoothly again. We offer:
- Comprehensive diagnostic guides and repair procedures
- Expert advice and troubleshooting tips
- Recommendations for the best OBD2 scanners and diagnostic tools
- Assistance in finding a reliable mechanic in your area
- Up-to-date information on the latest automotive technologies and repair techniques
We are committed to empowering you with the knowledge and tools you need to take control of your vehicle’s maintenance and repair. Whether you’re a seasoned mechanic or a DIY enthusiast, OBD2-SCANNER.EDU.VN is your trusted partner for all things OBD2.
Ready to take the next step in resolving your P2509 code? Contact us today for personalized assistance and expert guidance!
Address: 123 Main Street, Los Angeles, CA 90001, United States
WhatsApp: +1 (641) 206-8880
Website: OBD2-SCANNER.EDU.VN
By following this comprehensive guide and utilizing the resources available at OBD2-SCANNER.EDU.VN, you can confidently diagnose and repair the P2509 code in your Dodge vehicle, ensuring optimal performance and reliability. Don’t let electrical issues keep you off the road – take control of your vehicle’s maintenance and repair today!