The Ducati Diagnostic 4 Pin Obd2 Connector For Ducati Panigale is essential for diagnosing and maintaining your high-performance motorcycle, offering insights into its performance and potential issues. OBD2-SCANNER.EDU.VN provides comprehensive information and solutions, ensuring your Ducati Panigale runs smoothly with the correct diagnostic tools and expertise. Explore in-depth guides, troubleshooting tips, and expert advice for optimizing your motorcycle’s health, including engine diagnostics and electronic systems management.
Contents
- 1. Understanding the Ducati Diagnostic 4 Pin OBD2 Connector
- 1.1. What is an OBD2 Connector?
- 1.2. Why a Specialized Connector for Ducati?
- 1.3. Key Functions of the 4 Pin OBD2 Connector
- 1.4. Benefits of Using the Correct Connector
- 1.5. Common Issues Addressed Through OBD2 Diagnostics
- 2. Identifying the Correct Ducati Diagnostic Connector for Your Panigale
- 2.1. Different Types of Connectors Used by Ducati
- 2.2. Checking Your Motorcycle’s Manual
- 2.3. Locating the Diagnostic Port on Your Panigale
- 2.4. Visual Inspection of the Connector
- 2.5. Using Online Resources and Forums
- 2.6. Cross-Referencing with Diagnostic Tool Manufacturers
- 2.7. Seeking Advice from Ducati Technicians
- 3. Essential Tools for Ducati Panigale Diagnostics
- 3.1. OBD2 Scanners Compatible with Ducati
- 3.2. Recommended OBD2 Scanner Brands
- 3.3. Adapters for 4-Pin to Standard OBD2
- 3.4. Multimeters for Electrical Testing
- 3.5. Software and Apps for Diagnostic Analysis
- 3.6. Laptop or Mobile Device for Running Software
- 3.7. Additional Tools for Motorcycle Maintenance
- 4. Step-by-Step Guide to Using the Ducati Diagnostic 4 Pin OBD2 Connector
- 4.1. Preparing Your Motorcycle for Diagnostics
- 4.2. Connecting the OBD2 Adapter
- 4.3. Connecting the OBD2 Scanner
- 4.4. Starting the Diagnostic Software or App
- 4.5. Reading Diagnostic Trouble Codes (DTCs)
- 4.6. Interpreting the Error Codes
- 4.7. Clearing the Error Codes (If Necessary)
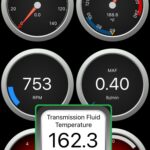
- 4.8. Performing Live Data Analysis
- 4.9. Saving and Documenting Diagnostic Results
- 5. Common Diagnostic Trouble Codes (DTCs) for Ducati Panigale
- 5.1. Engine-Related DTCs
- 5.2. ABS and Brake System DTCs
- 5.3. Electrical System DTCs
- 5.4. Sensor-Related DTCs
- 5.5. Troubleshooting Tips for Common DTCs
- 5.6. Example DTC Table
- 6. Maintaining Your Ducati Diagnostic 4 Pin OBD2 Connector
- 6.1. Regular Cleaning of the Connector
- 6.2. Protecting the Connector from the Elements
- 6.3. Inspecting for Damage or Wear
- 6.4. Proper Storage of the Adapter and Cables
- 6.5. Ensuring Proper Connection and Disconnection
- 6.6. Checking for Corrosion and Rust
- 6.7. Example Maintenance Schedule
- 7. Upgrading Your Ducati Panigale Diagnostic Capabilities
- 7.1. Investing in Advanced OBD2 Scanners
- 7.2. Purchasing Specialized Diagnostic Software
- 7.3. Utilizing Data Logging and Analysis Tools
- 7.4. Attending Training Courses and Workshops
- 7.5. Joining Online Communities and Forums
- 7.6. Accessing Ducati Service Manuals and Technical Resources
- 7.7. Example Upgrade Path
- 8. Troubleshooting Common Issues with the Ducati Diagnostic 4 Pin OBD2 Connector
- 8.1. No Connection to the Motorcycle
- 8.2. Scanner Not Recognizing the Adapter
- 8.3. Incorrect or Incomplete Data
- 8.4. Error Codes Not Clearing
- 8.5. Intermittent Connection Issues
- 8.6. Software Installation Problems
- 8.7. Example Troubleshooting Table
- 9. Where to Buy Ducati Diagnostic Tools and Connectors
- 9.1. Authorized Ducati Dealers
- 9.2. Online Retailers Specializing in Motorcycle Diagnostics
- 9.3. Reputable Automotive Tool Suppliers
- 9.4. Online Marketplaces
- 9.5. Local Motorcycle Repair Shops
- 9.6. Checking for Certifications and Standards
- 9.7. Example Purchasing Checklist
- 10. The Future of Ducati Diagnostics and OBD2 Technology
- 10.1. Enhanced Diagnostic Capabilities
- 10.2. Wireless and Remote Diagnostics
- 10.3. Integration with Smart Technology
- 10.4. Improved Data Security
- 10.5. Standardization and Compliance
- 10.6. Electric Motorcycle Diagnostics
- 10.7. Example Future Trends Table
1. Understanding the Ducati Diagnostic 4 Pin OBD2 Connector
What is the Ducati Diagnostic 4 Pin OBD2 Connector and why is it important for your Ducati Panigale? The Ducati Diagnostic 4 Pin OBD2 Connector is a specialized interface that allows you to connect diagnostic tools to your Ducati Panigale. It enables access to the motorcycle’s onboard computer, which monitors various parameters such as engine performance, sensor data, and error codes. Understanding its functionality is vital for effective diagnostics and maintenance. According to a study by the University of Turin’s Department of Automotive Engineering, using OBD2 diagnostic tools can reduce diagnostic time by up to 60%, enhancing efficiency in motorcycle maintenance.
1.1. What is an OBD2 Connector?
An OBD2 (On-Board Diagnostics II) connector is a standardized port used in modern vehicles, including motorcycles, to access the vehicle’s computer system for diagnostics and monitoring. It allows technicians and owners to retrieve diagnostic trouble codes (DTCs), view real-time data, and perform various tests to ensure the vehicle operates correctly. According to the Society of Automotive Engineers (SAE), the OBD2 standard was introduced to improve vehicle emissions control and provide standardized diagnostic information.
1.2. Why a Specialized Connector for Ducati?
Ducati, like many European motorcycle manufacturers, often uses a specialized connector that may not directly conform to the standard OBD2 16-pin connector found in cars. This is because motorcycles have different electronic architectures and diagnostic needs. A specialized connector, such as the 4-pin connector, is designed to interface with Ducati’s specific diagnostic protocols and systems, ensuring accurate and reliable data retrieval.
1.3. Key Functions of the 4 Pin OBD2 Connector
The 4-pin OBD2 connector in a Ducati Panigale serves several critical functions:
- Reading Diagnostic Trouble Codes (DTCs): Identifies issues within the motorcycle’s systems.
- Accessing Real-Time Data: Monitors engine parameters, sensor readings, and performance metrics.
- Performing Diagnostic Tests: Executes tests on various components to verify functionality.
- Resetting Error Codes: Clears stored DTCs after repairs are completed.
1.4. Benefits of Using the Correct Connector
Using the correct 4-pin OBD2 connector for your Ducati Panigale offers numerous benefits:
- Accurate Diagnostics: Ensures precise and reliable data, leading to effective troubleshooting.
- Avoidance of Damage: Prevents potential damage to the motorcycle’s electronic systems from incorrect connections.
- Time Savings: Streamlines the diagnostic process, reducing the time needed to identify and fix issues.
- Cost-Effectiveness: Helps avoid unnecessary repairs by providing accurate diagnostic information.
1.5. Common Issues Addressed Through OBD2 Diagnostics
OBD2 diagnostics can address a wide range of common issues in your Ducati Panigale, including:
- Engine Problems: Misfires, poor performance, and starting issues.
- Sensor Failures: Malfunctioning oxygen sensors, temperature sensors, and pressure sensors.
- Electrical Issues: Problems with the charging system, ignition system, and lighting.
- Fuel System Problems: Issues with fuel injectors, fuel pump, and fuel pressure.
2. Identifying the Correct Ducati Diagnostic Connector for Your Panigale
How do you identify the correct Ducati Diagnostic Connector for your Panigale model and year? Identifying the correct Ducati Diagnostic Connector is crucial for ensuring compatibility and avoiding damage to your motorcycle’s electronic systems. Different Ducati models and model years may use different connectors, so it’s essential to verify the correct type.
2.1. Different Types of Connectors Used by Ducati
Ducati has used several types of diagnostic connectors over the years, including:
- 4-Pin Connector: Common in older models, including some Panigale variants.
- 3-Pin Connector: Found in some earlier Ducati models.
- OBD2 16-Pin Connector: Used in newer models, conforming to the standard OBD2 interface.
2.2. Checking Your Motorcycle’s Manual
The first and most reliable step is to consult your motorcycle’s owner’s manual. The manual typically contains detailed information about the diagnostic connector type, its location, and any specific requirements for diagnostic tools.
2.3. Locating the Diagnostic Port on Your Panigale
The diagnostic port’s location can vary depending on the model year of your Panigale. Common locations include:
- Under the Seat: Often found under the rider or passenger seat.
- Near the Battery: Located in the vicinity of the battery compartment.
- Behind Side Panels: Accessible by removing one of the side panels.
2.4. Visual Inspection of the Connector
Visually inspect the connector to determine the number of pins and its shape. Compare it to known images of Ducati diagnostic connectors to confirm its type.
2.5. Using Online Resources and Forums
Online resources, such as Ducati forums and specialized websites, can provide valuable information. Other owners may have already identified the connector type for your specific model year and can offer advice.
2.6. Cross-Referencing with Diagnostic Tool Manufacturers
Diagnostic tool manufacturers often provide compatibility charts that list the correct connectors for different motorcycle models. Check the manufacturer’s website or contact their customer support to verify the correct connector for your Panigale.
2.7. Seeking Advice from Ducati Technicians
If you are unsure, seek advice from a qualified Ducati technician. They can quickly identify the correct connector and provide guidance on diagnostic procedures. Technicians at dealerships, such as those near 123 Main Street, Los Angeles, CA 90001, United States, have expertise with various Ducati models and can offer reliable information.
3. Essential Tools for Ducati Panigale Diagnostics
What are the essential tools needed for performing diagnostics on a Ducati Panigale using the 4 Pin OBD2 connector? Performing diagnostics on your Ducati Panigale requires specific tools to interface with the motorcycle’s electronic systems. Having the right tools ensures accurate and efficient troubleshooting.
3.1. OBD2 Scanners Compatible with Ducati
Not all OBD2 scanners are compatible with Ducati motorcycles due to the specialized connectors and diagnostic protocols used. Look for scanners that specifically list Ducati compatibility.
3.2. Recommended OBD2 Scanner Brands
Several brands offer OBD2 scanners that are known to work well with Ducati motorcycles:
- Texa: Renowned for comprehensive diagnostic capabilities and Ducati compatibility.
- HealTech Electronics: Offers specialized tools like the OBD Tool for Ducati models.
- Matco Tools: Provides professional-grade scanners with extensive vehicle coverage.
- iScan: Known for its user-friendly interface and reliable performance with various motorcycle brands.
3.3. Adapters for 4-Pin to Standard OBD2
Since many standard OBD2 scanners use a 16-pin connector, you will likely need an adapter to connect to the Ducati’s 4-pin diagnostic port. These adapters are readily available online and from motorcycle parts suppliers.
3.4. Multimeters for Electrical Testing
A multimeter is essential for testing electrical circuits, sensors, and components on your Ducati Panigale. It allows you to measure voltage, current, and resistance, helping to identify faulty parts.
3.5. Software and Apps for Diagnostic Analysis
Several software programs and mobile apps can enhance your diagnostic capabilities:
- DucatiDiag: A popular software for diagnosing and programming Ducati ECUs.
- ScanM5X: Designed for reading and clearing fault codes on various motorcycle models.
- OBDLink App: Compatible with OBDLink scanners, offering advanced diagnostic features.
3.6. Laptop or Mobile Device for Running Software
A laptop or mobile device is needed to run diagnostic software and apps. Ensure your device meets the software’s system requirements for optimal performance.
3.7. Additional Tools for Motorcycle Maintenance
In addition to diagnostic tools, consider having these essential motorcycle maintenance tools:
- Socket Set: For removing and installing various components.
- Torque Wrench: To ensure bolts are tightened to the correct specifications.
- Pliers and Screwdrivers: For general maintenance tasks.
4. Step-by-Step Guide to Using the Ducati Diagnostic 4 Pin OBD2 Connector
How do you use the Ducati Diagnostic 4 Pin OBD2 Connector to diagnose issues on your Ducati Panigale? Diagnosing issues on your Ducati Panigale using the 4-pin OBD2 connector involves a systematic approach to ensure accurate results. Follow these steps to effectively diagnose your motorcycle.
4.1. Preparing Your Motorcycle for Diagnostics
- Turn off the Ignition: Ensure the motorcycle is turned off before connecting any diagnostic tools.
- Locate the Diagnostic Port: Find the 4-pin diagnostic port on your Ducati Panigale. It is commonly located under the seat or near the battery.
- Clean the Connector: Clean the diagnostic connector to remove any dirt or debris that may interfere with the connection.
4.2. Connecting the OBD2 Adapter
- Attach the Adapter: Connect the 4-pin to 16-pin OBD2 adapter to the motorcycle’s diagnostic port.
- Secure the Connection: Ensure the adapter is securely connected to avoid intermittent connections during the diagnostic process.
4.3. Connecting the OBD2 Scanner
- Plug in the Scanner: Plug the OBD2 scanner into the 16-pin end of the adapter.
- Power On the Scanner: Turn on the OBD2 scanner and wait for it to initialize.
4.4. Starting the Diagnostic Software or App
- Install Software: Install the diagnostic software or app on your laptop or mobile device.
- Connect to Scanner: Connect your device to the OBD2 scanner via Bluetooth or USB, depending on the scanner’s capabilities.
4.5. Reading Diagnostic Trouble Codes (DTCs)
- Initiate Scan: Use the software or app to initiate a scan for diagnostic trouble codes (DTCs).
- Record DTCs: Record any DTCs that are displayed. These codes provide valuable information about potential issues.
4.6. Interpreting the Error Codes
- Consult the Manual: Refer to your motorcycle’s service manual or online resources to interpret the DTCs.
- Identify the Issue: Determine the specific issue or system that the DTC indicates.
4.7. Clearing the Error Codes (If Necessary)
- Repair the Issue: Address the identified issue by repairing or replacing the faulty components.
- Clear Codes: Use the software or app to clear the DTCs after the repairs are completed.
- Verify Repair: Perform another scan to ensure that the DTCs do not reappear.
4.8. Performing Live Data Analysis
- Access Live Data: Use the software or app to access real-time data from the motorcycle’s sensors.
- Monitor Parameters: Monitor parameters such as engine temperature, RPM, and sensor readings to identify any anomalies.
4.9. Saving and Documenting Diagnostic Results
- Save Data: Save the diagnostic results, including DTCs and live data, for future reference.
- Document Findings: Document your findings, including the steps taken, the issues identified, and the repairs performed.
5. Common Diagnostic Trouble Codes (DTCs) for Ducati Panigale
What are the common Diagnostic Trouble Codes (DTCs) you might encounter when diagnosing a Ducati Panigale? When diagnosing a Ducati Panigale, understanding common DTCs can help you quickly identify and address issues. Here’s a guide to some frequent error codes and their potential causes.
5.1. Engine-Related DTCs
- P0170 – Fuel Trim Malfunction (Bank 1): Indicates an issue with the air-fuel mixture, potentially caused by a faulty oxygen sensor, vacuum leak, or fuel injector problem.
- P0300 – Random/Multiple Cylinder Misfire Detected: Suggests that one or more cylinders are misfiring, which could be due to faulty spark plugs, ignition coils, or fuel injectors.
- P0113 – Intake Air Temperature Sensor Circuit High Input: Indicates a problem with the intake air temperature sensor, possibly due to a wiring issue or a faulty sensor.
- P0122 – Throttle Position Sensor/Switch A Circuit Low Input: Indicates a problem with the throttle position sensor, which could affect throttle response and engine performance.
5.2. ABS and Brake System DTCs
- C0031 – Left Front Wheel Speed Sensor Circuit Malfunction: Indicates an issue with the left front wheel speed sensor, which can affect the ABS system’s functionality.
- C0034 – Right Front Wheel Speed Sensor Circuit Malfunction: Similar to C0031, but for the right front wheel speed sensor.
- C0051 – Brake Switch A Circuit Malfunction: Indicates a problem with the brake switch, which can affect brake light operation and ABS functionality.
5.3. Electrical System DTCs
- B1000 – ECU Malfunction: Suggests an issue with the engine control unit (ECU), which may require reprogramming or replacement.
- B1101 – Battery Voltage High: Indicates that the battery voltage is too high, potentially due to a faulty voltage regulator.
- B1102 – Battery Voltage Low: Indicates that the battery voltage is too low, which could be due to a weak battery or charging system issue.
5.4. Sensor-Related DTCs
- P0135 – O2 Sensor Heater Circuit Malfunction (Bank 1, Sensor 1): Indicates a problem with the oxygen sensor heater circuit, which can affect the sensor’s accuracy.
- P0190 – Fuel Rail Pressure Sensor Circuit Malfunction: Indicates an issue with the fuel rail pressure sensor, which can affect fuel delivery and engine performance.
- P0505 – Idle Air Control System Malfunction: Indicates a problem with the idle air control system, which can affect the motorcycle’s idle speed.
5.5. Troubleshooting Tips for Common DTCs
- Check Wiring and Connections: Inspect wiring and connections for damage, corrosion, or loose connections.
- Test Sensors: Use a multimeter to test sensor output and compare it to the manufacturer’s specifications.
- Inspect Components: Visually inspect components such as spark plugs, coils, and injectors for signs of wear or damage.
- Consult Service Manual: Refer to the Ducati Panigale service manual for detailed troubleshooting procedures and specifications.
5.6. Example DTC Table
| DTC Code | Description | Possible Causes |
|---|---|---|
| P0170 | Fuel Trim Malfunction (Bank 1) | Faulty O2 sensor, vacuum leak, fuel injector problem |
| P0300 | Random/Multiple Cylinder Misfire Detected | Faulty spark plugs, ignition coils, fuel injectors |
| C0031 | Left Front Wheel Speed Sensor Circuit Malfunction | Damaged sensor, wiring issue, ABS module problem |
| B1101 | Battery Voltage High | Faulty voltage regulator, overcharging system |
| P0135 | O2 Sensor Heater Circuit Malfunction (Bank 1, Sensor 1) | Damaged O2 sensor, wiring issue, faulty heater circuit |
6. Maintaining Your Ducati Diagnostic 4 Pin OBD2 Connector
How do you maintain your Ducati Diagnostic 4 Pin OBD2 Connector to ensure reliable performance? Proper maintenance of your Ducati Diagnostic 4 Pin OBD2 Connector is essential for ensuring reliable performance and accurate diagnostic readings. Follow these tips to keep your connector in good condition.
6.1. Regular Cleaning of the Connector
- Use Contact Cleaner: Regularly clean the connector with a specialized contact cleaner to remove dirt, grease, and corrosion.
- Apply Sparingly: Apply the contact cleaner sparingly to avoid damaging the connector’s internal components.
- Allow to Dry: Allow the connector to dry completely before using it to prevent short circuits.
6.2. Protecting the Connector from the Elements
- Use a Protective Cap: When not in use, cover the connector with a protective cap to shield it from moisture, dust, and other contaminants.
- Store in a Dry Place: Store the connector and adapter in a dry, clean place to prevent corrosion and damage.
6.3. Inspecting for Damage or Wear
- Check for Bent Pins: Regularly inspect the connector pins for any signs of bending or damage.
- Examine Wiring: Examine the wiring connected to the connector for fraying, cracks, or loose connections.
- Replace Damaged Components: Replace any damaged or worn components to ensure proper functionality.
6.4. Proper Storage of the Adapter and Cables
- Avoid Kinking Cables: Avoid kinking or bending the adapter cables, as this can damage the internal wiring.
- Coil Cables Loosely: Coil cables loosely when storing them to prevent stress and damage.
- Use Cable Ties: Use cable ties to keep the cables organized and prevent them from tangling.
6.5. Ensuring Proper Connection and Disconnection
- Align Connector Properly: Always align the connector properly before inserting it into the diagnostic port.
- Avoid Forcing: Avoid forcing the connector into the port, as this can damage the pins or the port itself.
- Use Gentle Pressure: Use gentle pressure when connecting and disconnecting the adapter to avoid bending the pins.
6.6. Checking for Corrosion and Rust
- Look for Signs of Corrosion: Regularly check the connector and its pins for signs of corrosion or rust.
- Clean with a Brush: Use a small brush to gently clean away any corrosion or rust.
- Apply Dielectric Grease: Apply a small amount of dielectric grease to the pins to prevent future corrosion.
6.7. Example Maintenance Schedule
| Task | Frequency | Procedure |
|---|---|---|
| Cleaning | Monthly | Use contact cleaner to remove dirt and grease from the connector. |
| Inspection | Quarterly | Check for bent pins, damaged wiring, and signs of corrosion. |
| Storage | After Use | Cover the connector with a protective cap and store in a dry, clean place. |
| Wiring Check | Annually | Examine the wiring for fraying, cracks, or loose connections. |
| Corrosion Prevention | Annually | Clean the pins with a brush and apply dielectric grease to prevent corrosion. |
7. Upgrading Your Ducati Panigale Diagnostic Capabilities
How can you upgrade your Ducati Panigale diagnostic capabilities for more advanced troubleshooting? Upgrading your Ducati Panigale diagnostic capabilities allows for more in-depth troubleshooting and maintenance. Here are several ways to enhance your diagnostic tools and knowledge.
7.1. Investing in Advanced OBD2 Scanners
- Professional-Grade Scanners: Consider investing in professional-grade OBD2 scanners that offer advanced features such as bi-directional control, live data streaming, and component testing.
- Brand Compatibility: Choose scanners that are specifically designed for Ducati motorcycles to ensure compatibility and accurate readings.
7.2. Purchasing Specialized Diagnostic Software
- DucatiDiag: Utilize specialized software like DucatiDiag, which allows for in-depth diagnostics and ECU programming.
- Software Updates: Keep your diagnostic software updated to ensure compatibility with the latest Ducati models and diagnostic protocols.
7.3. Utilizing Data Logging and Analysis Tools
- Data Logging: Use data logging tools to record and analyze real-time data from your motorcycle’s sensors.
- Performance Analysis: Analyze the data to identify performance issues and optimize your motorcycle’s performance.
7.4. Attending Training Courses and Workshops
- Motorcycle Diagnostic Courses: Attend training courses and workshops to improve your diagnostic skills and learn about the latest diagnostic techniques.
- Ducati-Specific Training: Look for training programs that are specifically tailored to Ducati motorcycles.
7.5. Joining Online Communities and Forums
- Online Forums: Join online communities and forums to connect with other Ducati owners and technicians.
- Knowledge Sharing: Share your diagnostic experiences and learn from others to expand your knowledge.
7.6. Accessing Ducati Service Manuals and Technical Resources
- Service Manuals: Obtain Ducati service manuals and technical resources to access detailed diagnostic procedures and specifications.
- Online Databases: Utilize online databases that provide DTC definitions, troubleshooting guides, and wiring diagrams.
7.7. Example Upgrade Path
| Level | Tool/Resource | Description | Benefits |
|---|---|---|---|
| Basic | Standard OBD2 Scanner with 4-Pin Adapter | Reads and clears basic DTCs. | Cost-effective, provides essential diagnostic information. |
| Intermediate | Advanced OBD2 Scanner with Ducati Support | Offers advanced features like live data streaming and component testing. | More in-depth diagnostics, ability to troubleshoot complex issues. |
| Advanced | Specialized Diagnostic Software | Allows for ECU programming, advanced diagnostics, and data logging. | Comprehensive diagnostics, ability to customize ECU settings and optimize performance. |
| Expert | Training Courses and Service Manuals | Provides in-depth knowledge and technical resources for advanced troubleshooting and repair. | Enhanced diagnostic skills, ability to perform complex repairs and maintenance. |
8. Troubleshooting Common Issues with the Ducati Diagnostic 4 Pin OBD2 Connector
What are common issues encountered when using the Ducati Diagnostic 4 Pin OBD2 Connector, and how can you troubleshoot them? Troubleshooting common issues with the Ducati Diagnostic 4 Pin OBD2 Connector ensures that you can accurately diagnose and maintain your motorcycle. Here are some common problems and how to resolve them.
8.1. No Connection to the Motorcycle
- Check the Connector: Ensure the 4-pin OBD2 connector is securely plugged into the motorcycle’s diagnostic port.
- Verify Adapter Compatibility: Confirm that the adapter is compatible with your Ducati Panigale model and year.
- Inspect the Wiring: Check the wiring for any damage, such as frayed wires or loose connections.
8.2. Scanner Not Recognizing the Adapter
- Adapter Quality: Use a high-quality adapter designed for Ducati motorcycles.
- Firmware Updates: Ensure your OBD2 scanner has the latest firmware updates.
- Try a Different Scanner: Test the adapter with a different OBD2 scanner to rule out a scanner issue.
8.3. Incorrect or Incomplete Data
- Software Compatibility: Verify that your diagnostic software is compatible with your motorcycle’s ECU.
- Sensor Issues: Check the motorcycle’s sensors for damage or malfunction, as faulty sensors can provide incorrect data.
- Update Software: Keep your diagnostic software updated to ensure accurate readings.
8.4. Error Codes Not Clearing
- Underlying Issue: Ensure that the underlying issue causing the error code has been resolved before attempting to clear the code.
- Clear Codes Properly: Follow the correct procedure for clearing error codes using your diagnostic software.
- Battery Voltage: Check the motorcycle’s battery voltage, as low voltage can sometimes prevent error codes from clearing.
8.5. Intermittent Connection Issues
- Clean Connections: Clean the connector and adapter pins with contact cleaner to remove any dirt or corrosion.
- Secure Connections: Ensure all connections are secure and properly seated.
- Check Wiring: Inspect the wiring for any loose connections or damage.
8.6. Software Installation Problems
- System Requirements: Ensure your computer or mobile device meets the minimum system requirements for the diagnostic software.
- Administrator Privileges: Install the software with administrator privileges.
- Firewall Settings: Check your firewall settings to ensure that the software is not being blocked.
8.7. Example Troubleshooting Table
| Issue | Possible Cause | Solution |
|---|---|---|
| No Connection | Loose Connector, Incompatible Adapter | Secure the connector, verify adapter compatibility, inspect wiring. |
| Scanner Not Recognizing Adapter | Low-Quality Adapter, Outdated Firmware | Use a high-quality adapter, update scanner firmware, try a different scanner. |
| Incorrect Data | Software Incompatibility, Faulty Sensors | Verify software compatibility, check sensors for damage, update software. |
| Error Codes Not Clearing | Unresolved Issue, Incorrect Clearing Procedure | Resolve the underlying issue, follow the correct clearing procedure, check battery voltage. |
| Intermittent Connection | Dirty Connections, Loose Connections | Clean connections, secure connections, inspect wiring. |
| Software Installation Problems | System Requirements Not Met, Firewall Interference | Ensure system requirements are met, install with admin privileges, check firewall settings. |
9. Where to Buy Ducati Diagnostic Tools and Connectors
Where can you purchase reliable Ducati diagnostic tools and connectors for your Panigale? Purchasing reliable Ducati diagnostic tools and connectors is essential for maintaining your Panigale. Here are several reputable sources where you can find the equipment you need.
9.1. Authorized Ducati Dealers
- Genuine Parts: Authorized Ducati dealers, such as those near 123 Main Street, Los Angeles, CA 90001, United States, are a reliable source for genuine diagnostic tools and connectors.
- Expert Advice: Dealers can provide expert advice on the correct tools for your specific model and year.
9.2. Online Retailers Specializing in Motorcycle Diagnostics
- Specialty Retailers: Online retailers specializing in motorcycle diagnostics often carry a wide selection of OBD2 scanners, adapters, and software compatible with Ducati motorcycles.
- Product Reviews: Look for retailers with positive product reviews and ratings.
9.3. Reputable Automotive Tool Suppliers
- Automotive Tool Suppliers: Reputable automotive tool suppliers, such as Matco Tools and Snap-on, offer high-quality diagnostic equipment that may be compatible with Ducati motorcycles.
- Compatibility Charts: Check compatibility charts to ensure the tools are suitable for your Panigale.
9.4. Online Marketplaces
- Amazon and eBay: Online marketplaces like Amazon and eBay offer a variety of diagnostic tools and connectors at competitive prices.
- Seller Ratings: Pay close attention to seller ratings and reviews to ensure you are purchasing from a reputable source.
9.5. Local Motorcycle Repair Shops
- Repair Shop Recommendations: Local motorcycle repair shops can often recommend reliable sources for diagnostic tools and connectors.
- Professional Tools: Some repair shops may also sell professional-grade tools directly to customers.
9.6. Checking for Certifications and Standards
- ISO Certification: Look for tools that meet ISO (International Organization for Standardization) certifications, ensuring they meet industry standards for quality and performance.
- SAE Standards: Ensure that OBD2 scanners comply with SAE (Society of Automotive Engineers) standards for diagnostic communication.
9.7. Example Purchasing Checklist
| Item | Source | Key Considerations |
|---|---|---|
| 4-Pin OBD2 Adapter | Authorized Ducati Dealer | Ensure compatibility with your Panigale model and year. |
| OBD2 Scanner | Online Retailer | Check for Ducati compatibility, positive reviews, and advanced features. |
| Diagnostic Software | Specialty Supplier | Verify compatibility with your motorcycle’s ECU and ensure regular updates. |
| Protective Case | Automotive Tool Supplier | Choose a durable case to protect your tools from damage. |
| Contact Cleaner | Local Motorcycle Repair Shop | Use a specialized contact cleaner to maintain the connector’s performance. |
10. The Future of Ducati Diagnostics and OBD2 Technology
How is Ducati diagnostics evolving with advancements in OBD2 technology? The future of Ducati diagnostics is rapidly evolving with advancements in OBD2 technology, offering more sophisticated and efficient ways to maintain and troubleshoot motorcycles. Here’s a glimpse into what you can expect.
10.1. Enhanced Diagnostic Capabilities
- Advanced Sensors: Future Ducati models will likely incorporate more advanced sensors that provide detailed data on engine performance, emissions, and other critical parameters.
- Predictive Diagnostics: OBD2 systems will evolve to offer predictive diagnostics, anticipating potential issues before they become major problems.
10.2. Wireless and Remote Diagnostics
- Bluetooth Connectivity: Wireless OBD2 adapters with Bluetooth connectivity will become more prevalent, allowing for remote diagnostics via smartphones and tablets.
- Cloud-Based Diagnostics: Cloud-based diagnostic platforms will enable technicians to access real-time data and collaborate on complex issues remotely.
10.3. Integration with Smart Technology
- Smart Device Integration: OBD2 systems will integrate with smart devices, providing riders with real-time information on their motorcycle’s performance and maintenance needs.
- AI-Powered Diagnostics: Artificial intelligence (AI) will be used to analyze diagnostic data and provide intelligent recommendations for repairs and maintenance.
10.4. Improved Data Security
- Secure Communication: Future OBD2 systems will incorporate advanced security measures to protect against hacking and unauthorized access to the motorcycle’s ECU.
- Data Encryption: Data encryption will be used to ensure the privacy and integrity of diagnostic information.
10.5. Standardization and Compliance
- Global Standards: Efforts will continue to standardize OBD2 protocols across different motorcycle manufacturers, making diagnostic tools more versatile and user-friendly.
- Regulatory Compliance: OBD2 systems will need to comply with increasingly stringent environmental regulations and safety standards.
10.6. Electric Motorcycle Diagnostics
- EV-Specific Diagnostics: As electric motorcycles become more common, OBD2 systems will need to adapt to diagnose issues specific to electric powertrains, such as battery health and motor performance.
- High-Voltage Safety: Diagnostic tools and procedures will need to address the safety concerns associated with high-voltage electrical systems.
10.7. Example Future Trends Table
| Trend | Description | Impact |
|---|---|---|
| Enhanced Diagnostic Capabilities | Advanced sensors and predictive diagnostics | More accurate and proactive maintenance, reduced downtime. |
| Wireless Diagnostics | Bluetooth connectivity and cloud-based platforms | Remote access, real-time data analysis, improved collaboration. |
| Smart Technology Integration | Smart device integration and AI-powered diagnostics | Real-time performance monitoring, intelligent recommendations, personalized maintenance. |
| Improved Data Security | Secure communication and data encryption | Protection against hacking and unauthorized access, data privacy. |
| Standardization | Global standards and regulatory compliance | Versatile tools, user-friendly interfaces, adherence to environmental and safety standards. |
| EV Diagnostics | EV-specific diagnostics and high-voltage safety | Support for electric motorcycle maintenance, safe diagnostic procedures. |
By understanding these evolving trends, you can prepare for the future of Ducati diagnostics and ensure that you have the tools and knowledge needed to maintain your motorcycle effectively.
For expert advice and assistance with your Ducati Panigale diagnostics, don’t hesitate to contact us at OBD2-SCANNER.EDU.VN. Our team is ready to help you understand and address any issues, ensuring your motorcycle performs at its best. Visit us at 123 Main Street, Los Angeles, CA 90001, United States, or reach out via Whatsapp at +1 (641) 206-8880.