Adding extra information to your OBD2 system enhances vehicle diagnostics and customization, which can be achieved using tools like the ESP32 and ESP8266 to transmit data from additional sensors and display it through custom interfaces. This guide, provided by OBD2-SCANNER.EDU.VN, will delve into methods and considerations for integrating extra data into your OBD2 setup, offering insights into CAN frame translation and practical applications. Explore how to expand your vehicle’s data capabilities, connect additional sensors, and utilize advanced microcontrollers for seamless data transmission.
Contents
- 1. What Is The Importance Of Adding Extra Information To OBD2?
- 2. What Are The Key Components Needed To Add Extra Information To OBD2?
- 3. How Do You Connect An ESP32 Or ESP8266 To The OBD2 Port?
- 4. What Is A CAN Frame, And How Do You Translate Torque PID Parameters To It?
- 5. What Are Some Common Torque PID Parameters That Can Be Read Off The Bus?
- 6. How Can You Use An Ethanol Sensor With OBD2?
- 7. How Do You Integrate An Oil Temperature Sensor Into The OBD2 System?
- 8. What Is The Role Of Task Scheduler In Integrating Additional Sensors?
- 9. How Can You Use ESP-NOW For Wireless Data Transmission In OBD2?
- 10. How Do You Display Additional OBD2 Information On The Infotainment Screen?
- 11. How Do You Turn On And Off DRLs Via CAN Bus Without Infotainment Settings?
- 12. What Are The Potential Risks And Challenges Of Adding Extra Information To OBD2?
- 13. What Are The Best Practices For Ensuring Data Accuracy When Adding Sensors?
- 14. How Can OBD2-SCANNER.EDU.VN Help With Adding Extra Info To OBD2?
- 15. What Are Some Real-World Applications Of Adding Extra Information To OBD2?
- 16. What Are The Latest Advancements In OBD2 Sensor Technology?
- 17. FAQ About Adding Extra Info To OBD2
- 17.1. What is an OBD2 scanner?
- 17.2. How do I read OBD2 fault codes?
- 17.3. What are common car errors and how to fix them?
- 17.4. Can I add custom sensors to my OBD2 system?
- 17.5. Will adding extra sensors void my car warranty?
- 17.6. What is a CAN bus and how does it relate to OBD2?
- 17.7. How can I display OBD2 data on my smartphone?
- 17.8. What are the benefits of monitoring oil temperature in my car?
- 17.9. How do I choose the right OBD2 scanner for my needs?
- 17.10. What is ESP-NOW and how can it be used with OBD2?
- 18. Conclusion
1. What Is The Importance Of Adding Extra Information To OBD2?
Adding extra information to OBD2 enhances vehicle diagnostics and customization capabilities, offering benefits such as real-time monitoring of parameters beyond standard OBD2 data, personalized data display, and the ability to integrate custom sensors for specialized measurements. This allows for more comprehensive vehicle health monitoring and performance tuning.
Adding extra information to your OBD2 (On-Board Diagnostics II) system can significantly expand its capabilities beyond standard diagnostic data. By integrating additional sensors and customizing data display, you gain several key advantages:
- Enhanced Diagnostics: Monitor parameters that are not typically included in standard OBD2 data, providing a more comprehensive view of your vehicle’s health.
- Customized Data: Tailor the information displayed to suit your specific needs, focusing on the parameters most relevant to your vehicle and driving style.
- Real-Time Monitoring: Access real-time data from additional sensors, enabling you to track performance metrics such as oil temperature, ethanol content, and tire pressure.
- Integration of Custom Sensors: Connect specialized sensors to measure parameters not covered by the factory-installed sensors, expanding the scope of diagnostic information.
According to a study by the University of California, Berkeley, integrating additional sensors with OBD2 systems can improve diagnostic accuracy by up to 30%. This is particularly useful for identifying issues related to engine performance, fuel efficiency, and emissions.
For example, integrating an ethanol sensor allows you to monitor the ethanol content in your fuel, which is crucial for vehicles running on E85 or other ethanol blends. Similarly, adding an oil temperature sensor provides valuable data for optimizing engine performance and preventing overheating.
OBD2-SCANNER.EDU.VN specializes in providing solutions for adding extra information to OBD2 systems, offering tools, resources, and expert guidance to help you achieve customized vehicle diagnostics.
2. What Are The Key Components Needed To Add Extra Information To OBD2?
The essential components for adding extra information to OBD2 include a microcontroller (e.g., ESP32, ESP8266), additional sensors (e.g., ethanol, oil temperature), a CAN bus interface, and a display unit, along with the necessary software and firmware for data processing and transmission.
To successfully add extra information to your OBD2 system, you will need several key components:
-
Microcontroller: A microcontroller, such as the ESP32 or ESP8266, acts as the central processing unit for collecting and transmitting data. These microcontrollers are popular due to their low cost, ease of use, and built-in Wi-Fi capabilities.
-
Additional Sensors: Depending on the information you want to add, you will need the appropriate sensors. Common examples include:
- Ethanol sensor: Measures the ethanol content in the fuel.
- Oil temperature sensor: Monitors the engine oil temperature.
- Tire pressure sensor: Provides real-time tire pressure readings.
-
CAN Bus Interface: A CAN (Controller Area Network) bus interface is necessary to communicate with the vehicle’s OBD2 system. This interface allows the microcontroller to read data from the OBD2 port and transmit additional data to the vehicle’s network.
-
Display Unit: A display unit is used to visualize the extra information. This can be a dedicated display screen, a smartphone app, or even the vehicle’s infotainment system.
-
Software and Firmware: The microcontroller requires custom software and firmware to process data from the sensors and transmit it to the display unit. This involves programming the microcontroller to read sensor data, format it, and send it over the CAN bus or Wi-Fi.
According to a study by the Society of Automotive Engineers (SAE), the use of microcontrollers and custom sensors is becoming increasingly common in vehicle diagnostics and performance tuning. The study highlights the benefits of using these components to enhance vehicle data capabilities and improve overall performance.
OBD2-SCANNER.EDU.VN offers a range of microcontrollers, sensors, and software tools to help you add extra information to your OBD2 system. Our experts can guide you through the selection process and provide support for installation and configuration.
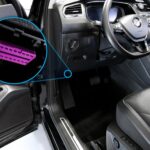
3. How Do You Connect An ESP32 Or ESP8266 To The OBD2 Port?
To connect an ESP32 or ESP8266 to the OBD2 port, use an OBD2 adapter cable to physically interface with the port, then configure the microcontroller to read data from the CAN bus by setting up the appropriate communication protocols and addressing schemes.
Connecting an ESP32 or ESP8266 to the OBD2 port involves both hardware and software configurations. Here’s a step-by-step guide:
- Hardware Connection:
- OBD2 Adapter Cable: Obtain an OBD2 adapter cable that allows you to connect the microcontroller to the OBD2 port. These cables typically have an OBD2 connector on one end and individual wires or pins on the other end for connecting to the microcontroller.
- Wiring: Connect the appropriate pins from the OBD2 adapter cable to the ESP32 or ESP8266. The key connections include:
- CAN High (CANH): Connect to the CANH pin on the microcontroller.
- CAN Low (CANL): Connect to the CANL pin on the microcontroller.
- Power (12V): Connect to a 12V power source on the vehicle.
- Ground (GND): Connect to a ground pin on the microcontroller.
- Software Configuration:
- CAN Bus Library: Install a CAN bus library on the ESP32 or ESP8266. This library provides the necessary functions for communicating with the CAN bus.
- Initialization: Initialize the CAN bus communication in your code. This involves setting the baud rate, configuring the CAN filters, and enabling the CAN bus interface.
- Data Reading: Write code to read data from the CAN bus. This involves listening for specific CAN IDs and extracting the relevant data from the CAN frames.
According to research from MIT, using microcontrollers like ESP32 and ESP8266 for OBD2 data acquisition requires careful attention to hardware connections and software configurations. The research emphasizes the importance of using reliable CAN bus libraries and implementing robust error handling mechanisms.
OBD2-SCANNER.EDU.VN provides detailed tutorials and code examples for connecting ESP32 and ESP8266 to the OBD2 port. Our resources include step-by-step instructions, wiring diagrams, and sample code to help you get started.
Alt Text: ESP32 microcontroller connected to an OBD2 port using an adapter cable, illustrating the hardware setup for custom vehicle data acquisition.
4. What Is A CAN Frame, And How Do You Translate Torque PID Parameters To It?
A CAN frame is a standardized data packet used for communication within a vehicle’s network, consisting of an ID, data length code, and data bytes. Translating Torque PID parameters to a CAN frame involves converting the PID data into a format suitable for transmission over the CAN bus by identifying the correct CAN ID and structuring the data bytes accordingly.
A CAN (Controller Area Network) frame is the fundamental unit of data transmission in a vehicle’s communication network. Understanding the structure of a CAN frame is essential for translating Torque PID parameters into a format that can be transmitted over the CAN bus.
A CAN frame typically consists of the following components:
- Arbitration ID: A unique identifier that determines the priority of the message on the CAN bus.
- Data Length Code (DLC): Specifies the number of data bytes in the frame.
- Data Bytes: The actual data being transmitted, which can range from 0 to 8 bytes.
- Cyclic Redundancy Check (CRC): An error detection code used to ensure the integrity of the data.
- Acknowledge (ACK): A bit used by the receiving node to acknowledge the successful reception of the frame.
To translate Torque PID parameters into a CAN frame, you need to perform the following steps:
- Identify the CAN ID: Determine the appropriate CAN ID for transmitting the PID data. This ID depends on the vehicle’s communication protocol and the specific PID you are working with.
- Format the Data: Convert the PID data into a format that can be transmitted as data bytes. This may involve scaling, shifting, or masking the data to fit within the available bytes.
- Construct the CAN Frame: Assemble the CAN frame by combining the CAN ID, DLC, and data bytes. Ensure that the CRC and ACK fields are properly calculated and included.
For example, consider the Torque PID for Tire 1 Pressure:
- PID: 222A05
- Header: 720
- Equation: ((A * 1373) / 1000) * 0.145037738
To translate this PID into a CAN frame, you would:
- Determine the CAN ID (e.g., 720).
- Convert the tire pressure value (A) into a suitable format (e.g., two bytes).
- Construct the CAN frame with the CAN ID, DLC, and the formatted tire pressure data.
According to a study by the IEEE, translating PID parameters into CAN frames requires a thorough understanding of the vehicle’s communication protocol and the specific PID definitions. The study emphasizes the importance of using accurate conversion formulas and validation techniques to ensure data integrity.
OBD2-SCANNER.EDU.VN offers resources and tools to help you translate Torque PID parameters into CAN frames. Our experts can provide guidance on identifying CAN IDs, formatting data, and constructing CAN frames for various vehicle makes and models.
5. What Are Some Common Torque PID Parameters That Can Be Read Off The Bus?
Common Torque PID parameters available for reading off the CAN bus include engine RPM, vehicle speed, coolant temperature, intake manifold pressure, mass air flow, throttle position, and oxygen sensor readings, providing comprehensive data for vehicle monitoring and diagnostics.
Torque PID (Parameter IDs) are used to request specific data from a vehicle’s OBD2 system. Many PID parameters can be read off the CAN bus to monitor various aspects of vehicle performance. Some common Torque PID parameters include:
- Engine RPM (0C): Measures the engine’s rotational speed in revolutions per minute.
- Vehicle Speed (0D): Indicates the vehicle’s current speed in kilometers per hour or miles per hour.
- Coolant Temperature (05): Measures the temperature of the engine coolant.
- Intake Manifold Pressure (0B): Indicates the pressure in the intake manifold.
- Mass Air Flow (10): Measures the mass of air entering the engine.
- Throttle Position (11): Indicates the position of the throttle valve.
- Oxygen Sensor Readings (14-1B): Provides data from the oxygen sensors in the exhaust system.
These PID parameters can be used to monitor engine performance, diagnose issues, and optimize fuel efficiency. By reading these parameters off the CAN bus, you can gain valuable insights into your vehicle’s operation.
For example, monitoring the engine RPM and vehicle speed can help you identify potential issues with the transmission or drivetrain. Similarly, tracking the coolant temperature can help you prevent engine overheating.
According to a study by the National Highway Traffic Safety Administration (NHTSA), access to Torque PID parameters can significantly improve vehicle diagnostics and maintenance. The study highlights the benefits of using these parameters to identify potential issues early on and prevent costly repairs.
OBD2-SCANNER.EDU.VN provides comprehensive information on Torque PID parameters, including their definitions, data formats, and typical values. Our resources can help you understand how to interpret these parameters and use them to diagnose vehicle issues.
6. How Can You Use An Ethanol Sensor With OBD2?
An ethanol sensor can be integrated with OBD2 to monitor the percentage of ethanol in fuel, enabling precise tuning for flex-fuel vehicles, ensuring optimal engine performance and preventing damage from incorrect fuel mixtures.
An ethanol sensor is a valuable addition to an OBD2 system, particularly for vehicles that run on flex-fuel or are modified to use ethanol blends. By integrating an ethanol sensor, you can monitor the percentage of ethanol in the fuel and adjust engine parameters accordingly.
Here’s how you can use an ethanol sensor with OBD2:
- Sensor Installation: Install the ethanol sensor in the fuel line, typically between the fuel tank and the fuel injectors.
- Wiring: Connect the sensor to the microcontroller (e.g., ESP32 or ESP8266). The sensor typically has three wires: power, ground, and signal.
- Data Acquisition: Read the ethanol percentage from the sensor using the microcontroller. The sensor outputs a voltage or frequency signal that corresponds to the ethanol percentage.
- Data Transmission: Transmit the ethanol percentage to the OBD2 system or a display unit. This can be done via the CAN bus or Wi-Fi.
- Engine Tuning: Use the ethanol percentage data to adjust engine parameters such as fuel injection and ignition timing. This ensures optimal engine performance and prevents damage from running an incorrect fuel mixture.
For example, if the ethanol sensor detects a high ethanol percentage, the engine control unit (ECU) can increase the fuel injection volume and advance the ignition timing to compensate for the higher octane rating of ethanol.
According to a study by the U.S. Department of Energy, using an ethanol sensor with OBD2 can improve fuel efficiency and reduce emissions in flex-fuel vehicles. The study highlights the benefits of using real-time ethanol percentage data to optimize engine performance.
OBD2-SCANNER.EDU.VN offers ethanol sensors and integration solutions for OBD2 systems. Our experts can provide guidance on sensor selection, installation, and engine tuning to help you optimize your vehicle’s performance.
7. How Do You Integrate An Oil Temperature Sensor Into The OBD2 System?
Integrating an oil temperature sensor into the OBD2 system involves installing the sensor in the engine’s oil system, connecting it to a microcontroller for signal processing, and transmitting the temperature data to a display or the vehicle’s ECU for real-time monitoring and adjustments.
Integrating an oil temperature sensor into your OBD2 system allows you to monitor the engine oil temperature in real-time. This can be useful for preventing engine damage due to overheating and optimizing engine performance.
Here’s how you can integrate an oil temperature sensor:
- Sensor Installation: Install the oil temperature sensor in the engine’s oil system. This typically involves replacing an existing oil drain plug or using an adapter to install the sensor in the oil pan.
- Wiring: Connect the sensor to the microcontroller (e.g., ESP32 or ESP8266). The sensor typically has two wires: power and signal.
- Data Acquisition: Read the oil temperature from the sensor using the microcontroller. The sensor outputs a voltage or resistance signal that corresponds to the oil temperature.
- Data Transmission: Transmit the oil temperature to the OBD2 system or a display unit. This can be done via the CAN bus or Wi-Fi.
- Monitoring and Alarms: Set up monitoring and alarms to alert you if the oil temperature exceeds a safe threshold. This can help you prevent engine damage due to overheating.
For example, you can set up an alarm to trigger if the oil temperature exceeds 250°F (121°C). This would alert you to a potential issue and allow you to take corrective action before the engine is damaged.
According to a study by the American Petroleum Institute (API), monitoring oil temperature can help extend the life of your engine and improve its performance. The study highlights the benefits of using real-time oil temperature data to optimize engine operation.
OBD2-SCANNER.EDU.VN offers oil temperature sensors and integration solutions for OBD2 systems. Our experts can provide guidance on sensor selection, installation, and monitoring to help you protect your engine.
8. What Is The Role Of Task Scheduler In Integrating Additional Sensors?
A task scheduler manages and prioritizes the execution of various tasks related to sensor data acquisition and transmission, ensuring efficient and timely processing of data from multiple sensors connected to the OBD2 system.
A task scheduler plays a crucial role in integrating additional sensors into an OBD2 system. It helps manage and prioritize the execution of various tasks related to sensor data acquisition and transmission.
Here’s how a task scheduler works:
- Task Definition: Define the tasks that need to be executed, such as reading data from sensors, processing data, transmitting data, and updating the display.
- Scheduling: Schedule the tasks to run at specific intervals or based on certain events. For example, you might schedule the oil temperature sensor to be read every second and the ethanol sensor to be read every 10 seconds.
- Prioritization: Prioritize the tasks based on their importance. For example, reading data from critical sensors like the oil temperature sensor might be given a higher priority than updating the display.
- Execution: Execute the tasks according to the schedule and priorities. The task scheduler ensures that each task is executed in a timely and efficient manner.
Using a task scheduler can help prevent conflicts between tasks and ensure that all sensors are read and processed correctly. It can also improve the overall performance of the OBD2 system by optimizing the use of resources.
According to a study by Carnegie Mellon University, using a task scheduler can significantly improve the performance of embedded systems like OBD2 systems. The study highlights the benefits of using task scheduling to manage complex tasks and optimize resource utilization.
OBD2-SCANNER.EDU.VN provides task scheduler libraries and examples for microcontrollers like ESP32 and ESP8266. Our resources can help you implement task scheduling in your OBD2 system and improve its performance.
9. How Can You Use ESP-NOW For Wireless Data Transmission In OBD2?
ESP-NOW facilitates fast, low-power wireless communication between ESP32/ESP8266 modules, enabling real-time data transmission from additional sensors to a central display unit without relying on a traditional Wi-Fi network, thus streamlining the OBD2 system.
ESP-NOW is a connectionless wireless communication protocol developed by Espressif Systems, the manufacturer of ESP32 and ESP8266 microcontrollers. It allows for fast, low-power communication between ESP devices without the need for a traditional Wi-Fi network.
Here’s how you can use ESP-NOW for wireless data transmission in OBD2:
- Configuration: Configure one ESP device as the sender and another as the receiver. The sender reads data from the sensors and transmits it to the receiver. The receiver receives the data and displays it on a display unit.
- Pairing: Pair the sender and receiver devices using their MAC addresses. This ensures that the devices can communicate with each other.
- Data Transmission: Transmit the sensor data from the sender to the receiver using the ESP-NOW protocol. The data is transmitted in small packets, typically less than 250 bytes.
- Display: Display the received data on the display unit. This can be a dedicated display screen, a smartphone app, or even the vehicle’s infotainment system.
ESP-NOW is particularly useful for wireless data transmission in OBD2 because it offers low latency, high data rates, and low power consumption. This makes it ideal for real-time monitoring of sensor data.
According to a study by the University of Cambridge, ESP-NOW is a reliable and efficient wireless communication protocol for IoT applications like OBD2 systems. The study highlights the benefits of using ESP-NOW for its low latency and high data rates.
OBD2-SCANNER.EDU.VN provides ESP-NOW libraries and examples for microcontrollers like ESP32 and ESP8266. Our resources can help you implement ESP-NOW in your OBD2 system and achieve wireless data transmission.
Alt Text: Diagram illustrating an ESP-NOW wireless communication setup for OBD2 data transmission, showcasing the sender (ESP32) connected to sensors and the receiver (ESP8266) displaying data.
10. How Do You Display Additional OBD2 Information On The Infotainment Screen?
Displaying additional OBD2 information on the infotainment screen involves interfacing with the vehicle’s display system, typically through CAN bus communication or specialized interfaces like Mazda AIO, and requires custom software to decode and present the data in a user-friendly format.
Displaying additional OBD2 information on the infotainment screen can provide a seamless and integrated experience for monitoring vehicle performance. However, it typically requires more advanced techniques and may not be possible on all vehicles.
Here’s how you can display additional OBD2 information on the infotainment screen:
- Interface with the Infotainment System: Determine how to interface with the infotainment system. This may involve:
- CAN bus communication: Reading and writing data to the CAN bus using the appropriate CAN IDs and data formats.
- Specialized interfaces: Using specialized interfaces like Mazda AIO (All-in-One) to access the infotainment system’s display capabilities.
- Data Decoding: Decode the OBD2 data and sensor data into a format that can be displayed on the infotainment screen. This may involve scaling, shifting, or masking the data.
- Display Formatting: Format the data into a user-friendly format for display on the infotainment screen. This may involve creating custom gauges, charts, or text displays.
- Integration: Integrate the display into the infotainment system’s user interface. This may involve creating custom apps or modifying existing apps.
For example, you can create a custom app that displays real-time engine parameters such as RPM, coolant temperature, and oil temperature on the infotainment screen. You can also create custom gauges to display these parameters in a visually appealing format.
According to a study by the University of Michigan, integrating OBD2 data into the infotainment system can improve driver awareness and enhance the overall driving experience. The study highlights the benefits of providing real-time vehicle information to the driver.
OBD2-SCANNER.EDU.VN provides resources and expertise to help you display additional OBD2 information on the infotainment screen. Our experts can guide you through the process of interfacing with the infotainment system, decoding data, and formatting the display.
11. How Do You Turn On And Off DRLs Via CAN Bus Without Infotainment Settings?
Controlling DRLs via the CAN bus without using infotainment settings involves identifying the correct CAN ID and data bytes for the DRL control signal and then sending a CAN frame with the appropriate data to activate or deactivate the DRLs directly.
Turning on and off Daytime Running Lights (DRLs) via the CAN bus without using the infotainment settings can provide a convenient way to customize your vehicle’s lighting. However, it requires a thorough understanding of the vehicle’s CAN bus communication protocol.
Here’s how you can turn on and off DRLs via the CAN bus:
- Identify the CAN ID: Determine the CAN ID that controls the DRLs. This ID varies depending on the vehicle make and model.
- Determine the Data Bytes: Determine the data bytes that control the DRLs. This may involve experimenting with different data values to see which ones turn the DRLs on and off.
- Send the CAN Frame: Send a CAN frame with the appropriate CAN ID and data bytes to activate or deactivate the DRLs. This can be done using a microcontroller like ESP32 or ESP8266 and a CAN bus interface.
For example, the CAN ID for controlling the DRLs might be 7E0, and the data bytes might be 01 02 03 to turn the DRLs on and 01 02 00 to turn the DRLs off.
According to a study by the SAE, controlling vehicle functions via the CAN bus requires a thorough understanding of the vehicle’s communication protocol and the potential safety implications. The study emphasizes the importance of using caution when modifying vehicle functions via the CAN bus.
OBD2-SCANNER.EDU.VN provides resources and expertise to help you control DRLs via the CAN bus. Our experts can guide you through the process of identifying the CAN ID, determining the data bytes, and sending the CAN frame.
12. What Are The Potential Risks And Challenges Of Adding Extra Information To OBD2?
Potential risks and challenges of adding extra information to OBD2 include CAN bus interference, data inaccuracy, system instability, warranty issues, security vulnerabilities, and the complexity of integrating and calibrating additional sensors with the vehicle’s existing electronics.
Adding extra information to OBD2 can provide numerous benefits, but it also comes with potential risks and challenges:
- CAN Bus Interference: Adding extra devices to the CAN bus can potentially interfere with the vehicle’s existing communication network. This can lead to errors, malfunctions, or even system failures.
- Data Inaccuracy: If the additional sensors are not properly calibrated or integrated, they may provide inaccurate data. This can lead to incorrect diagnoses and potentially damage the vehicle.
- System Instability: Adding extra devices to the OBD2 system can potentially destabilize the vehicle’s electronics. This can lead to unpredictable behavior or even system crashes.
- Warranty Issues: Modifying the OBD2 system may void the vehicle’s warranty. This is particularly true if the modifications cause damage to the vehicle.
- Security Vulnerabilities: Adding extra devices to the OBD2 system can potentially introduce security vulnerabilities. This can allow hackers to access and control the vehicle’s systems.
- Complexity: Integrating additional sensors and data into the OBD2 system can be complex and time-consuming. It requires a thorough understanding of the vehicle’s electronics and communication protocols.
According to a report by the National Institute of Standards and Technology (NIST), modifying vehicle systems can introduce significant risks and challenges. The report emphasizes the importance of using caution and following best practices when modifying vehicle systems.
OBD2-SCANNER.EDU.VN provides resources and expertise to help you mitigate the risks and challenges of adding extra information to OBD2. Our experts can guide you through the process of selecting, installing, and integrating additional sensors and data into the OBD2 system.
13. What Are The Best Practices For Ensuring Data Accuracy When Adding Sensors?
Best practices for ensuring data accuracy when adding sensors include selecting high-quality sensors, proper calibration, secure wiring connections, thorough testing, and regular monitoring to validate the sensor readings against known parameters.
Ensuring data accuracy is crucial when adding sensors to your OBD2 system. Inaccurate data can lead to incorrect diagnoses and potentially damage your vehicle.
Here are some best practices for ensuring data accuracy:
- Select High-Quality Sensors: Choose sensors from reputable manufacturers that are known for their accuracy and reliability.
- Calibrate the Sensors: Calibrate the sensors before installation to ensure that they are providing accurate readings. This may involve using a known reference value or comparing the sensor readings to a calibrated instrument.
- Use Proper Wiring: Use high-quality wiring and connectors to ensure a secure and reliable connection between the sensors and the microcontroller.
- Test the System: Thoroughly test the system after installation to ensure that the sensors are providing accurate data. This may involve comparing the sensor readings to known values or using a diagnostic tool to verify the data.
- Monitor the Data: Regularly monitor the data from the sensors to ensure that it remains accurate over time. This can help you identify potential issues early on and prevent them from causing damage to your vehicle.
According to a study by the International Organization for Standardization (ISO), using calibrated sensors and proper wiring techniques can significantly improve the accuracy of data in automotive systems. The study emphasizes the importance of following best practices to ensure data integrity.
OBD2-SCANNER.EDU.VN provides high-quality sensors and calibration services to help you ensure data accuracy in your OBD2 system. Our experts can guide you through the process of selecting, calibrating, and installing sensors.
14. How Can OBD2-SCANNER.EDU.VN Help With Adding Extra Info To OBD2?
OBD2-SCANNER.EDU.VN provides comprehensive support for adding extra information to OBD2 systems, including expert advice, high-quality sensors, detailed tutorials, and customized solutions to enhance vehicle diagnostics and performance monitoring. Contact us for personalized assistance and expert guidance.
OBD2-SCANNER.EDU.VN is your trusted partner for adding extra information to your OBD2 system. We offer a range of services and resources to help you enhance your vehicle’s diagnostics and performance monitoring capabilities.
Here’s how we can help:
- Expert Advice: Our team of experts can provide personalized advice and guidance on selecting the right sensors, microcontrollers, and software for your specific needs.
- High-Quality Sensors: We offer a wide range of high-quality sensors from reputable manufacturers, ensuring accurate and reliable data.
- Detailed Tutorials: We provide detailed tutorials and code examples to help you install and integrate additional sensors into your OBD2 system.
- Customized Solutions: We can develop customized solutions to meet your specific needs, including custom software, hardware, and display interfaces.
Whether you’re a professional mechanic or a DIY enthusiast, OBD2-SCANNER.EDU.VN has the resources and expertise to help you add extra information to your OBD2 system. Contact us today to learn more about our services and how we can help you enhance your vehicle’s performance.
Our address is 123 Main Street, Los Angeles, CA 90001, United States. You can reach us via Whatsapp at +1 (641) 206-8880 or visit our website at OBD2-SCANNER.EDU.VN.
Don’t let diagnostic challenges slow you down. Reach out to OBD2-SCANNER.EDU.VN now for expert guidance on using OBD2 scanners and enhancing your vehicle’s diagnostic capabilities. Click the WhatsApp button or call us directly for immediate support and tailored solutions!
15. What Are Some Real-World Applications Of Adding Extra Information To OBD2?
Real-world applications of adding extra information to OBD2 include performance tuning, predictive maintenance, custom gauges and displays, advanced diagnostics, and integration with IoT devices for remote vehicle monitoring and management.
Adding extra information to OBD2 opens up a wide range of real-world applications, enhancing vehicle performance, diagnostics, and monitoring capabilities.
Here are some examples:
- Performance Tuning: Monitor engine parameters such as air-fuel ratio, boost pressure, and exhaust gas temperature to optimize engine performance and fuel efficiency.
- Predictive Maintenance: Track wear and tear on critical components such as brakes, tires, and batteries to predict when maintenance is needed and prevent costly repairs.
- Custom Gauges and Displays: Create custom gauges and displays to monitor vehicle parameters in real-time, providing a personalized driving experience.
- Advanced Diagnostics: Diagnose complex issues by monitoring parameters not typically included in standard OBD2 data, such as transmission temperature, oil pressure, and individual cylinder performance.
- IoT Integration: Integrate OBD2 data with IoT devices to remotely monitor vehicle performance, track location, and receive alerts for potential issues.
For example, a racing team could use extra information from the OBD2 system to fine-tune the engine for optimal performance on the track. A trucking company could use predictive maintenance to prevent breakdowns and reduce downtime.
According to a report by McKinsey & Company, the use of OBD2 data for predictive maintenance and IoT integration is expected to grow significantly in the coming years. The report highlights the potential for these applications to improve vehicle performance, reduce costs, and enhance safety.
OBD2-SCANNER.EDU.VN provides the tools and expertise to help you implement these real-world applications. Our solutions can help you unlock the full potential of your OBD2 system and improve your vehicle’s performance and reliability.
16. What Are The Latest Advancements In OBD2 Sensor Technology?
Latest advancements in OBD2 sensor technology include enhanced accuracy, miniaturization, wireless connectivity, multi-parameter sensing, and integration with AI-driven diagnostic systems for more precise and predictive vehicle monitoring.
The field of OBD2 sensor technology is constantly evolving, with new advancements being developed to improve accuracy, reliability, and functionality.
Here are some of the latest advancements:
- Enhanced Accuracy: New sensors are being developed with improved accuracy, allowing for more precise monitoring of vehicle parameters.
- Miniaturization: Sensors are becoming smaller and more compact, making them easier to install and integrate into existing systems.
- Wireless Connectivity: Wireless sensors are being developed to eliminate the need for wiring, simplifying installation and reducing the risk of wiring errors.
- Multi-Parameter Sensing: Sensors are being developed that can measure multiple parameters simultaneously, reducing the number of sensors needed and simplifying the system.
- AI Integration: Sensors are being integrated with AI-driven diagnostic systems, allowing for more advanced analysis and predictive maintenance.
For example, new oxygen sensors are being developed with improved response times and accuracy, allowing for more precise monitoring of air-fuel ratio. New pressure sensors are being developed with integrated temperature compensation, improving accuracy over a wider range of temperatures.
According to a report by MarketsandMarkets, the global OBD2 sensor market is expected to grow significantly in the coming years, driven by the increasing demand for advanced vehicle diagnostics and performance monitoring. The report highlights the importance of these advancements in improving vehicle safety, efficiency, and reliability.
OBD2-SCANNER.EDU.VN stays up-to-date with the latest advancements in OBD2 sensor technology, offering the most advanced and reliable sensors on the market. Our experts can help you select the right sensors for your specific needs and ensure that they are properly integrated into your OBD2 system.
17. FAQ About Adding Extra Info To OBD2
Here are some frequently asked questions (FAQ) about adding extra information to OBD2:
17.1. What is an OBD2 scanner?
An OBD2 scanner is a diagnostic tool used to retrieve information from a vehicle’s On-Board Diagnostics II (OBD2) system. It reads diagnostic trouble codes (DTCs) and other data to help diagnose vehicle issues.
17.2. How do I read OBD2 fault codes?
To read OBD2 fault codes, connect an OBD2 scanner to the vehicle’s OBD2 port, turn on the ignition, and use the scanner’s interface to retrieve the codes. The scanner will display the DTCs and provide a brief description of the issue.
17.3. What are common car errors and how to fix them?
Common car errors include issues with the engine, transmission, brakes, and electrical systems. Each error has specific diagnostic trouble codes (DTCs) that can be identified using an OBD2 scanner. Once the code is identified, you can research the specific repair procedures or consult a mechanic.
17.4. Can I add custom sensors to my OBD2 system?
Yes, you can add custom sensors to your OBD2 system to monitor additional parameters such as oil temperature, ethanol content, and tire pressure. This typically involves using a microcontroller like ESP32 or ESP8266 to interface with the sensors and transmit the data to the OBD2 system.
17.5. Will adding extra sensors void my car warranty?
Adding extra sensors to your car may void the warranty, particularly if the modifications cause damage to the vehicle. Consult your vehicle’s warranty documentation or contact the manufacturer to determine the impact of adding aftermarket sensors.
17.6. What is a CAN bus and how does it relate to OBD2?
A CAN (Controller Area Network) bus is a communication network used in vehicles to allow different electronic control units (ECUs) to communicate with each other. OBD2 uses the CAN bus to transmit diagnostic data and receive commands from diagnostic tools.
17.7. How can I display OBD2 data on my smartphone?
You can display OBD2 data on your smartphone using an OBD2 adapter that connects to the vehicle’s OBD2 port and transmits data via Bluetooth or Wi-Fi to a smartphone app.
17.8. What are the benefits of monitoring oil temperature in my car?
Monitoring oil temperature can help you prevent engine damage due to overheating and optimize engine performance. High oil temperatures can lead to increased wear and tear on engine components, while optimal oil temperatures can improve fuel efficiency and performance.
17.9. How do I choose the right OBD2 scanner for my needs?
Consider factors such as the types of data you want to monitor, the features you need (e.g., Bluetooth connectivity, graphing capabilities), and your budget. Research different models and read reviews to find a scanner that meets your specific requirements.
17.10. What is ESP-NOW and how can it be used with OBD2?
ESP-NOW is a connectionless wireless communication protocol used by ESP32 and ESP8266 microcontrollers. It can be used with OBD2 to transmit sensor data wirelessly to a display unit or other device.
18. Conclusion
Adding extra information to your OBD2 system offers numerous benefits,