Unlocking your vehicle’s hidden health secrets is easier than you think; you can discover how to read OBD2 codes without a scanner, gaining insights into potential problems. OBD2-SCANNER.EDU.VN is here to help you navigate the world of car diagnostics, even without specialized equipment, giving you a head start on vehicle maintenance. Learn about alternative diagnostic methods and understand your vehicle’s diagnostic system today for smarter car care.
Contents
- 1. Decoding Your Car’s Signals: OBD2 Without a Scanner
- 2. The Ignition Key Dance: Reading Codes Manually
- 3. Odometer Magic: Unlocking Codes with the Reset Button
- 4. When to Call in the Pros: Free Diagnostic Scans
- 5. Understanding Your Check Engine Light: Solid vs. Flashing
- 6. Common Culprits: Decoding the Reasons Behind the Light
- 7. The Risks of Ignoring the Warning Light
- 8. Resetting the Check Engine Light: Temporary Fixes
- 9. Disconnecting the Battery: A Common Reset Method
- 10. Cycling the Engine: A Simple Reset Attempt
- 11. Pulling the Fuse: An Older Car Trick
- 12. The Gas Cap Connection: A Simple Solution
- 13. Understanding Your Warranty: Before You Reset
- 14. The Power of OBD2 Scanners: A Deeper Dive
- 15. OBD2-SCANNER.EDU.VN: Your Partner in Car Care
- 16. Step-by-Step Guide: Using Key Cycling for Code Retrieval
- 17. Decoding OBD2 Codes: A Quick Reference Table
- 18. Advanced Diagnostics: Beyond the Basics
- 19. Real-World Example: Diagnosing a Misfire Without a Scanner
- 20. Choosing the Right Path: DIY vs. Professional Help
- 21. The Future of Car Diagnostics: What’s on the Horizon?
- 22. OBD2 and Emissions Testing: What You Need to Know
- 23. Maintaining Your Vehicle’s Health: Proactive Steps
- 24. Connecting with OBD2-SCANNER.EDU.VN: Get Expert Assistance
- 25. FAQ: Your Burning OBD2 Questions Answered
1. Decoding Your Car’s Signals: OBD2 Without a Scanner
Can you really decipher your car’s check engine light without plugging in a scanner? Absolutely. While an OBD2 scanner offers a direct route, alternative methods exist. These involve using your car’s built-in systems or professional assistance, each with its own level of accuracy and convenience.
- Key Cycling Method: This involves turning the ignition key on and off in a specific sequence to trigger the display of diagnostic codes on the odometer or dashboard.
- Odometer Reset Method: Similar to the key cycling method, this technique uses the odometer reset button in combination with the ignition key to access diagnostic codes.
- Professional Assistance: Visiting a local mechanic or auto parts store for a free diagnostic scan is a reliable way to obtain accurate codes and professional advice.
2. The Ignition Key Dance: Reading Codes Manually
One popular method for retrieving OBD2 codes involves using your vehicle’s ignition key. This trick works by prompting the car’s computer to display stored diagnostic trouble codes (DTCs) directly on the dashboard, usually through the odometer or check engine light.
- Initiate the Sequence: Insert the ignition key and turn it to the “on” position without starting the engine. Then, turn the key back to the “off” position.
- Repeat the Cycle: Repeat this on-off cycle quickly, typically three to five times. The goal is to activate the vehicle’s diagnostic mode.
- Observe the Dashboard: After the final cycle, leave the key in the “on” position. Watch the check engine light or the odometer display. Newer vehicles with OBD2 systems often show the codes directly on the odometer. Older vehicles with OBD1 systems may flash the check engine light in a pattern that represents the code.
- Record the Codes: Carefully write down any codes displayed. If the check engine light is flashing, count the number of flashes between pauses. For example, two flashes, a pause, then three flashes would indicate code 23.
- Consult Your Repair Manual: Use your vehicle’s repair manual or a reliable online resource to decipher the meaning of the codes. This will help you identify the specific issue triggering the check engine light.
Please Note: This method may not work on all vehicles. Check your vehicle’s manual or consult a mechanic to confirm compatibility.
3. Odometer Magic: Unlocking Codes with the Reset Button
Another technique involves using the odometer reset button to access diagnostic codes. This method is similar to the key cycling method, but it utilizes the odometer reset button to initiate the diagnostic mode.
- Press and Hold: Press and hold the odometer reset button and the trip button simultaneously.
- Turn on Ignition: While holding the buttons, turn the ignition to the “on” position without starting the engine.
- Release the Buttons: Release the odometer reset and trip buttons while keeping the ignition on.
- Observe the Display: The diagnostic codes should appear on the odometer display.
- Record the Codes: Write down the codes and consult your vehicle’s repair manual or a reliable online resource to identify the issue.
4. When to Call in the Pros: Free Diagnostic Scans
While DIY methods can provide a quick glimpse into your car’s issues, sometimes professional help is necessary. Many auto parts stores, like AutoZone, offer free diagnostic scans.
This involves connecting a professional-grade OBD2 scanner to your vehicle’s diagnostic port. The scanner retrieves and displays any stored diagnostic codes, providing a clear and accurate assessment of the problem. The scan takes only a few minutes, and you’ll receive a printed or emailed report with a description of the codes. This is a great option if you’re unsure about DIY methods or want a more comprehensive diagnosis.
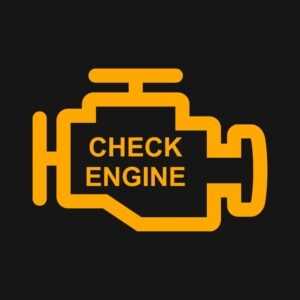
5. Understanding Your Check Engine Light: Solid vs. Flashing
The check engine light is a crucial indicator of your vehicle’s health, but its message can vary depending on how it appears. A solid light indicates a detected issue that needs attention, while a flashing light signals a severe problem requiring immediate action.
- Solid Yellow or Orange Light: This indicates that the diagnostic system has detected a problem that needs attention, but it is not considered detrimental. You can typically drive the vehicle for a few days or up to 100 miles before seeking service.
- Solid Red Light: This means that the issue needs to be fixed soon, but you can still drive the vehicle to the nearest mechanic, repair shop, or dealership for service.
- Flashing Engine Light: This signals a severe problem that could potentially cause engine misfires or failure. It is crucial to stop driving immediately and seek professional assistance.
No matter how it shows up, addressing the check engine light as soon as possible is essential.
6. Common Culprits: Decoding the Reasons Behind the Light
Many issues can trigger the check engine light, ranging from minor to severe. Understanding the common causes can help you narrow down the potential problem and take appropriate action.
- Emission System Issues: Problems with the oxygen sensor, catalytic converter, or evaporative emissions system.
- Engine Misfires: Issues with ignition components or fuel delivery.
- Faulty Sensors: Malfunctioning sensors like the Mass Airflow Sensor or Throttle Position Sensor.
- Fuel System Problems: Fuel leaks, a loose gas cap, or low fuel pressure.
- Exhaust System Issues: Leaks or damage to the exhaust system.
- Transmission Problems: Issues with the transmission can trigger the light.
- Oil Change Needed: In some cases, the check engine light may indicate that your vehicle is due for an oil change.
7. The Risks of Ignoring the Warning Light
Driving with the check engine light on can pose several risks to your safety, your vehicle, and the environment. Ignoring the warning can lead to reduced engine performance, potential stalling, increased emissions, impaired safety systems, and costly repairs.
- Reduced Engine Performance: The check engine light typically illuminates when the vehicle’s onboard computer (ECU) detects a problem with the engine or emission control systems. Ignoring this warning can lead to reduced engine performance, which can affect your ability to accelerate, maintain speed, and respond to traffic situations.
- Potential Stalling: Some engine problems can lead to stalling or sudden loss of power. This can be especially dangerous when driving at high speeds or in heavy traffic, as it may result in a loss of control over the vehicle.
- Emission Control Issues: Many check engine light warnings are related to emissions control systems. Ignoring these warnings can result in increased emissions, which contribute to air pollution and harm the environment. Additionally, some states have strict emissions testing requirements, and driving with a check engine light on may lead to a failed inspection.
- Impaired Safety Systems: Some modern vehicles rely on data from various sensors, including those tied to the engine, to operate safety systems like traction control, stability control, and anti-lock brakes. Ignoring a check engine light may affect the proper functioning of these safety systems, potentially increasing the risk of accidents.
- Potential for Costly Repairs: Delaying necessary repairs can lead to more extensive damage and more costly repairs in the long run. What may start as a relatively minor issue can escalate into a major engine problem if left unaddressed.
Addressing the check engine light as soon as possible is always advisable to ensure your safety and the reliability of your vehicle.
 Check Engine Light on a car dashboard, indicating a potential issue.
8. Resetting the Check Engine Light: Temporary Fixes
Resetting the check engine light is possible in some cases, but it’s important to understand that doing so will not fix the underlying issue. It only clears the code and turns off the light, which may come back on if the problem persists. Resetting the light without diagnosing and addressing the problem may lead to more significant issues down the line, and it may also prevent you from passing emissions tests or inspections.
If your check engine light is on, identifying and addressing the root cause of the problem is always best.
9. Disconnecting the Battery: A Common Reset Method
One method of resetting your check engine light is to disconnect the battery. This process involves temporarily disconnecting the vehicle’s battery to clear the stored diagnostic codes.
- Prepare for Disconnection: Ensure the ignition is off and the key is removed from the switch. Gather the necessary tools, such as a wrench or socket set, and wear safety glasses and gloves.
- Disconnect the Negative Terminal: Locate the negative terminal of the battery (marked with a “-” sign). Use the wrench or socket set to loosen the nut on the terminal.
- Remove the Cable: Carefully remove the cable from the negative terminal post. Secure it away from the battery to prevent accidental reconnection.
- Wait and Discharge: After disconnecting, wait about 15 minutes for the vehicle’s capacitors to discharge. This will help ensure that the diagnostic codes are cleared.
- Reconnect the Negative Terminal: After waiting, reconnect the negative terminal cable to the battery post and tighten the nut securely.
- Start the Car: Start the car to see if the light is still on. If the problem that triggered the light has been fixed, the light should stay off. However, if the problem is still there, the light will likely come back on.
10. Cycling the Engine: A Simple Reset Attempt
Another method of resetting your engine light is to cycle the engine. This involves turning the ignition on and off several times in a row, which may clear the stored diagnostic codes.
- Turn Ignition On and Off: Turn the ignition to the “on” position without starting the engine. Then, turn the ignition back to the “off” position.
- Repeat the Cycle: Repeat this on-off cycle several times in a row.
- Check the Light: After cycling the ignition, start the engine and check if the check engine light is still on.
This method may not work on all vehicles, but it’s a simple attempt worth trying.
11. Pulling the Fuse: An Older Car Trick
Another option is pulling the fuse for the engine control unit (ECU). This method tends to work only on older cars, and it may cause a complete reset, wiping out all codes.
- Locate the Fuse Box: Find the fuse box, typically located under the dashboard or in the engine compartment.
- Consult the Service Manual: Consult your vehicle’s service manual to identify the fuse for the ECU.
- Pull the Fuse: Use a fuse puller or pliers to carefully remove the fuse.
- Wait and Reinsert: Wait for a few minutes and then reinsert the fuse.
- Start the Car: Start the car and check if the check engine light is still on.
12. The Gas Cap Connection: A Simple Solution
Sometimes, a loose gas cap can be the reason your check engine light is on. The evaporative emissions system can detect a leak if the gas cap is not properly tightened, triggering the light.
- Check the Gas Cap: Ensure that the gas cap is properly tightened. Remove it and then re-tighten it until you hear a click.
- Wait and See: After tightening the gas cap, the system should recognize that the leak has been fixed and turn off the light within a few driving cycles.
13. Understanding Your Warranty: Before You Reset
Before attempting to reset your engine light, it’s crucial to understand the terms and conditions of your vehicle’s warranty. Taking matters into your own hands could potentially void your warranty and take away all of the benefits.
Visiting a qualified mechanic or automotive technician who can diagnose the issue and perform any necessary repairs is the best course of action while under warranty. Remember that the check engine light is a valuable safety feature designed to alert you to potential problems, and ignoring it can have serious consequences.
 OBD2 Code Reader being used to diagnose a car problem.
14. The Power of OBD2 Scanners: A Deeper Dive
While this article focuses on reading OBD2 codes without a scanner, it’s worth noting the benefits of using a dedicated scanner. OBD2 scanners provide more detailed information about your vehicle’s health, allowing for more accurate diagnoses and efficient repairs.
OBD2 scanners can:
- Read and clear diagnostic trouble codes (DTCs).
- Display live sensor data, such as engine temperature, RPM, and oxygen sensor readings.
- Perform advanced tests, such as EVAP system tests and oxygen sensor tests.
- Provide access to manufacturer-specific codes and data.
Investing in an OBD2 scanner can empower you to take control of your vehicle’s maintenance and save money on costly repairs.
15. OBD2-SCANNER.EDU.VN: Your Partner in Car Care
At OBD2-SCANNER.EDU.VN, we’re committed to providing you with the knowledge and resources you need to keep your vehicle running smoothly. Whether you’re looking to understand your check engine light, diagnose a specific problem, or perform routine maintenance, we’re here to help.
We offer a wide range of services, including:
- Informative articles and guides on OBD2 systems and vehicle diagnostics.
- Expert advice from certified mechanics and automotive technicians.
- Product reviews and recommendations for OBD2 scanners and other automotive tools.
- A comprehensive database of diagnostic trouble codes (DTCs) and their meanings.
16. Step-by-Step Guide: Using Key Cycling for Code Retrieval
Let’s walk through a detailed step-by-step guide on how to use the key cycling method to retrieve OBD2 codes without a scanner. This method is applicable to many vehicles, but it’s always best to consult your vehicle’s manual to confirm compatibility.
| Step | Action | Description |
|---|---|---|
| 1 | Insert the Key | Insert the ignition key into the ignition switch. |
| 2 | Turn to “On” Position | Turn the key to the “on” position without starting the engine. This will activate the vehicle’s electrical systems. |
| 3 | Turn Back to “Off” Position | Turn the key back to the “off” position. |
| 4 | Repeat the Cycle | Repeat steps 2 and 3 quickly, typically three to five times. The exact number of cycles may vary depending on the vehicle. |
| 5 | Leave in “On” Position | After the final cycle, leave the key in the “on” position. |
| 6 | Observe the Dashboard | Watch the check engine light or the odometer display. Newer vehicles with OBD2 systems often show the codes directly on the odometer. Older vehicles with OBD1 systems may flash the check engine light in a pattern. |
| 7 | Record the Codes | Carefully write down any codes displayed. If the check engine light is flashing, count the number of flashes between pauses. |
| 8 | Consult Your Repair Manual | Use your vehicle’s repair manual or a reliable online resource to decipher the meaning of the codes. |
| 9 | Take Action | Based on the code descriptions, take appropriate action to address the underlying issue. This may involve performing repairs yourself or seeking professional assistance. |
Disclaimer: The key cycling method may not work on all vehicles. Always consult your vehicle’s manual or a qualified mechanic for specific instructions.
17. Decoding OBD2 Codes: A Quick Reference Table
OBD2 codes are standardized across the automotive industry, but understanding their structure and meaning can be challenging. Here’s a quick reference table to help you decipher common OBD2 code categories:
| Code Category | Description | Example Codes |
|---|---|---|
| P0 | Powertrain Codes: Relate to the engine, transmission, and related components. | P0300 (Random Misfire Detected), P0171 (System Too Lean) |
| P1 | Manufacturer-Specific Powertrain Codes: Unique to each vehicle manufacturer. | P1000 (Ford: OBD-II Monitor Testing Incomplete) |
| P2 | Powertrain Codes: Similar to P0 codes, but may indicate more specific issues. | P2195 (O2 Sensor Signal Biased/Stuck Lean) |
| B0 | Body Codes: Relate to body-related systems, such as airbags, power windows, and door locks. | B0001 (Airbag Deployment Commanded) |
| C0 | Chassis Codes: Relate to chassis-related systems, such as ABS, traction control, and steering. | C0035 (Left Front Wheel Speed Sensor Circuit) |
| U0 | Network Communication Codes: Relate to communication between different electronic control units (ECUs). | U0100 (Lost Communication With ECM/PCM) |
This table provides a general overview of OBD2 code categories. Consult your vehicle’s repair manual or a reliable online resource for specific code definitions.
18. Advanced Diagnostics: Beyond the Basics
While reading OBD2 codes without a scanner can provide valuable insights into your vehicle’s health, it’s important to recognize the limitations of these methods. Advanced diagnostics often require specialized tools and expertise.
Here are some advanced diagnostic techniques that may be necessary to accurately diagnose and repair complex vehicle issues:
- Live Data Analysis: Monitoring live sensor data to identify deviations from normal operating parameters.
- Component Testing: Using specialized tools to test individual components, such as sensors, actuators, and solenoids.
- Wiring Diagram Analysis: Tracing and testing electrical circuits to identify faults and shorts.
- Oscilloscope Diagnostics: Using an oscilloscope to analyze waveforms and identify electrical signal problems.
If you’re facing a complex or persistent vehicle issue, it’s always best to seek professional diagnostic services from a qualified mechanic or automotive technician.
19. Real-World Example: Diagnosing a Misfire Without a Scanner
Let’s consider a real-world example of how you can use the key cycling method to diagnose a common vehicle issue: a misfire.
Scenario: Your check engine light is flashing, and your engine is running rough. You suspect a misfire.
Steps:
- Perform Key Cycling: Use the key cycling method to retrieve the OBD2 codes.
- Identify the Code: The code displayed is P0300 (Random Misfire Detected).
- Further Investigation: Since the code indicates a random misfire, you’ll need to investigate further to identify the specific cause.
- Visual Inspection: Start by visually inspecting the spark plugs, ignition coils, and fuel injectors. Look for any signs of damage, wear, or loose connections.
- Component Testing (If Possible): If you have access to basic tools, you can test the spark plugs and ignition coils to see if they are functioning properly.
- Professional Assistance (If Needed): If you’re unable to identify the cause of the misfire, it’s best to seek professional assistance from a qualified mechanic.
In this example, the key cycling method provided a valuable starting point for diagnosing the misfire. However, further investigation and testing were necessary to pinpoint the exact cause and perform the necessary repairs.
20. Choosing the Right Path: DIY vs. Professional Help
Deciding whether to attempt a DIY repair or seek professional help depends on several factors, including your mechanical skills, available tools, and the complexity of the repair.
Here’s a general guideline to help you make the right decision:
| Factor | DIY Repair | Professional Help |
|---|---|---|
| Mechanical Skills | Basic understanding of automotive systems and repair procedures. | Limited or no mechanical skills. |
| Available Tools | Access to basic tools, such as wrenches, sockets, screwdrivers, and pliers. | Limited or no access to tools. |
| Repair Complexity | Simple repairs, such as replacing spark plugs, air filters, or light bulbs. | Complex repairs, such as engine or transmission work, electrical system diagnostics, or ABS repairs. |
| Time Commitment | Willingness to spend time researching and performing the repair. | Limited time or desire to spend time on repairs. |
| Confidence Level | Confident in your ability to successfully complete the repair. | Uncertain or uncomfortable with performing the repair. |
| Cost | Potential cost savings compared to professional labor rates. | Higher cost due to professional labor rates and specialized equipment. |
| Warranty | Potential risk of voiding warranty if repairs are not performed correctly. | Repairs performed by qualified technicians are typically covered by a warranty. |
| Safety | Risk of injury if proper safety precautions are not followed. | Reduced risk of injury due to professional training and safety equipment. |
| Expertise | Limited knowledge and experience compared to professional technicians. | Extensive knowledge and experience in diagnosing and repairing vehicle issues. |
| Diagnostic Tools | Limited access to advanced diagnostic tools, such as OBD2 scanners and oscilloscopes. | Access to advanced diagnostic tools and equipment for accurate diagnosis and repair. |
| Training | Limited formal training in automotive repair. | Formal training and certification in automotive repair. |
| Resources | Reliance on online resources, repair manuals, and forums for guidance. | Access to technical service bulletins, repair databases, and manufacturer support. |
| Problem Solving | May encounter challenges in troubleshooting complex or unusual issues. | Expertise in diagnosing and resolving a wide range of vehicle problems. |
| Quality | Potential for inconsistent repair quality depending on skill level. | Consistent repair quality due to professional training and adherence to industry standards. |
| Time Efficiency | May take longer to complete repairs compared to experienced technicians. | Repairs can typically be completed more quickly and efficiently due to experience and specialized tools. |
| Customer Service | No direct customer service or support available. | Access to customer service and support for addressing questions and concerns. |
| Guarantee | No guarantee of repair success or warranty on parts and labor. | Guarantee of repair success and warranty on parts and labor. |
| Risk Mitigation | Risk of causing further damage if repairs are not performed correctly. | Reduced risk of damage due to professional expertise and adherence to proper repair procedures. |
| Legal Compliance | Responsibility for ensuring compliance with local regulations and environmental standards during repairs. | Assurance of compliance with local regulations and environmental standards during repairs. |
| Documentation | Limited documentation of repairs performed. | Detailed documentation of repairs performed for future reference. |
| Insurance | No insurance coverage for damages or liabilities arising from DIY repairs. | Insurance coverage for damages or liabilities arising from professional repairs. |
| Resale Value | Potential impact on resale value if repairs are not documented or performed to a professional standard. | Repairs performed by qualified technicians can help maintain or improve resale value. |
By carefully considering these factors, you can make an informed decision about whether to tackle a repair yourself or seek professional assistance.
21. The Future of Car Diagnostics: What’s on the Horizon?
The field of car diagnostics is constantly evolving, with new technologies and innovations emerging all the time. Here’s a glimpse into what the future holds for car diagnostics:
- Enhanced OBD Systems: Future OBD systems will likely provide even more detailed and comprehensive data about vehicle health, allowing for more accurate diagnoses and predictive maintenance.
- Wireless Diagnostics: Wireless OBD2 scanners and smartphone apps will become even more prevalent, allowing for convenient and real-time vehicle monitoring.
- Artificial Intelligence (AI): AI-powered diagnostic tools will be able to analyze vast amounts of data and identify patterns that human technicians might miss, leading to faster and more accurate diagnoses.
- Augmented Reality (AR): AR technology will overlay diagnostic information onto the vehicle in real-time, guiding technicians through the repair process.
- Remote Diagnostics: Remote diagnostic services will allow technicians to diagnose and repair vehicles from anywhere in the world, reducing downtime and improving efficiency.
These advancements will revolutionize the way we diagnose and repair cars, making the process faster, more accurate, and more convenient.
22. OBD2 and Emissions Testing: What You Need to Know
OBD2 systems play a crucial role in emissions testing, ensuring that vehicles meet stringent environmental standards. Many states and countries require vehicles to pass an OBD2 emissions test as part of their registration process.
During an OBD2 emissions test, a certified technician connects an OBD2 scanner to your vehicle’s diagnostic port and retrieves data about the emissions control systems. The scanner checks for any stored diagnostic trouble codes (DTCs) related to emissions and verifies that the emissions control systems are functioning properly.
If your vehicle fails the OBD2 emissions test, you’ll need to address the underlying issues and have the vehicle retested before you can register it.
23. Maintaining Your Vehicle’s Health: Proactive Steps
Preventative maintenance is key to keeping your vehicle running smoothly and avoiding costly repairs. Here are some proactive steps you can take to maintain your vehicle’s health:
- Follow the Manufacturer’s Recommended Maintenance Schedule: Consult your vehicle’s owner’s manual for the manufacturer’s recommended maintenance schedule and adhere to it diligently.
- Perform Regular Fluid Checks: Check the levels of engine oil, coolant, brake fluid, power steering fluid, and transmission fluid regularly.
- Inspect and Replace Filters: Replace air filters, fuel filters, and oil filters according to the manufacturer’s recommendations.
- Monitor Tire Pressure: Maintain proper tire pressure to improve fuel efficiency, handling, and tire life.
- Inspect Belts and Hoses: Inspect belts and hoses for signs of wear, cracking, or leaks.
- Address Minor Issues Promptly: Don’t ignore minor issues, such as squealing brakes or a loose gas cap. Addressing them promptly can prevent them from escalating into more significant problems.
By taking these proactive steps, you can extend the life of your vehicle and minimize the risk of unexpected breakdowns.
24. Connecting with OBD2-SCANNER.EDU.VN: Get Expert Assistance
If you’re facing a challenging vehicle issue or need expert advice on OBD2 systems and car care, we encourage you to connect with us at OBD2-SCANNER.EDU.VN.
We offer a variety of ways to get in touch:
- Visit Our Website: Explore our website for informative articles, guides, product reviews, and a comprehensive DTC database.
- Contact Us via WhatsApp: Send us a message on WhatsApp at +1 (641) 206-8880 for quick answers to your questions.
- Call Us: Give us a call at our office located at 123 Main Street, Los Angeles, CA 90001, United States.
- Follow Us on Social Media: Stay up-to-date on the latest automotive news, tips, and promotions by following us on social media.
Our team of certified mechanics and automotive technicians is ready to assist you with all your car care needs.
25. FAQ: Your Burning OBD2 Questions Answered
Here are some frequently asked questions about OBD2 systems and reading codes without a scanner:
Q: What is an OBD2 scanner?
An OBD2 scanner is a diagnostic tool that connects to your vehicle’s diagnostic port and retrieves data about its health, including diagnostic trouble codes (DTCs).
Q: How do I read OBD2 codes without a scanner?
You can use methods like key cycling or the odometer reset button.
Q: What does the check engine light mean?
It means your vehicle’s computer has recognized a fault needing repair.
Q: What are common reasons for the check engine light to come on?
Emission system issues, engine misfires, faulty sensors, fuel system problems, exhaust system issues, or transmission problems.
Q: Can I reset the check engine light without fixing the problem?
Yes, but it’s not recommended as the light will likely come back on and you won’t address the underlying issue.
Q: Is it safe to drive with the check engine light on?
It depends. A solid light means you can drive for a short distance, but a flashing light indicates a severe problem requiring immediate attention.
Q: Where can I get my car scanned for free?
Many auto parts stores, like AutoZone, offer free diagnostic scans.
Q: What is the best course of action if my check engine light comes on while under warranty?
Visit a qualified mechanic or automotive technician to diagnose the issue and perform any necessary repairs.
Q: Can ignoring a check engine light cause more damage?
Yes, delaying repairs can lead to more extensive damage and costly repairs in the long run.
Q: What should I do if I’m not comfortable performing DIY repairs?
Seek professional assistance from a qualified mechanic or automotive technician.
Remember, at OBD2-SCANNER.EDU.VN, we’re here to help you navigate the complexities of car diagnostics and ensure that your vehicle is running smoothly. Contact us today for expert assistance and personalized advice. We are located at 123 Main Street, Los Angeles, CA 90001, United States and reachable via Whatsapp at +1 (641) 206-8880 or our website at OBD2-SCANNER.EDU.VN. Act now and let us help you keep your car in top condition.