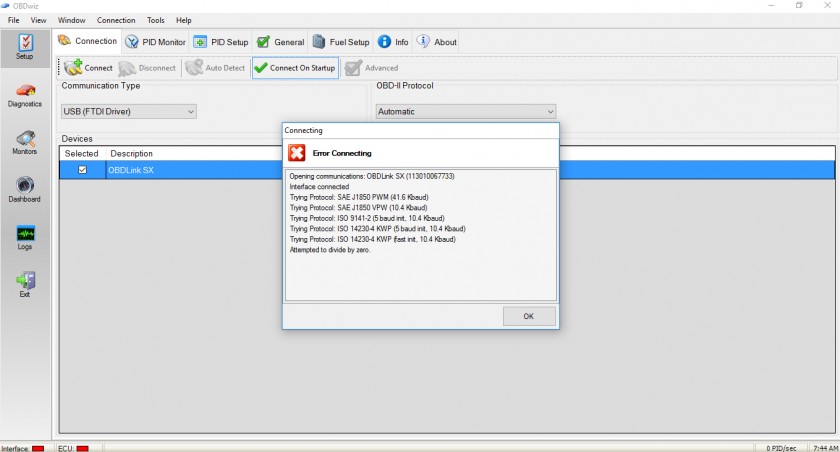
Is your OBD2 scanner failing to connect? OBD2-SCANNER.EDU.VN provides expert insights and troubleshooting steps to diagnose why your scan tool won’t read, ensuring you can get back to diagnosing and fixing vehicle issues quickly and efficiently. Explore potential causes, from faulty scanners to connection problems, and learn how to resolve them. We’ll cover diagnostic link connector issues, CAN bus problems, and PCM malfunctions.
Contents
- 1. Understanding Why Your OBD2 Scanner Won’t Read
- 1.1 Common Causes of OBD2 Scanner Failure
- 1.2 Initial Checks When the OBD2 Scanner Won’t Connect
- 2. Detailed Troubleshooting Steps
- 2.1 Testing Ground Connections
- 2.2 Verifying Voltage on DLC Pin 2
- 2.3 Checking ECM Voltage Supply
- 2.4 Testing DLC Bias Terminals
- 3. Advanced Diagnostic Techniques
- 3.1 Examining the CAN Bus System
- 3.2 Diagnosing PCM Malfunctions
- 3.3 Utilizing Advanced Diagnostic Tools
- 4. Practical Solutions and Repairs
- 4.1 Repairing Damaged Wiring
- 4.2 Replacing a Faulty OBD2 Port
- 4.3 Addressing Power Supply Issues
- 4.4 Software and Firmware Updates
- 5. Preventing Future OBD2 Scanner Issues
- 5.1 Regular Maintenance Tips
- 5.2 Choosing the Right OBD2 Scanner
- 6. OBD2 Scanner Won’t Read FAQs
- 6.1 What does it mean when my OBD2 scanner won’t read?
- 6.2 How can I test if my OBD2 port is working?
- 6.3 What are common signs of a faulty OBD2 scanner?
- 6.4 Can a dead battery affect the OBD2 scanner?
- 6.5 How do I update the software on my OBD2 scanner?
- 6.6 What should I do if my OBD2 scanner is not compatible with my vehicle?
- 6.7 Is it possible to fix a damaged OBD2 port?
- 6.8 What is the CAN bus, and how does it affect the OBD2 scanner?
- 6.9 Can a blown fuse cause the OBD2 scanner to not work?
- 6.10 When should I seek professional help for OBD2 scanner issues?
- 7. Need More Help?
1. Understanding Why Your OBD2 Scanner Won’t Read
An OBD2 scanner is an essential tool for modern automotive diagnostics. However, encountering a situation where your OBD2 scanner won’t read can be frustrating. Several potential issues can cause this problem. Understanding these issues is the first step toward effective troubleshooting. Let’s explore the common reasons behind this connectivity problem.
1.1 Common Causes of OBD2 Scanner Failure
Several factors can prevent your OBD2 scanner from reading data correctly. These can range from simple issues to more complex problems within the vehicle’s electronic systems.
-
Faulty OBD2 Scanner: The scanner itself might be defective due to hardware or software issues.
-
Damaged OBD2 Port: The diagnostic link connector (DLC) in your vehicle could be damaged or malfunctioning.
-
Wiring Problems: Disconnected or damaged wires between the OBD2 port and the vehicle’s computer can interrupt communication.
-
Power Issues: A dead or weak car battery can prevent the OBD2 scanner from establishing a connection.
-
Software Incompatibility: The scanner’s software may not be compatible with your vehicle’s make and model.
-
CAN Bus Issues: Problems within the controller area network (CAN) bus can disrupt data flow.
1.2 Initial Checks When the OBD2 Scanner Won’t Connect
Before diving into detailed troubleshooting, perform these initial checks to rule out simple issues:
- Ensure the Ignition Is On: The vehicle’s ignition must be in the “ON” position for the OBD2 scanner to work.
- Check the Scanner’s Power: Verify that the scanner is powered on and the display is lit.
- Inspect the OBD2 Port: Look for any visible damage or debris in the OBD2 port.
- Try a Different Vehicle: If possible, test the scanner on another vehicle to determine if the problem lies with the scanner or the car.
- Check the Fuses: Inspect the vehicle’s fuses related to the OBD2 port and ECM to ensure they are not blown.
2. Detailed Troubleshooting Steps
If the initial checks don’t resolve the issue, follow these detailed troubleshooting steps to diagnose and fix the problem. These steps involve using a digital multimeter (DMM) to check various electrical connections and voltages.
2.1 Testing Ground Connections
Poor ground connections can prevent the OBD2 scanner from communicating with the vehicle’s computer. Follow these steps to test the ground connections:
- Locate DLC Pins: Identify DLC pins 4 and 5, which are the ground pins.
- Connect DMM: Connect the positive lead of the DMM to DLC pin 4 and the negative lead to the negative battery terminal. Use jumper wires if needed. Ensure you connect directly to the battery terminal, not the chassis ground.
- Check Voltage Drop: With the ignition ON, the voltage drop across the ground terminal should be 0.1 volts or less.
- Repeat for Pin 5: Repeat the same procedure for DLC pin 5.
Note: An open circuit or high ground resistance indicates that the powertrain control module (PCM) will not enter diagnostic mode.
2.2 Verifying Voltage on DLC Pin 2
DLC pin 2 is used for data transmission. Verifying the voltage on this pin can help identify communication issues.
- Connect DMM: Connect the positive lead of the DMM to DLC pin 2 (class 2 Serial Data pin) and the negative lead to either pin 4, pin 5, or a known good ground.
- Check Voltage: With the ignition ON, the voltage on the class 2 serial data pin should be 5V or fluctuate between 3.5V and 5.0V.
- Interpret Results: If the circuit is open, the PCM cannot transmit data to the scan tool.
Note: This test may not apply to all vehicles, such as the Mazda MPV.
2.3 Checking ECM Voltage Supply
The electronic control module (ECM) needs proper voltage to function correctly. A blown fuse or faulty connection can disrupt the voltage supply.
- Locate DLC Battery + Terminal: Identify the DLC battery + terminal.
- Connect DMM: Connect the positive DMM lead to the DLC battery + terminal and the negative DMM lead to the battery ground terminal.
- Check Voltage: The DMM should display the battery voltage. This tests the ECM voltage supply.
- Investigate Further: If there is no voltage, check the lighter fuse and other related fuses, as a lack of power could be due to a blown fuse.
2.4 Testing DLC Bias Terminals
The bias terminals in the DLC should have specific voltage readings to ensure proper communication.
-
Connect DMM: Connect the positive DMM lead to either of the DLC bias terminals and the negative DMM lead to the ground terminal.
-
Check Voltage with Ignition ON:
- With the ignition key ON and no bus activity, BUS + should read 0V, and BUS – should read 5V.
- With the ignition key ON and bus activity present, the voltage should vary from 0 to 5V, depending on the level of bus activity.
-
Interpret Results: Incorrect voltage readings indicate a problem with the CAN bus or related circuits.
3. Advanced Diagnostic Techniques
If the basic troubleshooting steps do not resolve the issue, consider these advanced diagnostic techniques.
3.1 Examining the CAN Bus System
The CAN bus is a critical communication network in modern vehicles. Issues within this system can prevent the OBD2 scanner from reading data.
- Check CAN Bus Wiring: Inspect the CAN bus wires for any signs of damage, corrosion, or loose connections.
- Use an Oscilloscope: Use an oscilloscope to analyze the CAN bus signals. Look for proper waveform patterns and voltage levels.
- Isolate CAN Bus Issues: Disconnect modules one by one to isolate the source of the CAN bus problem.
3.2 Diagnosing PCM Malfunctions
A malfunctioning PCM can prevent the OBD2 scanner from communicating with the vehicle.
- Check PCM Power and Ground: Verify that the PCM is receiving proper power and ground connections.
- Inspect PCM Connectors: Look for any corrosion or damage to the PCM connectors.
- Perform a PCM Reset: Try resetting the PCM by disconnecting the battery for 15-20 minutes.
- Consider PCM Replacement: If all other tests fail, the PCM may need to be replaced.
 fried PCM
3.3 Utilizing Advanced Diagnostic Tools
Advanced diagnostic tools can provide deeper insights into the vehicle’s electronic systems.
- Professional-Grade Scanners: Use professional-grade OBD2 scanners that offer advanced features such as bi-directional control and live data streaming.
- Software Updates: Ensure your scanner has the latest software updates to support newer vehicle models and diagnostic protocols.
- Access to Vehicle-Specific Data: Obtain access to vehicle-specific diagnostic data and repair information to aid in troubleshooting.
4. Practical Solutions and Repairs
Once you’ve identified the cause of the problem, implement the necessary solutions and repairs.
4.1 Repairing Damaged Wiring
Damaged or corroded wiring can prevent the OBD2 scanner from functioning correctly.
- Inspect Wiring: Carefully inspect all wiring related to the OBD2 port and ECM for any signs of damage.
- Repair or Replace Wires: Repair any damaged wires by splicing and soldering new sections. Replace severely damaged wires entirely.
- Use Quality Connectors: Use high-quality connectors to ensure a secure and reliable connection.
- Protect Wiring: Protect repaired wiring with electrical tape or heat shrink tubing to prevent future damage.
4.2 Replacing a Faulty OBD2 Port
If the OBD2 port is damaged or malfunctioning, it may need to be replaced.
- Disconnect Battery: Disconnect the vehicle’s battery before starting the repair.
- Remove Old Port: Remove the old OBD2 port by disconnecting any wiring and unscrewing or unclipping it from its mounting location.
- Install New Port: Install the new OBD2 port by connecting the wiring and securing it in place.
- Reconnect Battery: Reconnect the vehicle’s battery and test the OBD2 scanner to ensure it is working correctly.
4.3 Addressing Power Supply Issues
Power supply issues can often be resolved by checking and replacing fuses.
- Locate Fuse Box: Find the vehicle’s fuse box, typically located under the dashboard or in the engine compartment.
- Identify Relevant Fuses: Identify the fuses related to the OBD2 port and ECM using the vehicle’s wiring diagram.
- Check Fuses: Use a fuse tester or multimeter to check if the fuses are blown.
- Replace Blown Fuses: Replace any blown fuses with new fuses of the same amperage.
4.4 Software and Firmware Updates
Keeping your OBD2 scanner’s software and firmware up to date is crucial for compatibility and performance.
- Check for Updates: Visit the manufacturer’s website or use the scanner’s software to check for available updates.
- Download Updates: Download the latest software and firmware updates.
- Install Updates: Follow the manufacturer’s instructions to install the updates on your OBD2 scanner.
- Test Scanner: Test the scanner after the update to ensure it is functioning correctly.
5. Preventing Future OBD2 Scanner Issues
Preventative measures can help avoid future issues with your OBD2 scanner and vehicle’s diagnostic systems.
5.1 Regular Maintenance Tips
Regular maintenance can keep your vehicle’s electronic systems in good condition and prevent OBD2 scanner problems.
- Keep Battery Charged: Ensure your vehicle’s battery is fully charged and in good condition.
- Inspect Wiring Regularly: Regularly inspect the wiring related to the OBD2 port and ECM for any signs of damage or corrosion.
- Protect OBD2 Port: Use a protective cover for the OBD2 port to prevent dust and debris from entering.
- Avoid Extreme Temperatures: Avoid exposing your OBD2 scanner to extreme temperatures, which can damage its internal components.
5.2 Choosing the Right OBD2 Scanner
Selecting the right OBD2 scanner for your needs can also prevent compatibility issues.
- Consider Vehicle Compatibility: Choose a scanner that is compatible with your vehicle’s make, model, and year.
- Read Reviews: Read reviews from other users to get an idea of the scanner’s performance and reliability.
- Look for Essential Features: Look for essential features such as code reading, code clearing, live data streaming, and bi-directional control.
- Invest in Quality: Invest in a high-quality OBD2 scanner from a reputable brand to ensure accuracy and durability.
6. OBD2 Scanner Won’t Read FAQs
6.1 What does it mean when my OBD2 scanner won’t read?
When your OBD2 scanner won’t read, it means the scanner is unable to establish a connection with your vehicle’s computer. This can be due to various reasons, including a faulty scanner, a damaged OBD2 port, wiring problems, power issues, or software incompatibility.
6.2 How can I test if my OBD2 port is working?
You can test your OBD2 port by using a digital multimeter (DMM) to check the voltage on various pins. Refer to section 2 of this guide for detailed steps on testing ground connections, voltage on DLC pin 2, ECM voltage supply, and DLC bias terminals.
6.3 What are common signs of a faulty OBD2 scanner?
Common signs of a faulty OBD2 scanner include the scanner not powering on, displaying error messages, failing to connect to any vehicle, or providing inaccurate data.
6.4 Can a dead battery affect the OBD2 scanner?
Yes, a dead or weak battery can prevent the OBD2 scanner from establishing a connection with the vehicle’s computer. Ensure your battery is fully charged before using the scanner.
6.5 How do I update the software on my OBD2 scanner?
To update the software on your OBD2 scanner, visit the manufacturer’s website or use the scanner’s software to check for available updates. Download the latest software and firmware updates and follow the manufacturer’s instructions to install them.
6.6 What should I do if my OBD2 scanner is not compatible with my vehicle?
If your OBD2 scanner is not compatible with your vehicle, check the scanner’s specifications to ensure it supports your vehicle’s make, model, and year. If necessary, purchase a scanner that is compatible with your vehicle.
6.7 Is it possible to fix a damaged OBD2 port?
Yes, it is possible to fix a damaged OBD2 port. You can repair damaged wiring or replace the entire port if necessary. Refer to section 4.2 of this guide for detailed instructions on replacing a faulty OBD2 port.
6.8 What is the CAN bus, and how does it affect the OBD2 scanner?
The controller area network (CAN) bus is a communication network in modern vehicles that allows various electronic modules to communicate with each other. Issues within the CAN bus system can disrupt data flow and prevent the OBD2 scanner from reading data.
6.9 Can a blown fuse cause the OBD2 scanner to not work?
Yes, a blown fuse can cause the OBD2 scanner to not work. Check the vehicle’s fuses related to the OBD2 port and ECM to ensure they are not blown. Replace any blown fuses with new fuses of the same amperage.
6.10 When should I seek professional help for OBD2 scanner issues?
You should seek professional help for OBD2 scanner issues if you are unable to diagnose and resolve the problem using the troubleshooting steps in this guide. Professional technicians have the expertise and tools to diagnose and repair complex electronic system issues.
7. Need More Help?
Diagnosing why your OBD2 scanner won’t read can be challenging, but with the right approach, you can often identify and fix the issue yourself. By following the troubleshooting steps and practical solutions outlined in this guide, you’ll be well-equipped to tackle OBD2 scanner problems and keep your vehicle running smoothly.
If you’re still experiencing issues or need expert assistance, don’t hesitate to contact us at OBD2-SCANNER.EDU.VN. Our team of experienced automotive technicians is here to help you diagnose and repair any OBD2 scanner or vehicle-related problems. Reach out to us today for professional advice and support.
Contact Information:
- Address: 123 Main Street, Los Angeles, CA 90001, United States
- WhatsApp: +1 (641) 206-8880
- Website: OBD2-SCANNER.EDU.VN
Let OBD2-SCANNER.EDU.VN be your trusted partner in automotive diagnostics and repair.
