Troubleshooting Obd2 Codes effectively helps you pinpoint automotive issues with precision using an OBD2 scanner, and OBD2-SCANNER.EDU.VN offers comprehensive guidance and repair services. Understanding diagnostic trouble codes (DTCs), performing accurate vehicle diagnostics, and utilizing advanced scanning tools are crucial for efficient car repairs. Let us help you with engine diagnostics, emission control systems, and automotive computer systems to resolve your car problems accurately.
Contents
- 1. What Are OBD2 Codes and How Do They Work?
- 1.1 Understanding the Structure of OBD2 Codes
- 1.2 How OBD2 Systems Detect Issues
- 1.3 Importance of Understanding OBD2 Codes
- 2. What Are the Common OBD2 Codes and Their Meanings?
- 2.1 Engine-Related Codes
- 2.2 Emission Control System Codes
- 2.3 Sensor-Related Codes
- 2.4 Transmission Codes
- 3. What Tools Are Needed for Troubleshooting OBD2 Codes?
- 3.1 Basic OBD2 Scanner
- 3.2 Advanced OBD2 Scanner
- 3.3 Multimeter
- 3.4 Scan Tool with Oscilloscope
- 3.5 Smoke Machine
- 3.6 Fuel Pressure Tester
- 3.7 Compression Tester
- 4. How to Diagnose OBD2 Codes Step-by-Step?
- 4.1 Step 1: Connect the OBD2 Scanner
- 4.2 Step 2: Read the OBD2 Codes
- 4.3 Step 3: Research the OBD2 Codes
- 4.4 Step 4: Verify the Symptoms
- 4.5 Step 5: Inspect Related Components
- 4.6 Step 6: Perform Diagnostic Tests
- 4.7 Step 7: Analyze the Data and Results
- 4.8 Step 8: Repair or Replace Faulty Components
- 4.9 Step 9: Clear the OBD2 Codes
- 4.10 Step 10: Verify the Repair
- 5. What Are Some Advanced Troubleshooting Techniques for OBD2 Codes?
- 5.1 Using Live Data to Diagnose Intermittent Issues
- 5.2 Performing Component-Level Testing
- 5.3 Conducting System-Specific Tests
- 5.4 Using Freeze Frame Data
- 5.5 Performing a Manual Vacuum Test
- 5.6 Utilizing a Lab Scope (Oscilloscope)
- 6. How Does OBD2-SCANNER.EDU.VN Help in Troubleshooting OBD2 Codes?
- 6.1 Expert Guidance on Code Interpretation
- 6.2 Access to Advanced Diagnostic Tools
- 6.3 Step-by-Step Diagnostic Procedures
- 6.4 Professional Repair Services
- 6.5 Remote Diagnostic Support
- 6.6 Educational Resources and Training
1. What Are OBD2 Codes and How Do They Work?
OBD2 (On-Board Diagnostics II) codes are standardized codes used to identify specific problems in a vehicle’s engine, transmission, and other systems. Understanding how these codes work is the first step in effective troubleshooting.
OBD2 codes are generated by the vehicle’s computer system when it detects a malfunction or a reading outside of normal parameters. These codes are designed to help mechanics and vehicle owners diagnose and repair issues efficiently. According to the Environmental Protection Agency (EPA), OBD2 systems have been mandatory on all cars sold in the United States since 1996, ensuring standardization and ease of access for diagnostic purposes.
1.1 Understanding the Structure of OBD2 Codes
An OBD2 code consists of five characters: one letter followed by four numbers. Each character provides valuable information about the nature and location of the problem.
- First Character (Letter):
- P: Powertrain (engine, transmission)
- B: Body (interior, airbags)
- C: Chassis (brakes, suspension)
- U: Network (communication systems)
- Second Character (Number):
- 0: Generic (SAE) code, applicable to all vehicles
- 1: Manufacturer-specific code
- Third Character (Number): Indicates the specific system:
- 1: Fuel and air metering
- 2: Fuel and air metering (injector circuit)
- 3: Ignition system or misfire
- 4: Auxiliary emission controls
- 5: Vehicle speed control, idle control system
- 6: Computer output circuit
- 7: Transmission
- 8: Transmission
- Fourth and Fifth Characters (Numbers): Specify the particular fault within the system.
For example, the code P0301 indicates:
- P: Powertrain
- 0: Generic code
- 3: Ignition system or misfire
- 01: Cylinder 1 misfire
This image illustrates the OBD2 code structure, highlighting the meaning of each character.
1.2 How OBD2 Systems Detect Issues
OBD2 systems rely on various sensors throughout the vehicle to monitor operating conditions. These sensors send data to the vehicle’s computer, which continuously checks if the readings are within pre-defined ranges. When a sensor reading falls outside the acceptable range or a test fails, the computer logs a DTC (Diagnostic Trouble Code).
For example, oxygen sensors monitor the amount of oxygen in the exhaust gases. If an oxygen sensor detects an abnormal oxygen level, it triggers an OBD2 code related to the fuel-air mixture. Similarly, if the engine control unit (ECU) detects a misfire in one of the cylinders, it will log a misfire code.
1.3 Importance of Understanding OBD2 Codes
Understanding OBD2 codes allows vehicle owners and mechanics to:
- Accurately Diagnose Problems: Knowing what a code means helps pinpoint the source of the issue.
- Avoid Unnecessary Repairs: Instead of replacing parts randomly, you can focus on the specific problem area.
- Save Time and Money: Accurate diagnostics lead to faster and more effective repairs.
- Communicate Effectively with Mechanics: Being able to describe the problem using the OBD2 code helps ensure clear communication.
By understanding OBD2 codes, you can take a proactive approach to vehicle maintenance and repair, ensuring your car runs smoothly and efficiently. If you need help interpreting OBD2 codes, OBD2-SCANNER.EDU.VN is here to provide expert guidance and service. Contact us at +1 (641) 206-8880 for immediate assistance.
2. What Are the Common OBD2 Codes and Their Meanings?
Identifying common OBD2 codes and understanding their meanings is essential for efficient troubleshooting. These codes can range from simple sensor issues to more complex engine and transmission problems.
Here are some of the most common OBD2 codes and their typical meanings:
2.1 Engine-Related Codes
- P0300: Random/Multiple Cylinder Misfire Detected
- Meaning: The engine is experiencing misfires in multiple cylinders or the system is unable to determine which cylinder is misfiring.
- Possible Causes: Faulty spark plugs, ignition coils, vacuum leaks, fuel injector issues, low fuel pressure, or a defective crankshaft position sensor.
- P0301 – P0306: Cylinder X Misfire Detected (where X is the cylinder number)
- Meaning: A specific cylinder is experiencing misfires.
- Possible Causes: Similar to P0300, but specific to the cylinder identified in the code.
- P0171: System Too Lean (Bank 1)
- Meaning: The engine is running with too much air and not enough fuel in Bank 1 (the side of the engine containing cylinder 1).
- Possible Causes: Vacuum leaks, faulty oxygen sensor, dirty or faulty mass airflow (MAF) sensor, low fuel pressure, or a defective fuel injector.
- P0174: System Too Lean (Bank 2)
- Meaning: The engine is running with too much air and not enough fuel in Bank 2.
- Possible Causes: Similar to P0171, but affecting Bank 2.
- P0172: System Too Rich (Bank 1)
- Meaning: The engine is running with too much fuel and not enough air in Bank 1.
- Possible Causes: Faulty fuel injector, high fuel pressure, defective oxygen sensor, or a malfunctioning MAF sensor.
- P0175: System Too Rich (Bank 2)
- Meaning: The engine is running with too much fuel and not enough air in Bank 2.
- Possible Causes: Similar to P0172, but affecting Bank 2.
2.2 Emission Control System Codes
- P0420: Catalyst System Efficiency Below Threshold (Bank 1)
- Meaning: The catalytic converter on Bank 1 is not working efficiently.
- Possible Causes: Failing catalytic converter, faulty oxygen sensors, exhaust leaks, or engine issues causing excessive emissions.
- P0442: Evaporative Emission Control System Leak Detected (Small Leak)
- Meaning: A small leak has been detected in the evaporative emission control system (EVAP).
- Possible Causes: Loose or damaged fuel cap, cracked EVAP hose, faulty purge valve, or a defective fuel tank pressure sensor.
- P0401: EGR Flow Insufficient Detected
- Meaning: The Exhaust Gas Recirculation (EGR) system is not flowing enough exhaust gas into the intake manifold.
- Possible Causes: Clogged EGR valve, blocked EGR passages, faulty EGR valve position sensor, or a defective vacuum modulator.
2.3 Sensor-Related Codes
- P0101: Mass Air Flow (MAF) Sensor Circuit Range/Performance Problem
- Meaning: The MAF sensor signal is out of the expected range.
- Possible Causes: Dirty or faulty MAF sensor, vacuum leaks, or wiring issues.
- P0113: Intake Air Temperature Sensor 1 Circuit High
- Meaning: The signal from the intake air temperature (IAT) sensor is too high.
- Possible Causes: Faulty IAT sensor, wiring issues, or a poor connection.
- P0131: O2 Sensor Circuit Low Voltage (Bank 1, Sensor 1)
- Meaning: The oxygen sensor on Bank 1, Sensor 1 is reporting a low voltage.
- Possible Causes: Faulty oxygen sensor, exhaust leaks, wiring issues, or a defective ECU.
2.4 Transmission Codes
- P0700: Transmission Control System Malfunction
- Meaning: A general fault has been detected in the transmission control system.
- Possible Causes: Faulty transmission sensors, wiring issues, defective solenoids, or a failing transmission control module (TCM).
- P0741: Torque Converter Clutch Circuit Performance or Stuck Off
- Meaning: The torque converter clutch is not engaging or disengaging properly.
- Possible Causes: Low transmission fluid, faulty torque converter, defective solenoid, or wiring issues.
Here’s a quick reference table for these common OBD2 codes:
| OBD2 Code | Description | Possible Causes |
|---|---|---|
| P0300 | Random/Multiple Cylinder Misfire Detected | Faulty spark plugs, ignition coils, vacuum leaks, fuel injector issues, low fuel pressure, defective crankshaft position sensor |
| P0301-P0306 | Cylinder X Misfire Detected | Similar to P0300, but specific to the cylinder identified |
| P0171 | System Too Lean (Bank 1) | Vacuum leaks, faulty oxygen sensor, dirty or faulty MAF sensor, low fuel pressure, defective fuel injector |
| P0174 | System Too Lean (Bank 2) | Similar to P0171, but affecting Bank 2 |
| P0420 | Catalyst System Efficiency Below Threshold (Bank 1) | Failing catalytic converter, faulty oxygen sensors, exhaust leaks, engine issues causing excessive emissions |
| P0442 | Evaporative Emission Control System Leak (Small) | Loose or damaged fuel cap, cracked EVAP hose, faulty purge valve, defective fuel tank pressure sensor |
| P0101 | Mass Air Flow (MAF) Sensor Circuit Range/Performance | Dirty or faulty MAF sensor, vacuum leaks, wiring issues |
| P0700 | Transmission Control System Malfunction | Faulty transmission sensors, wiring issues, defective solenoids, failing TCM |
Understanding these common OBD2 codes can help you quickly identify and address potential issues, saving you time and money on repairs. However, remember that a code is just a starting point. Always perform a thorough diagnostic process to confirm the root cause of the problem. If you encounter any difficulties, contact OBD2-SCANNER.EDU.VN at +1 (641) 206-8880 for expert advice and assistance.
This image represents an engine misfire, a common issue indicated by OBD2 codes P0300-P0306.
3. What Tools Are Needed for Troubleshooting OBD2 Codes?
Having the right tools is crucial for effectively troubleshooting OBD2 codes. These tools can range from basic code readers to advanced diagnostic equipment. Here’s a rundown of essential tools for diagnosing and resolving OBD2 issues.
3.1 Basic OBD2 Scanner
A basic OBD2 scanner is the most fundamental tool for reading and clearing diagnostic trouble codes (DTCs). These scanners plug into the OBD2 port of your vehicle (usually located under the dashboard) and display the stored codes.
-
Features:
- Reads and displays OBD2 codes.
- Clears OBD2 codes and resets the check engine light.
- Displays basic vehicle information such as VIN (Vehicle Identification Number).
-
Use:
- Quickly identify the trouble codes.
- Clear codes after repairs are made.
- Verify that a repair has been successful by clearing the code and checking if it returns.
3.2 Advanced OBD2 Scanner
Advanced OBD2 scanners offer more features than basic models, providing deeper insights into the vehicle’s performance.
-
Features:
- Reads and clears OBD2 codes (including manufacturer-specific codes).
- Displays live sensor data (such as oxygen sensor readings, MAF sensor data, engine temperature).
- Performs advanced diagnostic tests (such as oxygen sensor tests, EVAP system tests).
- Provides access to freeze frame data (snapshot of sensor data when the code was triggered).
- Some models include built-in repair databases and diagnostic tips.
-
Use:
- Monitor real-time sensor data to identify intermittent problems.
- Perform specific tests to pinpoint the cause of a problem.
- Access additional information that can aid in diagnosis.
3.3 Multimeter
A multimeter is an essential tool for electrical testing. It can measure voltage, current, and resistance, allowing you to check the integrity of circuits and components.
-
Features:
- Measures voltage (AC and DC).
- Measures current (amps).
- Measures resistance (ohms).
- Continuity testing (checks if a circuit is complete).
-
Use:
- Check for proper voltage at sensors and actuators.
- Test the continuity of wires and connections.
- Measure the resistance of components such as sensors and solenoids.
3.4 Scan Tool with Oscilloscope
A scan tool with an oscilloscope provides a visual representation of electrical signals, allowing you to analyze the performance of sensors and circuits over time.
-
Features:
- Displays waveforms of electrical signals.
- Captures intermittent signals that may be missed by a multimeter.
- Analyzes the performance of sensors and actuators.
-
Use:
- Diagnose complex electrical problems.
- Identify intermittent sensor failures.
- Verify the performance of components such as ignition coils and fuel injectors.
3.5 Smoke Machine
A smoke machine is used to detect leaks in the EVAP system, vacuum lines, and intake system. It introduces a safe, non-toxic smoke into the system, and any leaks will be revealed by escaping smoke.
-
Features:
- Generates a dense, visible smoke.
- Includes adapters to connect to various systems.
- Helps locate leaks quickly and accurately.
-
Use:
- Find leaks in the EVAP system.
- Locate vacuum leaks that can cause engine performance problems.
- Check for leaks in the intake system.
3.6 Fuel Pressure Tester
A fuel pressure tester is used to measure the fuel pressure in the fuel system. This is important for diagnosing fuel-related issues such as lean or rich running conditions.
-
Features:
- Measures fuel pressure accurately.
- Includes adapters to connect to various fuel systems.
- Helps diagnose fuel pump, fuel regulator, and fuel injector problems.
-
Use:
- Verify that the fuel pump is providing adequate pressure.
- Check the performance of the fuel pressure regulator.
- Identify fuel delivery problems.
3.7 Compression Tester
A compression tester measures the compression in each cylinder of the engine. Low compression can indicate worn piston rings, damaged valves, or a blown head gasket.
-
Features:
- Measures cylinder compression.
- Includes adapters to fit various spark plug sizes.
- Helps diagnose engine mechanical problems.
-
Use:
- Identify cylinders with low compression.
- Determine the cause of engine performance problems.
- Assess the overall health of the engine.
Here’s a table summarizing the essential tools for troubleshooting OBD2 codes:
| Tool | Features | Use |
|---|---|---|
| Basic OBD2 Scanner | Reads and clears OBD2 codes, displays VIN | Identify trouble codes, clear codes after repairs, verify repair success |
| Advanced OBD2 Scanner | Reads/clears codes, live sensor data, advanced tests, freeze frame data, repair databases | Monitor real-time data, perform specific tests, access additional diagnostic information |
| Multimeter | Measures voltage, current, resistance, continuity testing | Check voltage at sensors, test wire continuity, measure component resistance |
| Scan Tool with Oscilloscope | Displays electrical signal waveforms | Diagnose complex electrical issues, identify intermittent sensor failures, verify component performance |
| Smoke Machine | Generates visible smoke, includes adapters | Find EVAP system leaks, locate vacuum leaks, check intake system leaks |
| Fuel Pressure Tester | Measures fuel pressure, includes adapters | Verify fuel pump pressure, check fuel pressure regulator, identify fuel delivery problems |
| Compression Tester | Measures cylinder compression, includes spark plug adapters | Identify low compression cylinders, determine cause of engine problems, assess engine health |
Having these tools will enable you to diagnose and repair OBD2-related issues effectively. If you need assistance with using these tools or interpreting the results, contact OBD2-SCANNER.EDU.VN at +1 (641) 206-8880 for expert support.
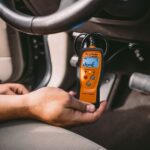
This image shows a basic OBD2 scanner, an essential tool for reading and clearing diagnostic trouble codes.
4. How to Diagnose OBD2 Codes Step-by-Step?
Diagnosing OBD2 codes requires a systematic approach to accurately identify and resolve the underlying issues. Here’s a step-by-step guide to help you effectively diagnose OBD2 codes.
4.1 Step 1: Connect the OBD2 Scanner
The first step is to connect the OBD2 scanner to the vehicle’s OBD2 port. This port is typically located under the dashboard on the driver’s side.
- Turn off the ignition.
- Locate the OBD2 port.
- Plug the OBD2 scanner into the port.
- Turn the ignition to the “ON” position (but do not start the engine).
- Follow the scanner’s instructions to power it on and connect to the vehicle.
4.2 Step 2: Read the OBD2 Codes
Once the scanner is connected, read the OBD2 codes stored in the vehicle’s computer.
- Navigate the scanner’s menu to the “Read Codes” or “Diagnostic Codes” option.
- The scanner will display a list of current and pending codes.
- Write down all the codes and their descriptions.
4.3 Step 3: Research the OBD2 Codes
After obtaining the codes, research their meanings and potential causes.
- Consult a reliable OBD2 code database or repair manual.
- Note the possible causes for each code, as well as common symptoms and related diagnostic procedures.
- Websites like OBD2-SCANNER.EDU.VN provide detailed information on OBD2 codes and their potential solutions.
4.4 Step 4: Verify the Symptoms
Confirm that the symptoms you are experiencing match the problems indicated by the OBD2 codes.
- Check for any noticeable issues such as engine misfires, poor fuel economy, rough idling, or unusual noises.
- Compare these symptoms with the potential causes identified in your research.
- If the symptoms don’t match the codes, investigate further or consult a mechanic.
4.5 Step 5: Inspect Related Components
Inspect the components and systems related to the OBD2 codes.
- Visually inspect wiring, connectors, and hoses for damage or corrosion.
- Check fluid levels (such as engine oil, coolant, and transmission fluid).
- Inspect sensors and actuators for signs of wear or malfunction.
- Use a multimeter to test the voltage and resistance of electrical components.
4.6 Step 6: Perform Diagnostic Tests
Perform diagnostic tests to pinpoint the exact cause of the problem.
- Use an advanced OBD2 scanner to monitor live sensor data.
- Perform specific tests such as oxygen sensor tests, EVAP system tests, and fuel pressure tests.
- Use a smoke machine to check for vacuum leaks or EVAP system leaks.
- Perform a compression test to check the mechanical health of the engine.
4.7 Step 7: Analyze the Data and Results
Carefully analyze the data and results from your diagnostic tests.
- Compare the sensor data with the expected values specified in the repair manual.
- Identify any abnormalities or inconsistencies.
- Use this information to narrow down the possible causes of the problem.
4.8 Step 8: Repair or Replace Faulty Components
Once you have identified the root cause of the problem, repair or replace the faulty components.
- Follow the repair procedures outlined in the repair manual.
- Use high-quality replacement parts.
- Ensure that all connections are secure and properly installed.
4.9 Step 9: Clear the OBD2 Codes
After completing the repairs, clear the OBD2 codes from the vehicle’s computer.
- Reconnect the OBD2 scanner.
- Navigate to the “Clear Codes” or “Erase Codes” option.
- Confirm that the codes have been cleared.
4.10 Step 10: Verify the Repair
Verify that the repair has been successful by monitoring the vehicle’s performance and checking for the return of the OBD2 codes.
- Drive the vehicle under various conditions to ensure the problem has been resolved.
- Use the OBD2 scanner to check for any pending or current codes.
- If the codes return, repeat the diagnostic process or consult a professional mechanic.
Here is a summary of the steps in a table format:
| Step | Action | Description |
|---|---|---|
| 1 | Connect the OBD2 Scanner | Plug the scanner into the OBD2 port, turn on the ignition (but don’t start the engine) |
| 2 | Read the OBD2 Codes | Use the scanner to read and record any current and pending codes |
| 3 | Research the OBD2 Codes | Consult a reliable OBD2 code database or repair manual to understand the meanings and potential causes of the codes |
| 4 | Verify the Symptoms | Check for noticeable issues such as engine misfires, poor fuel economy, or unusual noises, and compare them with the potential causes identified in your research |
| 5 | Inspect Related Components | Visually inspect wiring, connectors, and hoses for damage; check fluid levels; and inspect sensors and actuators for signs of wear or malfunction |
| 6 | Perform Diagnostic Tests | Use advanced tools and techniques such as live sensor data monitoring, oxygen sensor tests, EVAP system tests, and compression tests to pinpoint the exact cause of the problem |
| 7 | Analyze the Data and Results | Compare the sensor data with the expected values, identify abnormalities, and narrow down the possible causes of the problem |
| 8 | Repair or Replace Components | Follow the repair procedures outlined in the repair manual and use high-quality replacement parts to repair or replace the faulty components |
| 9 | Clear the OBD2 Codes | Reconnect the OBD2 scanner and clear the codes from the vehicle’s computer |
| 10 | Verify the Repair | Monitor the vehicle’s performance under various conditions and check for the return of the OBD2 codes to ensure the repair has been successful |
By following these steps, you can effectively diagnose OBD2 codes and perform the necessary repairs. If you encounter any challenges or need expert guidance, OBD2-SCANNER.EDU.VN is here to help. Contact us at +1 (641) 206-8880 for professional support.
This image illustrates the process of diagnosing OBD2 codes, emphasizing the importance of a systematic approach.
5. What Are Some Advanced Troubleshooting Techniques for OBD2 Codes?
Advanced troubleshooting techniques are essential for diagnosing complex OBD2 issues that may not be easily resolved with basic methods. These techniques often involve using specialized tools, analyzing intricate data, and understanding the nuances of automotive systems.
5.1 Using Live Data to Diagnose Intermittent Issues
Live data, also known as real-time data, allows you to monitor the performance of sensors and systems while the vehicle is running. This is particularly useful for diagnosing intermittent issues that may not trigger a code all the time.
- Connect an advanced OBD2 scanner to the vehicle.
- Select the “Live Data” or “Real-Time Data” option.
- Choose the sensors and parameters you want to monitor (e.g., oxygen sensor voltage, MAF sensor readings, engine temperature).
- Drive the vehicle under the conditions that typically trigger the problem.
- Observe the data for any anomalies or inconsistencies.
For example, if you suspect an intermittent misfire, monitor the misfire counters for each cylinder while driving. If one cylinder shows a sudden increase in misfires, it could indicate a problem with the ignition coil, fuel injector, or spark plug in that cylinder.
5.2 Performing Component-Level Testing
Component-level testing involves testing individual components to verify their functionality. This can be done using a multimeter, oscilloscope, or specialized testing equipment.
- Identify the component you want to test.
- Consult the repair manual for the component’s specifications and testing procedures.
- Disconnect the component from the vehicle’s electrical system.
- Use the appropriate testing tool to measure the component’s voltage, resistance, or current.
- Compare the results with the specifications in the repair manual.
For example, to test an oxygen sensor, you can use a multimeter to measure its resistance and voltage output. The resistance should fall within a specified range, and the voltage output should vary based on the oxygen content in the exhaust gas. If the readings are outside the specified range, the oxygen sensor may be faulty.
5.3 Conducting System-Specific Tests
System-specific tests involve performing specialized tests to diagnose problems within a particular system, such as the EVAP system, EGR system, or fuel system.
- EVAP System Test: Use a smoke machine to check for leaks in the EVAP system. Connect the smoke machine to the EVAP service port and introduce smoke into the system. Look for smoke escaping from any hoses, connections, or components.
- EGR System Test: Use an advanced OBD2 scanner to monitor the EGR valve position and flow rate. Command the EGR valve to open and close and observe the changes in the sensor readings. If the EGR valve is not functioning properly, it may be clogged or faulty.
- Fuel System Test: Use a fuel pressure tester to measure the fuel pressure at the fuel rail. Compare the reading with the specifications in the repair manual. If the fuel pressure is too low or too high, it could indicate a problem with the fuel pump, fuel pressure regulator, or fuel filter.
5.4 Using Freeze Frame Data
Freeze frame data is a snapshot of the sensor data that was recorded when the OBD2 code was triggered. This data can provide valuable clues about the conditions that led to the problem.
- Connect an advanced OBD2 scanner to the vehicle.
- Select the “Freeze Frame Data” option.
- Review the data, paying attention to the engine speed, load, temperature, and sensor readings.
- Analyze the data to identify any unusual conditions or patterns.
For example, if the freeze frame data shows that the engine was running at high speed and load when the code was triggered, it could indicate a problem with the fuel system or ignition system.
5.5 Performing a Manual Vacuum Test
A vacuum test can help identify vacuum leaks, which can cause a variety of engine performance problems.
- Connect a vacuum gauge to a vacuum port on the intake manifold.
- Start the engine and let it idle.
- Observe the vacuum reading on the gauge.
- Compare the reading with the specifications in the repair manual.
- If the vacuum reading is too low, it could indicate a vacuum leak.
- Use a stethoscope or spray carburetor cleaner around vacuum lines and connections to locate the leak.
5.6 Utilizing a Lab Scope (Oscilloscope)
A lab scope, or oscilloscope, allows you to visualize electrical signals and waveforms. This can be extremely helpful for diagnosing complex electrical problems.
- Connect the lab scope to the sensor or component you want to test.
- Start the engine and let it run.
- Observe the waveform on the screen.
- Compare the waveform with known good waveforms.
- If the waveform is distorted or missing, it could indicate a problem with the sensor, wiring, or ECU.
Here’s a table summarizing these advanced troubleshooting techniques:
| Technique | Description | Use |
|---|---|---|
| Using Live Data | Monitoring real-time sensor data while the vehicle is running | Diagnosing intermittent issues, identifying sensor anomalies, and observing system performance under different conditions |
| Component-Level Testing | Testing individual components to verify their functionality using a multimeter, oscilloscope, or specialized equipment | Checking voltage, resistance, or current of components and comparing results with specifications in the repair manual |
| System-Specific Tests | Performing specialized tests to diagnose problems within a particular system, such as the EVAP system, EGR system, or fuel system | Using smoke machines, advanced OBD2 scanners, and fuel pressure testers to identify leaks, monitor valve positions, and measure fuel pressure |
| Using Freeze Frame Data | Analyzing a snapshot of sensor data that was recorded when the OBD2 code was triggered | Identifying unusual conditions or patterns that led to the problem and providing clues about the potential causes |
| Performing a Manual Vacuum Test | Connecting a vacuum gauge to a vacuum port on the intake manifold and observing the vacuum reading | Identifying vacuum leaks and using a stethoscope or carburetor cleaner to locate the source of the leak |
| Utilizing a Lab Scope | Visualizing electrical signals and waveforms using an oscilloscope | Diagnosing complex electrical problems, observing sensor and component waveforms, and comparing them with known good waveforms to identify issues with sensors, wiring, or ECU |
By mastering these advanced troubleshooting techniques, you can effectively diagnose and repair even the most challenging OBD2 issues. If you need expert assistance with these techniques, contact OBD2-SCANNER.EDU.VN at +1 (641) 206-8880 for professional guidance and support.
This image illustrates advanced OBD2 troubleshooting techniques, emphasizing the use of specialized tools and data analysis.
6. How Does OBD2-SCANNER.EDU.VN Help in Troubleshooting OBD2 Codes?
OBD2-SCANNER.EDU.VN provides comprehensive assistance in troubleshooting OBD2 codes, offering a range of resources and services to help you diagnose and resolve automotive issues effectively. We leverage our expertise and advanced tools to ensure you receive accurate and reliable solutions.
6.1 Expert Guidance on Code Interpretation
One of the primary ways OBD2-SCANNER.EDU.VN helps is by providing expert guidance on interpreting OBD2 codes. Our website features a detailed database of OBD2 codes, complete with descriptions, possible causes, and common symptoms. This resource allows you to quickly understand the meaning of a code and narrow down the potential issues.
- Comprehensive Code Database: Access detailed information on thousands of OBD2 codes.
- Possible Causes and Symptoms: Understand the common causes and symptoms associated with each code.
- Diagnostic Tips: Receive expert tips on diagnosing and resolving OBD2 issues.
6.2 Access to Advanced Diagnostic Tools
OBD2-SCANNER.EDU.VN offers access to advanced diagnostic tools that can help you pinpoint the root cause of OBD2 issues. Our range of tools includes advanced OBD2 scanners, multimeters, smoke machines, fuel pressure testers, and more.
- Advanced OBD2 Scanners: Monitor live sensor data, perform system-specific tests, and access freeze frame data.
- Multimeters: Test the voltage, resistance, and current of electrical components.
- Smoke Machines: Detect leaks in the EVAP system, vacuum lines, and intake system.
- Fuel Pressure Testers: Measure fuel pressure and diagnose fuel system problems.
6.3 Step-by-Step Diagnostic Procedures
We provide step-by-step diagnostic procedures to guide you through the troubleshooting process. Our procedures are designed to be easy to follow, even for those with limited automotive experience.
- Connect the OBD2 Scanner: Plug the scanner into the OBD2 port and read the codes.
- Research the Codes: Consult our database to understand the meaning and potential causes of the codes.
- Inspect Related Components: Visually inspect wiring, connectors, and hoses for damage.
- Perform Diagnostic Tests: Use advanced tools to monitor sensor data and perform system-specific tests.
- Analyze the Results: Compare the results with the specifications in the repair manual.
- Repair or Replace Components: Repair or replace the faulty components.
- Clear the Codes: Clear the OBD2 codes from the vehicle’s computer.
- Verify the Repair: Monitor the vehicle’s performance to ensure the problem has been resolved.
6.4 Professional Repair Services
For complex OBD2 issues that require professional attention, OBD2-SCANNER.EDU.VN offers expert repair services. Our team of certified mechanics has the knowledge and experience to diagnose and repair a wide range of automotive problems.
- Expert Technicians: Our certified mechanics have extensive experience in diagnosing and repairing OBD2-related issues.
- State-of-the-Art Equipment: We use advanced diagnostic and repair equipment to ensure accurate and reliable results.
- Quality Parts: We use high-quality replacement parts to ensure the longevity and reliability of our repairs.
- Comprehensive Services: We offer a full range of repair services, from basic maintenance to complex engine and transmission repairs.
6.5 Remote Diagnostic Support
OBD2-SCANNER.EDU.VN also offers remote diagnostic support to help you troubleshoot OBD2 codes from the comfort of your own home or shop. Our remote support services include:
- Real-Time Assistance: Connect with our expert technicians via phone or video chat for real-time assistance.
- Remote Diagnostics: Allow our technicians to remotely access your vehicle’s computer and perform diagnostic tests.
- Diagnostic Reports: Receive detailed diagnostic reports outlining the findings and recommended repairs.
6.6 Educational Resources and Training
In addition to our diagnostic and repair services, OBD2-SCANNER.EDU.VN provides a wealth of educational resources and training materials to help you expand your knowledge of OBD2 systems and automotive diagnostics.
- Articles and Guides: Access a library of articles and guides covering various aspects of OBD2 systems and automotive repair.
- Training Courses: Enroll in our online training courses to learn advanced diagnostic techniques and repair procedures.
- Webinars and Workshops: Attend our webinars and workshops to stay up-to-date on the latest OBD2 technologies and best practices.
Here’s a table summarizing how OBD2-SCANNER.EDU.VN can assist you:
| Service/Resource | Description | Benefits |
| ———————— | ————————————————————————————————