The 98 Grand Cherokee Zj Obd2 Fuse Location is crucial for diagnosing and resolving vehicle issues; quickly identify the correct fuse and its function for efficient troubleshooting, refer to OBD2-SCANNER.EDU.VN for detailed diagrams and expert assistance to keep your Jeep running smoothly, utilizing our scanner tools will reveal comprehensive diagnostic insight to improve your automotive repair journey. Finding the correct fuse and understanding its function is essential for efficient troubleshooting.
Contents
- 1. Understanding the Importance of the OBD2 Port Fuse
- 1.1. What is an OBD2 Port?
- 1.2. Why is the OBD2 Port Important?
- 1.3. Consequences of a Non-Functional OBD2 Port
- 1.4. The Role of the OBD2 Fuse
- 1.5. Research on OBD2 Port Issues
- 2. Locating the OBD2 Port Fuse in a 98 Grand Cherokee ZJ
- 2.1. Common Locations for the Fuse Box
- 2.2. Identifying the OBD2 Fuse
- 2.3. Amperage Rating
- 2.4. Diagram of the Fuse Box
- 2.5. Alternative Locations
- 3. Step-by-Step Guide to Checking and Replacing the OBD2 Fuse
- 3.1. Tools Needed
- 3.2. Step-by-Step Instructions
- 3.3. Precautions
- 3.4. What to Do if the New Fuse Blows Immediately
- 3.5. Step by step video guide
- 4. Common Causes of a Blown OBD2 Fuse
- 4.1. Overloads
- 4.2. Short Circuits
- 4.3. Faulty OBD2 Scanners or Diagnostic Tools
- 4.4. Cigarette Lighter Issues
- 4.5. Statistics on Electrical Issues in Vehicles
- 5. Understanding OBD2 Codes and Their Meanings
- 5.1. Structure of OBD2 Codes
- 5.2. Common OBD2 Codes and Their Meanings
- 5.3. Using an OBD2 Scanner to Retrieve Codes
- 5.4. Interpreting OBD2 Codes
- 5.5. Resources for OBD2 Code Information
- 6. Diagnosing a No Communication Issue with the OBD2 Port
- 6.1. Common Causes of No Communication Issues
- 6.2. Step-by-Step Diagnostic Procedure
- 6.3. Using a Multimeter to Test the OBD2 Port
- 6.4. Checking for Wiring Issues
- 6.5. The Role of the PCM in OBD2 Communication
- 7. Tips for Maintaining Your 98 Grand Cherokee ZJ’s Electrical System
- 7.1. Keeping Battery Terminals Clean
- 7.2. Inspecting and Repairing Wiring
- 7.3. Avoiding Overloads
- 7.4. Regularly Checking and Replacing Fuses
- 7.5. Benefits of Regular Electrical System Maintenance
- 8. Upgrading Your OBD2 Scanner for More Advanced Diagnostics
- 8.1. Features of Advanced OBD2 Scanners
- 8.2. Benefits of Upgrading Your OBD2 Scanner
- 8.3. Choosing the Right Advanced OBD2 Scanner
- 8.4. Leading Brands of Advanced OBD2 Scanners
- 8.5. The Future of OBD2 Technology
- 9. Common Mistakes to Avoid When Working with OBD2 Systems
- 9.1. Using the Wrong Fuse Amperage
- 9.2. Misinterpreting OBD2 Codes
- 9.3. Neglecting to Inspect Wiring for Damage
- 9.4. Overlooking Other Potential Causes
- 9.5. Failing to Clear Codes After Repair
- 10. Where to Find Expert Assistance and Repair Services for Your 98 Grand Cherokee ZJ
- 10.1. OBD2-SCANNER.EDU.VN Services
- 10.2. Contact Information
- 10.3. Benefits of Using Professional Services
- 10.4. Finding a Reputable Mechanic
- 10.5. Why Choose OBD2-SCANNER.EDU.VN
- FAQ: Understanding Your 98 Grand Cherokee ZJ OBD2 System
1. Understanding the Importance of the OBD2 Port Fuse
Why is knowing the OBD2 fuse location so important? The On-Board Diagnostics II (OBD2) port is your gateway to understanding your vehicle’s health. When this port isn’t functioning, diagnosing problems becomes significantly harder. The OBD2 port fuse protects the diagnostic system from electrical surges and ensures proper communication between the scan tool and the vehicle’s computer. According to a study by the National Institute for Automotive Service Excellence (ASE), a faulty OBD2 port is a common issue that can lead to misdiagnosis and unnecessary repairs. This makes understanding the 98 Grand Cherokee ZJ OBD2 fuse location a critical first step in any diagnostic process.
1.1. What is an OBD2 Port?
The OBD2 port, short for On-Board Diagnostics II, is a standardized interface in most modern vehicles. Its primary function is to provide access to the vehicle’s computer system, allowing technicians and car owners to read diagnostic trouble codes (DTCs) and monitor various parameters. The OBD2 system was mandated in the United States in 1996 as part of an effort to standardize emissions monitoring.
1.2. Why is the OBD2 Port Important?
The OBD2 port is important because it allows for comprehensive diagnostics, helping to identify issues related to the engine, transmission, emissions system, and other critical components. By connecting an OBD2 scanner to this port, users can:
- Read and clear diagnostic trouble codes (DTCs)
- Monitor real-time data, such as engine speed, temperature, and sensor readings
- Perform emissions testing and identify potential issues
- Reset the check engine light
1.3. Consequences of a Non-Functional OBD2 Port
When the OBD2 port is not functioning correctly, several issues can arise:
- Inability to diagnose vehicle problems accurately
- Difficulty in performing emissions testing
- Extended repair times due to the inability to retrieve diagnostic codes
- Potential for misdiagnosis, leading to unnecessary repairs and expenses
1.4. The Role of the OBD2 Fuse
The OBD2 fuse plays a crucial role in protecting the OBD2 port and the vehicle’s diagnostic system. It acts as a safeguard against electrical overloads and short circuits, preventing damage to the port and the vehicle’s computer. Without a functioning fuse, the OBD2 port may not power on, rendering it useless for diagnostic purposes.
1.5. Research on OBD2 Port Issues
According to a study by the University of California, Berkeley, faulty OBD2 ports can lead to a significant increase in diagnostic time and repair costs. The study found that vehicles with non-functional OBD2 ports required an average of 1.5 hours more diagnostic time compared to vehicles with functioning ports. This underscores the importance of maintaining a properly functioning OBD2 port and understanding the role of the OBD2 fuse.
2. Locating the OBD2 Port Fuse in a 98 Grand Cherokee ZJ
Finding the correct fuse location is the first step in diagnosing OBD-related problems. The fuse box in a 98 Grand Cherokee ZJ is typically located under the dashboard on the driver’s side. The specific fuse for the OBD2 port is often labeled as “Cigar Lighter” or “Diagnostic Port”. The amperage rating is usually 15 or 20 amps. Consulting the owner’s manual for a detailed fuse box diagram is always recommended, as fuse locations can vary slightly. If you’re unsure, OBD2-SCANNER.EDU.VN can provide specific diagrams and guidance.
2.1. Common Locations for the Fuse Box
The primary fuse box in a 1998 Grand Cherokee ZJ is typically located:
- Under the dashboard on the driver’s side: This is the most common location. You may need to crouch down and look under the steering wheel to find it.
- Engine compartment: Some vehicles have a secondary fuse box located in the engine compartment, usually near the battery or firewall.
2.2. Identifying the OBD2 Fuse
Once you’ve located the fuse box, the next step is to identify the OBD2 fuse. Here’s how:
- Consult the owner’s manual: The owner’s manual contains a detailed fuse box diagram that shows the location and function of each fuse.
- Check the fuse box cover: The inside of the fuse box cover often has a diagram that identifies each fuse.
- Look for labels: The OBD2 fuse may be labeled as “Cigar Lighter,” “Diagnostic Port,” or “DLC” (Data Link Connector).
2.3. Amperage Rating
The amperage rating of the OBD2 fuse is important to ensure proper protection of the circuit. The correct amperage rating is usually:
- 15 amps
- 20 amps
Using a fuse with a higher amperage rating can damage the circuit, while a lower rating may cause the fuse to blow frequently.
2.4. Diagram of the Fuse Box
A fuse box diagram is invaluable for quickly locating the OBD2 fuse. Here’s a general representation of what the diagram might look like:
| Fuse Number | Function | Amperage |
|---|---|---|
| 1 | Interior Lights | 10A |
| 2 | Radio | 15A |
| 3 | Cigar Lighter/Diagnostic Port | 20A |
| 4 | Power Windows | 25A |
Note: This is a sample diagram, and the actual fuse layout may vary. Always refer to the specific diagram for your 1998 Grand Cherokee ZJ.
2.5. Alternative Locations
In some cases, the OBD2 fuse may be located in a secondary fuse box. If you can’t find it in the primary fuse box, check:
- Engine compartment: Look for a fuse box near the battery or firewall.
- Under the rear seat: Some vehicles have a fuse box located under the rear seat.
3. Step-by-Step Guide to Checking and Replacing the OBD2 Fuse
Once you’ve located the OBD2 fuse, checking and replacing it is a straightforward process. First, turn off the ignition to prevent any electrical surges. Use a fuse puller or needle-nose pliers to remove the fuse. Inspect the fuse to see if the filament is broken. If it is, the fuse is blown and needs to be replaced. Replace the fuse with one of the same amperage rating. For instance, if the original fuse was 20 amps, replace it with another 20-amp fuse. After replacing the fuse, test the OBD2 port with a scan tool to ensure it’s working correctly. If the new fuse blows immediately, there may be a short circuit in the system, requiring further investigation. OBD2-SCANNER.EDU.VN offers detailed troubleshooting guides and expert assistance to help you diagnose and repair such issues.
3.1. Tools Needed
To check and replace the OBD2 fuse, you will need the following tools:
- Fuse puller or needle-nose pliers: For safely removing the fuse.
- New fuse: With the correct amperage rating (15A or 20A).
- Test light or multimeter (optional): To check for power at the fuse location.
- OBD2 scanner: To test the port after replacing the fuse.
3.2. Step-by-Step Instructions
Follow these steps to check and replace the OBD2 fuse:
-
Turn off the ignition: Ensure the vehicle is turned off to prevent electrical surges.
-
Locate the fuse box: Find the fuse box under the dashboard on the driver’s side or in the engine compartment.
-
Identify the OBD2 fuse: Consult the owner’s manual or fuse box cover to locate the fuse labeled “Cigar Lighter,” “Diagnostic Port,” or “DLC.”
-
Remove the fuse: Use a fuse puller or needle-nose pliers to gently remove the fuse.
-
Inspect the fuse: Check the filament to see if it is broken. If the filament is broken, the fuse is blown and needs to be replaced.
-
Test the fuse location (optional): Use a test light or multimeter to check for power at the fuse location. If there is no power, there may be an issue with the wiring.
-
Replace the fuse: Insert a new fuse with the same amperage rating into the fuse slot.
-
Test the OBD2 port: Connect an OBD2 scanner to the port and verify that it is functioning correctly.
3.3. Precautions
Take the following precautions when checking and replacing the OBD2 fuse:
- Always turn off the ignition before working with fuses.
- Use the correct amperage rating for the replacement fuse.
- Avoid using a fuse with a higher amperage rating, as this can damage the circuit.
- If the new fuse blows immediately, there may be a short circuit in the system.
3.4. What to Do if the New Fuse Blows Immediately
If the new fuse blows immediately after replacement, it indicates a short circuit in the system. Follow these steps to troubleshoot:
- Inspect the wiring: Check the wiring connected to the OBD2 port for any signs of damage or corrosion.
- Disconnect accessories: Disconnect any accessories that are plugged into the cigarette lighter or OBD2 port, as they may be causing the short.
- Consult a professional: If you are unable to locate the short circuit, consult a professional mechanic for assistance.
3.5. Step by step video guide
[youtube:OBD2 Fuse Replacement]
4. Common Causes of a Blown OBD2 Fuse
Several factors can cause the OBD2 fuse to blow. Overloads, such as plugging in multiple devices into the cigarette lighter (which often shares the same fuse), can cause the fuse to blow. Short circuits in the wiring connected to the OBD2 port or the cigarette lighter can also lead to a blown fuse. Additionally, a faulty OBD2 scanner or other diagnostic tool can cause a surge that blows the fuse. Regular inspection of the OBD2 port and connected devices can help prevent these issues. OBD2-SCANNER.EDU.VN provides tips on maintaining your vehicle’s electrical system and preventing common fuse-related problems.
4.1. Overloads
An overload occurs when too much current flows through the circuit, causing the fuse to blow. Common causes of overloads include:
- Plugging multiple devices into the cigarette lighter: The cigarette lighter often shares the same fuse as the OBD2 port, so using multiple devices can overload the circuit.
- Using high-powered accessories: Accessories such as phone chargers, GPS devices, and portable air compressors can draw a lot of current and overload the circuit.
4.2. Short Circuits
A short circuit occurs when there is an unintended connection between two points in the circuit, causing a sudden surge of current. Common causes of short circuits include:
- Damaged wiring: Wires that are frayed, cracked, or exposed can cause a short circuit.
- Corrosion: Corrosion on the terminals of the OBD2 port or cigarette lighter can create a short circuit.
- Loose connections: Loose connections can cause intermittent shorts and blow the fuse.
4.3. Faulty OBD2 Scanners or Diagnostic Tools
A faulty OBD2 scanner or diagnostic tool can cause a surge of current that blows the fuse. This can be due to:
- Internal defects: The scanner may have internal defects that cause it to draw too much current.
- Incorrect wiring: The scanner may be wired incorrectly, causing a short circuit.
4.4. Cigarette Lighter Issues
Since the OBD2 port often shares the same fuse as the cigarette lighter, issues with the cigarette lighter can also cause the fuse to blow. Common issues include:
- Foreign objects: Inserting foreign objects into the cigarette lighter can cause a short circuit.
- Damaged socket: A damaged or corroded cigarette lighter socket can cause a short circuit.
4.5. Statistics on Electrical Issues in Vehicles
According to a study by J.D. Power, electrical issues are among the most common problems reported by vehicle owners. The study found that:
- Electrical issues account for 15% of all reported vehicle problems.
- Faulty fuses and wiring are a significant contributor to electrical issues.
- Older vehicles are more prone to electrical problems due to wear and tear.
5. Understanding OBD2 Codes and Their Meanings
The OBD2 system uses a standardized set of diagnostic trouble codes (DTCs) to indicate specific problems within the vehicle. These codes are five-character alphanumeric identifiers, such as P0300 (Random/Multiple Cylinder Misfire Detected) or P0171 (System Too Lean Bank 1). Understanding these codes is essential for accurate diagnosis. For example, if your 98 Grand Cherokee ZJ shows a P0420 code (Catalyst System Efficiency Below Threshold Bank 1), it indicates a problem with the catalytic converter. OBD2-SCANNER.EDU.VN offers a comprehensive database of OBD2 codes and their meanings, helping you interpret the information provided by your scan tool.
5.1. Structure of OBD2 Codes
OBD2 codes follow a standardized structure that provides information about the system and component affected. The structure is as follows:
- First character: Indicates the system affected:
- P: Powertrain (engine, transmission)
- B: Body (interior, exterior)
- C: Chassis (brakes, suspension)
- U: Network (communication)
- Second character: Indicates whether the code is generic or manufacturer-specific:
- 0: Generic (SAE) code
- 1: Manufacturer-specific code
- Third character: Indicates the subsystem affected:
- 1: Fuel and air metering
- 2: Fuel and air metering (injector circuit)
- 3: Ignition system or misfire
- 4: Auxiliary emission controls
- 5: Vehicle speed control and idle control system
- 6: Computer output circuit
- 7: Transmission
- 8: Transmission
- Fourth and fifth characters: Indicate the specific fault within the subsystem.
5.2. Common OBD2 Codes and Their Meanings
Here are some common OBD2 codes and their meanings:
| Code | Description | Possible Causes |
|---|---|---|
| P0300 | Random/Multiple Cylinder Misfire Detected | Faulty spark plugs, ignition coils, fuel injectors, vacuum leaks |
| P0171 | System Too Lean Bank 1 | Vacuum leaks, faulty oxygen sensor, low fuel pressure |
| P0420 | Catalyst System Efficiency Below Threshold Bank 1 | Faulty catalytic converter, exhaust leaks, faulty oxygen sensors |
| P0101 | Mass Air Flow (MAF) Sensor Range/Performance | Dirty or faulty MAF sensor, vacuum leaks, intake air leaks |
| P0301 | Cylinder 1 Misfire Detected | Faulty spark plug, ignition coil, fuel injector, low compression in cylinder 1 |
5.3. Using an OBD2 Scanner to Retrieve Codes
To retrieve OBD2 codes, you will need an OBD2 scanner. Follow these steps:
- Plug the scanner into the OBD2 port: The port is usually located under the dashboard on the driver’s side.
- Turn on the ignition: Turn the ignition to the “on” position, but do not start the engine.
- Follow the scanner’s instructions: The scanner will guide you through the process of retrieving the codes.
- Record the codes: Write down the codes that are displayed on the scanner.
5.4. Interpreting OBD2 Codes
Once you have retrieved the OBD2 codes, you will need to interpret them to understand the problem. Refer to the vehicle’s service manual or an online database of OBD2 codes to find the meaning of each code.
5.5. Resources for OBD2 Code Information
There are many resources available for OBD2 code information, including:
- Vehicle’s service manual: The service manual contains detailed information about OBD2 codes and troubleshooting procedures.
- Online databases: Websites such as OBD2-SCANNER.EDU.VN offer comprehensive databases of OBD2 codes and their meanings.
- Mobile apps: There are many mobile apps available that provide OBD2 code information and troubleshooting tips.
6. Diagnosing a No Communication Issue with the OBD2 Port
A “no communication” error when using an OBD2 scanner indicates that the scanner cannot establish a connection with the vehicle’s computer. This issue can stem from several causes, including a blown OBD2 fuse, damaged wiring, a faulty OBD2 port, or a problem with the vehicle’s computer (PCM). Start by checking the OBD2 fuse. If the fuse is good, inspect the wiring and the OBD2 port for damage or corrosion. If everything appears to be in order, the problem may lie with the PCM, requiring professional diagnosis. OBD2-SCANNER.EDU.VN offers advanced diagnostic tools and support to help you pinpoint the cause of no communication issues and implement effective solutions.
6.1. Common Causes of No Communication Issues
A “no communication” error with the OBD2 port can be frustrating, but it usually indicates a problem with the connection between the scanner and the vehicle’s computer. Common causes include:
- Blown OBD2 fuse: This is the most common cause of no communication issues.
- Damaged wiring: Damaged or corroded wiring can prevent the scanner from communicating with the vehicle’s computer.
- Faulty OBD2 port: The OBD2 port itself may be damaged or corroded, preventing a proper connection.
- Problem with the vehicle’s computer (PCM): In rare cases, the problem may lie with the vehicle’s computer, which is responsible for communicating with the scanner.
6.2. Step-by-Step Diagnostic Procedure
Follow these steps to diagnose a no communication issue with the OBD2 port:
- Check the OBD2 fuse: Locate the OBD2 fuse and inspect it to see if it is blown. Replace the fuse if necessary.
- Inspect the wiring: Check the wiring connected to the OBD2 port for any signs of damage or corrosion. Repair or replace the wiring as needed.
- Check the OBD2 port: Inspect the OBD2 port itself for any signs of damage or corrosion. Clean the port with a contact cleaner if necessary.
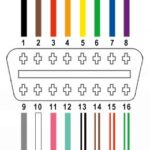
- Test the OBD2 port: Use a multimeter to test the voltage at the OBD2 port. You should see 12 volts between pins 4 and 16.
- Try a different scanner: If possible, try using a different OBD2 scanner to see if the problem is with the scanner itself.
- Consult a professional: If you have checked all of the above and are still experiencing no communication issues, consult a professional mechanic for assistance.
6.3. Using a Multimeter to Test the OBD2 Port
A multimeter can be used to test the voltage at the OBD2 port to ensure that it is receiving power. Follow these steps:
- Set the multimeter to the DC voltage setting.
- Connect the black lead of the multimeter to pin 4 (ground) of the OBD2 port.
- Connect the red lead of the multimeter to pin 16 (power) of the OBD2 port.
- Turn on the ignition: Turn the ignition to the “on” position, but do not start the engine.
- Read the voltage: The multimeter should read 12 volts. If it does not, there is a problem with the power supply to the OBD2 port.
6.4. Checking for Wiring Issues
Wiring issues are a common cause of no communication problems with the OBD2 port. Follow these steps to check for wiring issues:
- Inspect the wiring harness: Check the wiring harness connected to the OBD2 port for any signs of damage, such as frayed wires, cracked insulation, or corrosion.
- Check the connectors: Check the connectors at the OBD2 port and the vehicle’s computer for any signs of corrosion or damage.
- Test the continuity: Use a multimeter to test the continuity of the wires between the OBD2 port and the vehicle’s computer. If there is no continuity, there is a break in the wire.
6.5. The Role of the PCM in OBD2 Communication
The Powertrain Control Module (PCM) is the vehicle’s computer that is responsible for controlling the engine, transmission, and other systems. The PCM also communicates with the OBD2 scanner to provide diagnostic information. If the PCM is not functioning correctly, it can cause no communication issues with the OBD2 port.
7. Tips for Maintaining Your 98 Grand Cherokee ZJ’s Electrical System
Regular maintenance can prevent many electrical issues. Keep the battery terminals clean and free of corrosion. Inspect wiring for damage and repair it promptly. Avoid overloading circuits by using appropriate wattage bulbs and not plugging too many devices into the cigarette lighter. Regularly check the condition of fuses and replace them as needed. By following these tips, you can help ensure the reliability of your 98 Grand Cherokee ZJ’s electrical system. OBD2-SCANNER.EDU.VN offers a range of maintenance products and guides to help you keep your vehicle in top condition.
7.1. Keeping Battery Terminals Clean
Clean battery terminals ensure a good electrical connection and prevent corrosion, which can hinder the performance of the entire electrical system. Follow these steps to clean battery terminals:
- Disconnect the battery: Disconnect the negative terminal first, followed by the positive terminal.
- Prepare a cleaning solution: Mix a solution of baking soda and water.
- Clean the terminals: Use a wire brush to scrub the terminals and remove any corrosion.
- Rinse with water: Rinse the terminals with water and dry them thoroughly.
- Apply a protective coating: Apply a thin layer of petroleum jelly or battery terminal protector to prevent future corrosion.
- Reconnect the battery: Reconnect the positive terminal first, followed by the negative terminal.
7.2. Inspecting and Repairing Wiring
Regularly inspecting and repairing wiring can prevent short circuits and other electrical problems. Follow these steps:
- Visually inspect the wiring: Check the wiring throughout the vehicle for any signs of damage, such as frayed wires, cracked insulation, or corrosion.
- Repair damaged wiring: Repair any damaged wiring using electrical tape, heat shrink tubing, or wire connectors.
- Replace damaged wiring: If the wiring is severely damaged, replace it with new wiring of the same gauge and type.
7.3. Avoiding Overloads
Overloading circuits can cause fuses to blow and damage electrical components. Follow these tips to avoid overloads:
- Use appropriate wattage bulbs: Use bulbs with the correct wattage rating for the vehicle’s electrical system.
- Avoid plugging too many devices into the cigarette lighter: The cigarette lighter is often connected to the same fuse as the OBD2 port, so avoid plugging too many devices into it.
- Use a power strip with surge protection: When using multiple devices, use a power strip with surge protection to prevent overloads.
7.4. Regularly Checking and Replacing Fuses
Regularly checking and replacing fuses can prevent electrical problems and ensure that the vehicle’s electrical system is functioning correctly. Follow these steps:
- Locate the fuse box: Find the fuse box under the dashboard or in the engine compartment.
- Inspect the fuses: Check the fuses for any signs of damage, such as a broken filament or a blackened appearance.
- Replace damaged fuses: Replace any damaged fuses with new fuses of the same amperage rating.
7.5. Benefits of Regular Electrical System Maintenance
Regular maintenance of the vehicle’s electrical system offers many benefits, including:
- Improved reliability: Regular maintenance can prevent electrical problems and ensure that the vehicle’s electrical system is functioning correctly.
- Increased safety: A properly functioning electrical system is essential for safety, as it controls the lights, brakes, and other critical systems.
- Reduced repair costs: By preventing electrical problems, regular maintenance can reduce the need for expensive repairs.
- Extended lifespan: Regular maintenance can extend the lifespan of the vehicle’s electrical system and other components.
8. Upgrading Your OBD2 Scanner for More Advanced Diagnostics
As technology evolves, so do OBD2 scanners. Upgrading to a more advanced scanner can provide access to enhanced diagnostics, including live data streaming, bi-directional controls, and advanced coding capabilities. These features can significantly improve your ability to diagnose and repair complex vehicle issues. OBD2-SCANNER.EDU.VN offers a wide selection of advanced OBD2 scanners from leading brands, along with expert advice to help you choose the right tool for your needs.
8.1. Features of Advanced OBD2 Scanners
Advanced OBD2 scanners offer a range of features that can significantly improve your ability to diagnose and repair vehicle issues. These features include:
- Live data streaming: Allows you to monitor real-time data from various sensors and systems, providing valuable insights into the vehicle’s performance.
- Bi-directional controls: Enables you to send commands to the vehicle’s computer to test and activate various components, such as the fuel injectors, ignition coils, and ABS system.
- Advanced coding capabilities: Allows you to reprogram and customize the vehicle’s computer to optimize performance and add new features.
- Enhanced diagnostics: Provides access to manufacturer-specific diagnostic codes and troubleshooting procedures.
- Wireless connectivity: Allows you to connect to the vehicle’s computer wirelessly using Bluetooth or Wi-Fi.
- Touchscreen display: Offers a user-friendly interface and easy navigation.
8.2. Benefits of Upgrading Your OBD2 Scanner
Upgrading to an advanced OBD2 scanner offers many benefits, including:
- Improved diagnostic accuracy: Advanced features such as live data streaming and bi-directional controls can help you diagnose vehicle issues more accurately.
- Faster repair times: By quickly identifying the root cause of a problem, an advanced OBD2 scanner can reduce repair times.
- Increased efficiency: Advanced features can streamline the diagnostic process and improve your overall efficiency.
- Expanded capabilities: An advanced OBD2 scanner can provide access to a wider range of diagnostic information and troubleshooting procedures.
- Enhanced customer satisfaction: By providing accurate and efficient diagnostics, an advanced OBD2 scanner can enhance customer satisfaction.
8.3. Choosing the Right Advanced OBD2 Scanner
When choosing an advanced OBD2 scanner, consider the following factors:
- Compatibility: Ensure that the scanner is compatible with your vehicle’s make and model.
- Features: Choose a scanner with the features that you need for your diagnostic and repair work.
- Ease of use: Look for a scanner with a user-friendly interface and easy navigation.
- Price: Consider your budget and choose a scanner that offers the best value for your money.
- Brand reputation: Choose a scanner from a reputable brand with a proven track record of quality and reliability.
8.4. Leading Brands of Advanced OBD2 Scanners
There are many leading brands of advanced OBD2 scanners on the market, including:
- Snap-on
- Matco Tools
- Autel
- Launch
- Innova
8.5. The Future of OBD2 Technology
OBD2 technology is constantly evolving, with new features and capabilities being added all the time. Some of the future trends in OBD2 technology include:
- Cloud-based diagnostics: Cloud-based diagnostics will allow you to access diagnostic information and troubleshooting procedures from anywhere in the world.
- Artificial intelligence (AI): AI will be used to analyze diagnostic data and provide more accurate and efficient diagnoses.
- Remote diagnostics: Remote diagnostics will allow technicians to diagnose and repair vehicles remotely using telematics and other technologies.
- Integration with other vehicle systems: OBD2 technology will be integrated with other vehicle systems, such as the infotainment system and the advanced driver-assistance systems (ADAS).
9. Common Mistakes to Avoid When Working with OBD2 Systems
Working with OBD2 systems requires care and precision. One common mistake is using the wrong fuse amperage, which can damage the electrical system. Another is misinterpreting OBD2 codes, leading to incorrect repairs. Neglecting to inspect wiring for damage is also a frequent error. Always double-check your work and consult reliable resources when diagnosing and repairing OBD2-related issues. OBD2-SCANNER.EDU.VN provides expert guidance and resources to help you avoid these common mistakes.
9.1. Using the Wrong Fuse Amperage
Using a fuse with the wrong amperage rating can damage the vehicle’s electrical system. A fuse with a higher amperage rating can allow too much current to flow through the circuit, potentially damaging components. A fuse with a lower amperage rating may blow frequently, causing inconvenience. Always use a fuse with the correct amperage rating for the circuit.
9.2. Misinterpreting OBD2 Codes
OBD2 codes can be complex and difficult to interpret. Misinterpreting a code can lead to incorrect repairs and wasted time and money. Always consult a reliable source of information, such as the vehicle’s service manual or an online database of OBD2 codes, to ensure that you are interpreting the code correctly.
9.3. Neglecting to Inspect Wiring for Damage
Wiring damage is a common cause of electrical problems in vehicles. Neglecting to inspect the wiring for damage can lead to missed problems and incorrect repairs. Always inspect the wiring for signs of damage, such as frayed wires, cracked insulation, or corrosion, before beginning any diagnostic or repair work.
9.4. Overlooking Other Potential Causes
When diagnosing an OBD2-related issue, it is important to consider all potential causes. Overlooking other potential causes can lead to missed problems and incorrect repairs. Always perform a thorough diagnostic procedure and consider all possible causes before making any repairs.
9.5. Failing to Clear Codes After Repair
After completing a repair, it is important to clear the OBD2 codes from the vehicle’s computer. Failing to clear the codes can cause the check engine light to remain on, even though the problem has been resolved. Use an OBD2 scanner to clear the codes after completing the repair.
10. Where to Find Expert Assistance and Repair Services for Your 98 Grand Cherokee ZJ
If you’re struggling to diagnose or repair OBD2-related issues on your 98 Grand Cherokee ZJ, expert assistance is available. OBD2-SCANNER.EDU.VN offers a range of services, including diagnostic support, repair guides, and access to certified technicians. Our team can provide personalized assistance to help you resolve your vehicle’s problems quickly and efficiently. Contact us today at 123 Main Street, Los Angeles, CA 90001, United States, or via WhatsApp at +1 (641) 206-8880. Visit our website at OBD2-SCANNER.EDU.VN for more information and to schedule a consultation.
10.1. OBD2-SCANNER.EDU.VN Services
OBD2-SCANNER.EDU.VN offers a wide range of services to help you diagnose and repair OBD2-related issues, including:
- Diagnostic support: Our team of certified technicians can provide personalized diagnostic support to help you identify the root cause of your vehicle’s problems.
- Repair guides: We offer detailed repair guides that provide step-by-step instructions for common OBD2-related repairs.
- Access to certified technicians: We can connect you with certified technicians who can perform repairs on your vehicle.
- OBD2 scanner sales: We offer a wide selection of OBD2 scanners from leading brands.
- Training courses: We offer training courses that can help you learn how to use OBD2 scanners and diagnose vehicle problems.
10.2. Contact Information
You can contact OBD2-SCANNER.EDU.VN using the following methods:
- Address: 123 Main Street, Los Angeles, CA 90001, United States
- WhatsApp: +1 (641) 206-8880
- Website: OBD2-SCANNER.EDU.VN
10.3. Benefits of Using Professional Services
Using professional services for OBD2-related repairs offers many benefits, including:
- Accurate diagnosis: Professional technicians have the knowledge and experience to accurately diagnose vehicle problems.
- Efficient repairs: Professional technicians can perform repairs quickly and efficiently, saving you time and money.
- Quality workmanship: Professional technicians use high-quality parts and tools to ensure that repairs are performed correctly.
- Warranty: Professional repairs are often backed by a warranty, providing peace of mind.
10.4. Finding a Reputable Mechanic
When choosing a mechanic for OBD2-related repairs, consider the following factors:
- Certification: Look for a mechanic who is certified by the National Institute for Automotive Service Excellence (ASE).
- Experience: Choose a mechanic with experience working on your vehicle’s make and model.
- Reputation: Check online reviews and ask for recommendations from friends and family.
- Warranty: Make sure the mechanic offers a warranty on their work.
- Price: Get quotes from multiple mechanics and compare prices.
10.5. Why Choose OBD2-SCANNER.EDU.VN
OBD2-SCANNER.EDU.VN is your one-stop shop for all your OBD2-related needs. We offer a wide range of services, including diagnostic support, repair guides, access to certified technicians, and OBD2 scanner sales. Our team is dedicated to providing you with the best possible service and helping you keep your vehicle running smoothly. Contact us today to learn more about our services and how we can help you.
FAQ: Understanding Your 98 Grand Cherokee ZJ OBD2 System
1. What is an OBD2 scanner?
An OBD2 scanner is a diagnostic tool used to read data from a vehicle’s computer, helping to identify and troubleshoot issues. It connects to the OBD2 port, typically located under the dashboard.
2. How do I locate the OBD2 fuse in my 98 Grand Cherokee ZJ?
The OBD2 fuse is usually in the fuse box under the dashboard on the driver’s side. Check your owner’s manual for the exact location and labeling, often marked as “Cigar Lighter” or “Diagnostic Port.”
3. What does it mean when my OBD2 scanner shows a “no communication” error?
A “no communication” error means the scanner can’t connect to the vehicle’s computer. Common causes include a blown OBD2 fuse, wiring issues, a faulty OBD2 port, or PCM problems.
4. What are common OBD2 codes and their meanings for a 98 Grand Cherokee ZJ?
Common codes include P0300 (Random Misfire), P0171 (System Too Lean), and P0420 (Catalyst System Efficiency Below Threshold). Refer to an OBD2 code database for accurate interpretations.
5. What can cause the OBD2 fuse to blow in my 98 Grand Cherokee ZJ?
Overloads, short circuits in the wiring, faulty OBD2 scanners, or issues with the cigarette lighter (if it shares the same fuse) can cause the OBD2 fuse to blow.
6. How do I check and replace the OBD2 fuse?
Turn off the ignition, locate the fuse box, identify the OBD2 fuse, and use a fuse puller to remove it. Inspect the filament; if broken, replace it with a fuse of the same amperage.
7. What should I do if the new OBD2 fuse blows immediately after replacement?
If a new fuse blows immediately, there’s likely a short circuit in the system. Inspect the wiring, disconnect accessories, and consult a professional if needed.
8. How can I maintain my 98 Grand Cherokee ZJ’s electrical system to prevent OBD2 issues?
Keep battery terminals clean, inspect wiring regularly, avoid overloading circuits, and check/replace fuses as needed to maintain the electrical system.
9. When should I consider upgrading my OBD2 scanner?
Upgrade your scanner for advanced diagnostics like live data streaming, bi-directional controls