Navigating car diagnostics becomes effortless with Can Obd2 Code Reader Instructions provided by OBD2-SCANNER.EDU.VN, your reliable source for automotive solutions, offering a step-by-step guide, which empowers car owners and automotive technicians to accurately diagnose vehicle issues using OBD2 scanners and ensures efficient repairs with the right resources. Learn how to effectively use your scan tool, interpret diagnostic trouble codes (DTCs), and perform necessary maintenance with this comprehensive guide and enhance your diagnostic capabilities by consulting our detailed resources on OBD2-SCANNER.EDU.VN.
Contents
- 1. Understanding the OBD2 Port and Scanner Connection
- 1.1. Locating the OBD2 Port
- 1.2. Connecting the OBD2 Scanner
- 1.3. Powering Up the Scanner
- 2. Navigating the OBD2 Scanner Menu
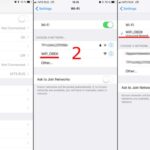
- 2.1. Common Menu Options
- 2.2. Using Scanner Buttons
- 2.3. Advanced Scanner Features
- 3. Interpreting Diagnostic Trouble Codes (DTCs)
- 3.1. Structure of a DTC
- 3.2. Example DTC Interpretation
- 3.3. Resources for Decoding DTCs
- 4. Performing Basic Diagnostics with an OBD2 Scanner
- 4.1. Reading and Recording DTCs
- 4.2. Interpreting Freeze Frame Data
- 4.3. Using Live Data for Real-Time Monitoring
- 5. Clearing Diagnostic Trouble Codes (DTCs)
- 5.1. When to Clear Codes
- 5.2. Steps to Clear Codes
- 5.3. Potential Consequences of Clearing Codes Without Repair
- 6. Understanding I/M Readiness Monitors
- 6.1. What are I/M Readiness Monitors?
- 6.2. Interpreting I/M Readiness Status
- 6.3. Using I/M Readiness for Smog Checks
- 7. Saving Money on Auto Repairs with OBD2 Scanners
- 7.1. Identifying Potential Issues Early
- 7.2. Diagnosing Check Engine Light Issues
- 7.3. Performing DIY Repairs
- 7.4. Ensuring Smog Check Readiness
- 8. Choosing the Right OBD2 Scanner
- 8.1. Basic Code Readers
- 8.2. Mid-Range Scanners
- 8.3. Advanced Diagnostic Tools
- 8.4. Features to Consider
- 9. Common OBD2 Codes and Their Meanings
- 10. Advanced Diagnostic Procedures
- 10.1. Performing System Tests
- 10.2. Using a Multimeter
- 10.3. Performing a Compression Test
- 10.4. Using a Smoke Machine
- 11. Maintaining Your OBD2 Scanner
- 11.1. Keeping Software Updated
- 11.2. Cleaning and Storing the Scanner
- 11.3. Replacing Cables and Connectors
- 12. Utilizing OBD2 Scanner Apps on Smartphones
- 12.1. Benefits of Using OBD2 Scanner Apps
- 12.2. Popular OBD2 Scanner Apps
- 12.3. Connecting the Adapter to Your Smartphone
- 13. Safety Precautions When Using an OBD2 Scanner
- 13.1. Working in a Safe Environment
- 13.2. Disconnecting the Battery
- 13.3. Using Protective Gear
- 13.4. Avoiding Distractions
- 14. The Future of OBD2 Technology
- 14.1. OBD3 and Enhanced Diagnostics
- 14.2. Telematics Integration
- 14.3. Cloud Connectivity
- 14.4. Artificial Intelligence (AI)
- 15. Frequently Asked Questions (FAQ) About OBD2 Scanners
1. Understanding the OBD2 Port and Scanner Connection
The OBD2 (On-Board Diagnostics II) port serves as the universal connection point for diagnostic tools in modern vehicles. According to a study by the Society of Automotive Engineers (SAE) in 1996, all cars and light trucks sold in the United States have been required to have an OBD2 system, which provides standardized access to vehicle health information. Connecting an OBD2 scanner is a straightforward process that involves locating the OBD2 port and correctly attaching the scanner to begin the diagnostic process.
1.1. Locating the OBD2 Port
The OBD2 port is typically found under the dashboard on the driver’s side. In most vehicles, this 16-pin trapezoidal connector is easily accessible. However, its exact location can vary.
- Common Locations: Usually under the driver’s side dashboard.
- Alternative Locations: In some models, it may be located in the center console or under the passenger side of the dash.
1.2. Connecting the OBD2 Scanner
Connecting the OBD2 scanner is a simple process. Ensure the ignition is off before proceeding.
- Step 1: Ensure the ignition is off.
- Step 2: Match the trapezoidal shape of the scanner’s plug with the OBD2 port and gently push them together. A slight wiggle might be necessary to fully seat the connectors.
- Step 3: Turn the ignition to the “ON” position without starting the engine. The OBD2 port will power up the scan tool in most cases.
- Step 4: Wait for the device to finish its boot sequence.
The scan tool will then guide you through any additional information required, such as engine size or VIN number.
1.3. Powering Up the Scanner
The OBD2 port typically provides power to the scanner once the ignition is turned to the “ON” position.
- Power Source: The OBD2 port supplies power to the scanner.
- Boot Sequence: Wait for the scanner to complete its boot sequence before proceeding.
- Additional Information: The scanner may request additional information such as the vehicle’s VIN or engine size.
2. Navigating the OBD2 Scanner Menu
Once the OBD2 scanner is connected and powered on, navigating the menu is essential to performing diagnostics. The menu options can vary based on whether you have a basic code reader or an advanced diagnostic tool. The EPA (Environmental Protection Agency) requires that all OBD2 systems provide standardized diagnostic information, which ensures a baseline of functionality across different scanners.
2.1. Common Menu Options
OBD2 scanners typically include several standard menu options:
- Read Codes: Displays diagnostic trouble codes (DTCs) and brief descriptions of the faults.
- Erase Codes: Clears stored DTCs and resets the vehicle’s computer.
- Live Data: Provides real-time sensor readings, allowing you to monitor various parameters.
- Freeze Frame: Captures specific data parameters at the time a DTC was set.
- Vehicle Info: Displays vehicle-specific information such as the VIN.
- I/M Readiness: Shows the status of emission-related systems, indicating readiness for smog testing.
2.2. Using Scanner Buttons
Scanners are equipped with buttons to navigate the menu and make selections.
- Arrow Buttons: Used to scroll through menu options.
- Enter Button: Used to select a menu option.
- Back Button: Used to return to the previous menu.
2.3. Advanced Scanner Features
Advanced scanners offer additional features:
- System Tests: Perform specific tests on vehicle systems.
- Data Logging: Record live data for later analysis.
- Software Updates: Keep the scanner updated with the latest vehicle information and diagnostic capabilities.
3. Interpreting Diagnostic Trouble Codes (DTCs)
Diagnostic Trouble Codes (DTCs) are alphanumeric codes that indicate specific issues within the vehicle. According to research published in the SAE International Journal of Vehicle Dynamics, understanding DTCs is crucial for accurate diagnostics and effective repairs. The codes are structured to provide specific information about the system and nature of the problem.
3.1. Structure of a DTC
A DTC consists of one letter followed by four numbers (e.g., P0301).
- First Letter: Indicates the system affected.
- P: Powertrain (engine, transmission, fuel system)
- B: Body (airbags, interior-related problems)
- C: Chassis (suspension, power steering)
- U: Network (communication issues)
- First Number: Indicates whether the code is generic or manufacturer-specific.
- 0: Generic code (applies to all manufacturers)
- 1: Manufacturer-specific code
- Second Number: Identifies the subsystem.
- 1: Fuel and air metering
- 2: Fuel and air metering (injector circuit)
- 3: Ignition system or misfire
- 4: Auxiliary emission controls
- 5: Vehicle speed control or idle system
- 7, 8, 9: Transmission-related codes
- A, B, C: Hybrid-specific codes
- Third and Fourth Numbers: Provide further details about the specific fault.
3.2. Example DTC Interpretation
For example, the code P0301 indicates a powertrain-related issue (P), is a generic code (0), involves the ignition system or a misfire (3), and specifies a cylinder #1 misfire (01).
3.3. Resources for Decoding DTCs
Several resources are available to help decode DTCs:
- OBD2-SCANNER.EDU.VN: Offers a comprehensive database of DTCs with detailed descriptions and possible causes.
- Online Databases: Websites and forums dedicated to OBD2 codes.
- Repair Manuals: Provide detailed information on DTCs specific to the vehicle make and model.
4. Performing Basic Diagnostics with an OBD2 Scanner
Using an OBD2 scanner for basic diagnostics can help identify potential issues before they become major problems. Regular diagnostic checks can save money and extend the life of your vehicle. A study by the National Institute for Automotive Service Excellence (ASE) highlights the importance of preventive maintenance in reducing repair costs.
4.1. Reading and Recording DTCs
The first step in performing diagnostics is to read and record any DTCs present.
- Connect the Scanner: Plug the OBD2 scanner into the OBD2 port.
- Turn on Ignition: Turn the ignition to the “ON” position without starting the engine.
- Select “Read Codes”: Navigate to the “Read Codes” option in the scanner menu.
- Record DTCs: Write down all DTCs displayed, including their descriptions.
4.2. Interpreting Freeze Frame Data
Freeze Frame data captures specific parameters at the time a DTC was set. This information can be invaluable in diagnosing intermittent issues.
- Access Freeze Frame: Select the “Freeze Frame” option in the scanner menu.
- Review Parameters: Note the engine speed, coolant temperature, and other relevant data.
- Analyze Data: Use the data to understand the conditions under which the fault occurred.
4.3. Using Live Data for Real-Time Monitoring
Live Data allows you to monitor sensor readings in real-time, helping you identify issues that may not trigger a DTC.
- Select “Live Data”: Navigate to the “Live Data” option in the scanner menu.
- Choose Parameters: Select the parameters you want to monitor (e.g., O2 sensor voltage, engine RPM).
- Monitor Readings: Observe the readings as the engine runs, looking for anomalies or out-of-range values.
5. Clearing Diagnostic Trouble Codes (DTCs)
Clearing DTCs is a common task performed with an OBD2 scanner. However, it should be done with caution. According to automotive diagnostic experts at Delphi Automotive, understanding the underlying issue before clearing codes is essential to prevent recurring problems.
5.1. When to Clear Codes
Only clear DTCs after you have:
- Diagnosed the Issue: Identified and resolved the underlying problem causing the DTC.
- Verified the Repair: Confirmed that the repair has corrected the issue.
- Documented the Codes: Recorded all DTCs for future reference.
5.2. Steps to Clear Codes
To clear DTCs:
- Connect the Scanner: Plug the OBD2 scanner into the OBD2 port.
- Turn on Ignition: Turn the ignition to the “ON” position without starting the engine.
- Select “Erase Codes”: Navigate to the “Erase Codes” option in the scanner menu.
- Confirm Selection: Follow the prompts to confirm that you want to clear the codes.
- Verify Clearing: After clearing the codes, read the codes again to ensure no DTCs are present.
5.3. Potential Consequences of Clearing Codes Without Repair
Clearing codes without addressing the underlying issue can lead to:
- Recurring Issues: The DTC will likely reappear.
- Failed Inspections: The vehicle may fail emissions testing if the underlying issue persists.
- Further Damage: Ignoring the problem can lead to more severe damage to the vehicle.
6. Understanding I/M Readiness Monitors
I/M Readiness monitors (Inspection and Maintenance Readiness) are indicators that show whether the vehicle’s emission control systems have been tested and are ready for a smog check. The California Air Resources Board (CARB) emphasizes the importance of I/M Readiness for ensuring vehicles meet emission standards.
6.1. What are I/M Readiness Monitors?
I/M Readiness monitors indicate the status of various emission-related systems:
- Catalyst Monitor: Checks the efficiency of the catalytic converter.
- Oxygen Sensor Monitor: Tests the performance of the oxygen sensors.
- Evaporative System Monitor: Evaluates the integrity of the evaporative emissions system.
- EGR System Monitor: Verifies the operation of the exhaust gas recirculation system.
- Secondary Air System Monitor: Checks the functionality of the secondary air injection system.
6.2. Interpreting I/M Readiness Status
The I/M Readiness status can be:
- Ready: The system has been tested and passed.
- Not Ready: The system has not been tested or has failed.
- Not Supported: The system is not monitored on this vehicle.
6.3. Using I/M Readiness for Smog Checks
Before taking your vehicle for a smog check, use the OBD2 scanner to check the I/M Readiness status. Ensure that all monitors are “Ready” or “Not Supported”. If any monitors are “Not Ready,” you may need to drive the vehicle to allow the system to complete its testing cycle.
7. Saving Money on Auto Repairs with OBD2 Scanners
Using an OBD2 scanner can lead to significant savings on auto repairs. According to a survey by Consumer Reports, vehicle owners who perform their own diagnostic checks and minor repairs save an average of $300 per year.
7.1. Identifying Potential Issues Early
Regularly scanning your vehicle for DTCs can help identify potential issues before they escalate into major problems. Early detection allows you to address minor issues before they cause more extensive and costly damage.
7.2. Diagnosing Check Engine Light Issues
The Check Engine Light (CEL) can indicate a wide range of issues, from minor problems like a loose gas cap to more serious issues like a faulty catalytic converter. An OBD2 scanner can quickly identify the cause of the CEL, allowing you to take appropriate action.
7.3. Performing DIY Repairs
With the information provided by an OBD2 scanner, you can perform many DIY repairs, saving on labor costs. Simple repairs such as replacing a faulty oxygen sensor or tightening a loose gas cap can be easily performed at home.
7.4. Ensuring Smog Check Readiness
By checking the I/M Readiness monitors before a smog check, you can avoid costly retests and repairs. Addressing any issues that prevent the monitors from setting to “Ready” can save time and money.
8. Choosing the Right OBD2 Scanner
Selecting the appropriate OBD2 scanner depends on your needs and budget. There are several types of scanners available, ranging from basic code readers to advanced diagnostic tools. A study by J.D. Power found that user satisfaction with OBD2 scanners is closely linked to the scanner’s features and ease of use.
8.1. Basic Code Readers
- Functionality: Read and clear DTCs.
- Cost: Typically inexpensive, ranging from $20 to $50.
- Ideal For: Car owners who want to quickly diagnose and clear basic issues.
8.2. Mid-Range Scanners
- Functionality: Read and clear DTCs, display live data, access freeze frame data, and perform basic system tests.
- Cost: Moderately priced, ranging from $50 to $200.
- Ideal For: DIY enthusiasts and mechanics who need more advanced diagnostic capabilities.
8.3. Advanced Diagnostic Tools
- Functionality: Read and clear DTCs, display live data, access freeze frame data, perform advanced system tests, data logging, and software updates.
- Cost: Expensive, ranging from $200 to $1000+.
- Ideal For: Professional mechanics and serious DIYers who need comprehensive diagnostic capabilities.
8.4. Features to Consider
- Compatibility: Ensure the scanner is compatible with your vehicle’s make and model.
- Ease of Use: Look for a scanner with an intuitive interface and clear instructions.
- Update Capability: Choose a scanner that can be updated with the latest vehicle information and diagnostic capabilities.
- Connectivity: Some scanners offer Bluetooth or Wi-Fi connectivity for transferring data to a computer or smartphone.
9. Common OBD2 Codes and Their Meanings
Understanding common OBD2 codes can help you quickly identify and address vehicle issues. Here are some frequent codes and their typical meanings:
| Code | Description | Possible Causes |
|---|---|---|
| P0171 | System Too Lean (Bank 1) | Vacuum leak, faulty O2 sensor, dirty MAF sensor |
| P0174 | System Too Lean (Bank 2) | Vacuum leak, faulty O2 sensor, dirty MAF sensor |
| P0300 | Random Misfire Detected | Faulty spark plugs, ignition coils, fuel injectors |
| P0301 | Cylinder 1 Misfire Detected | Faulty spark plug, ignition coil, fuel injector |
| P0420 | Catalyst System Efficiency Below Threshold (Bank 1) | Faulty catalytic converter, O2 sensor issue |
| P0442 | Evaporative Emission Control System Leak Detected (Small Leak) | Loose gas cap, faulty EVAP system component |
| P0455 | Evaporative Emission Control System Leak Detected (Gross Leak) | Loose gas cap, faulty EVAP system component |
These are just a few examples, and many other OBD2 codes can indicate various issues. Always consult a reliable source, such as OBD2-SCANNER.EDU.VN, for detailed information on specific codes.
10. Advanced Diagnostic Procedures
For more complex issues, advanced diagnostic procedures may be necessary. These procedures often require specialized tools and a deeper understanding of vehicle systems. Automotive technology experts at Bosch recommend continuous training and education to stay current with advanced diagnostic techniques.
10.1. Performing System Tests
Advanced OBD2 scanners can perform system tests to evaluate the performance of specific components. Examples include:
- Oxygen Sensor Test: Checks the response time and voltage output of the oxygen sensors.
- EGR System Test: Verifies the operation of the exhaust gas recirculation system.
- Fuel Injector Test: Evaluates the performance of the fuel injectors.
10.2. Using a Multimeter
A multimeter is an essential tool for diagnosing electrical issues. It can be used to measure voltage, current, and resistance, helping you identify faulty wiring, sensors, and components.
10.3. Performing a Compression Test
A compression test measures the pressure within each cylinder, indicating the condition of the piston rings, valves, and cylinder head. Low compression can indicate serious engine problems.
10.4. Using a Smoke Machine
A smoke machine injects smoke into the vehicle’s intake or exhaust system, helping you identify leaks. This is particularly useful for diagnosing vacuum leaks and EVAP system leaks.
11. Maintaining Your OBD2 Scanner
Proper maintenance of your OBD2 scanner ensures it remains accurate and reliable. Regular updates and proper storage can extend the life of your scanner. According to a study by the Equipment Service Association (ESA), preventive maintenance of diagnostic tools reduces downtime and improves accuracy.
11.1. Keeping Software Updated
Regularly update your scanner’s software to ensure it has the latest vehicle information and diagnostic capabilities. Software updates often include:
- New Vehicle Coverage: Support for new makes and models.
- DTC Updates: Information on new diagnostic trouble codes.
- Bug Fixes: Corrections to software issues.
11.2. Cleaning and Storing the Scanner
Keep your scanner clean and store it in a safe place when not in use.
- Cleaning: Use a soft, dry cloth to clean the scanner’s screen and buttons.
- Storage: Store the scanner in its case or a protected area to prevent damage.
11.3. Replacing Cables and Connectors
Inspect the scanner’s cables and connectors regularly for damage. Replace any damaged cables or connectors to ensure a reliable connection.
12. Utilizing OBD2 Scanner Apps on Smartphones
Smartphone apps have expanded the capabilities of OBD2 scanners. These apps connect to the vehicle via a Bluetooth or Wi-Fi OBD2 adapter, turning your smartphone into a powerful diagnostic tool. A report by the Automotive Aftermarket Suppliers Association (AASA) indicates a growing trend in the use of smartphone-based diagnostic tools.
12.1. Benefits of Using OBD2 Scanner Apps
- Portability: Use your smartphone as a diagnostic tool.
- Real-Time Data: View live data and DTCs on your smartphone screen.
- Data Logging: Record and analyze data on your smartphone.
- Cost-Effective: OBD2 adapters are often less expensive than dedicated scanners.
12.2. Popular OBD2 Scanner Apps
- Torque Pro: Offers real-time data, DTC reading, and customizable dashboards.
- OBD Auto Doctor: Provides comprehensive diagnostic information and supports multiple languages.
- DashCommand: Displays vehicle data in an attractive and customizable interface.
- Carista OBD2: Offers advanced diagnostics and customization options for specific vehicle makes.
12.3. Connecting the Adapter to Your Smartphone
- Plug in the Adapter: Plug the OBD2 adapter into the OBD2 port.
- Pair with Smartphone: Enable Bluetooth or Wi-Fi on your smartphone and pair it with the adapter.
- Launch the App: Open the OBD2 scanner app and follow the instructions to connect to the adapter.
13. Safety Precautions When Using an OBD2 Scanner
When using an OBD2 scanner, safety should always be a priority. Following safety precautions protects you and prevents damage to the vehicle. The National Highway Traffic Safety Administration (NHTSA) emphasizes the importance of safe diagnostic and repair practices.
13.1. Working in a Safe Environment
- Ventilation: Work in a well-ventilated area to avoid exposure to harmful fumes.
- Lighting: Ensure adequate lighting to see clearly and avoid accidents.
- Clear Space: Keep the work area clear of clutter and obstructions.
13.2. Disconnecting the Battery
- Electrical Work: Disconnect the battery before performing any electrical work to prevent short circuits.
- Procedure: Disconnect the negative terminal first, followed by the positive terminal.
13.3. Using Protective Gear
- Gloves: Wear gloves to protect your hands from chemicals and sharp objects.
- Eye Protection: Use safety glasses or goggles to protect your eyes from debris and fluids.
13.4. Avoiding Distractions
- Focus: Concentrate on the task at hand and avoid distractions.
- Phone Use: Refrain from using your phone while performing diagnostics or repairs.
14. The Future of OBD2 Technology
OBD2 technology continues to evolve, with new features and capabilities being introduced. The integration of telematics, cloud connectivity, and artificial intelligence is transforming the diagnostic landscape. According to a report by McKinsey & Company, connected car technologies are expected to revolutionize the automotive industry.
14.1. OBD3 and Enhanced Diagnostics
OBD3, the next generation of on-board diagnostics, will likely include enhanced monitoring capabilities and real-time reporting of emissions data. This will enable more proactive identification and resolution of vehicle issues.
14.2. Telematics Integration
Telematics systems, which combine telecommunications and informatics, are being integrated with OBD2 systems to provide remote diagnostics and vehicle health monitoring. This allows for predictive maintenance and proactive service alerts.
14.3. Cloud Connectivity
Cloud connectivity enables OBD2 data to be stored and analyzed in the cloud, providing valuable insights into vehicle performance and maintenance needs. This allows for more accurate diagnostics and personalized recommendations.
14.4. Artificial Intelligence (AI)
AI is being used to analyze OBD2 data and identify patterns and anomalies that may indicate potential issues. AI-powered diagnostic tools can provide more accurate and efficient diagnostics, reducing the time and cost of repairs.
15. Frequently Asked Questions (FAQ) About OBD2 Scanners
Here are some frequently asked questions about OBD2 scanners:
1. What is an OBD2 scanner?
An OBD2 scanner is a diagnostic tool used to read and interpret data from a vehicle’s on-board diagnostic system, helping to identify potential issues and troubleshoot problems.
2. How do I connect an OBD2 scanner to my car?
Locate the OBD2 port, usually under the dashboard on the driver’s side, and plug the scanner into the port. Turn the ignition to the “ON” position without starting the engine, and wait for the scanner to power up.
3. Can I use an OBD2 scanner on any car?
OBD2 scanners are compatible with most cars and light trucks sold in the United States after 1996, as well as many vehicles sold in other countries.
4. What do the different codes on an OBD2 scanner mean?
OBD2 codes are alphanumeric codes that indicate specific issues within the vehicle. The first letter indicates the system affected (e.g., P for Powertrain, B for Body, C for Chassis, U for Network), and the numbers provide further details about the fault.
5. Is it safe to clear OBD2 codes?
It is generally safe to clear OBD2 codes after you have diagnosed and resolved the underlying issue causing the code. Clearing codes without addressing the problem can lead to recurring issues and potential damage.
6. How often should I use an OBD2 scanner?
You should use an OBD2 scanner whenever the Check Engine Light comes on or if you notice any unusual symptoms or performance issues with your vehicle. Regular diagnostic checks can help identify potential problems early.
7. Can an OBD2 scanner tell me what is wrong with my car?
An OBD2 scanner can provide diagnostic trouble codes (DTCs) that indicate potential issues with your vehicle. These codes can help you identify the source of the problem and take appropriate action.
8. What is I/M readiness?
I/M Readiness (Inspection and Maintenance Readiness) monitors indicate the status of various emission-related systems, showing whether they have been tested and are ready for a smog check.
9. Do I need a special OBD2 scanner for my car?
While most OBD2 scanners are compatible with a wide range of vehicles, some scanners may offer additional features or capabilities specific to certain makes or models.
10. Can I use an OBD2 scanner while driving?
It is not recommended to use an OBD2 scanner while driving, as it can be a distraction and compromise safety. It is best to perform diagnostic checks when the vehicle is stationary and in a safe location.
Using can OBD2 code reader instructions empowers you to diagnose and resolve vehicle issues efficiently. By understanding how to connect the scanner, interpret diagnostic trouble codes, and perform basic diagnostics, you can save money on auto repairs and ensure your vehicle runs smoothly. Remember to follow safety precautions and stay informed about the latest advancements in OBD2 technology.
For more detailed information and expert guidance on using OBD2 scanners and performing auto repairs, contact OBD2-SCANNER.EDU.VN today. Visit us at 123 Main Street, Los Angeles, CA 90001, United States, or reach out via WhatsApp at +1 (641) 206-8880. Check our website OBD2-SCANNER.EDU.VN for comprehensive resources and assistance.
Let OBD2-SCANNER.EDU.VN help you diagnose and resolve your car issues with precision and confidence and contact us via WhatsApp to schedule a consultation and let us help you keep your vehicle running smoothly and efficiently.