The Duke 390 Obd2 4 Pin connector allows you to access your bike’s diagnostic data using an OBD2 scanner, providing real-time insights into engine performance and potential issues, and at OBD2-SCANNER.EDU.VN, we can help you understand and utilize this data effectively. This enables you to monitor parameters like coolant temperature, identify error codes, and optimize your motorcycle’s maintenance, leading to enhanced performance and longevity.
Contents
- 1. Understanding the Duke 390 OBD2 System
- 1.1. What is OBD2 and How Does it Apply to the Duke 390?
- 1.2. Key Components of the OBD2 System in Duke 390
- 1.3. Benefits of Using an OBD2 Scanner on Your Duke 390
- 1.4. Locating the OBD2 Connector on the Duke 390
- 2. Identifying the 4 Pins on the Duke 390 OBD2 Connector
- 2.1. Pinout Diagram and Functions
- 2.2. Understanding CAN Bus Communication
- 2.3. Importance of Correct Pin Identification
- 2.4. Color Coding and Wiring Standards
- 3. Choosing the Right OBD2 Scanner for Your Duke 390
- 3.1. Factors to Consider When Selecting a Scanner
- 3.2. Popular OBD2 Scanners Compatible with Duke 390
- 3.3. Bluetooth vs. Wired Scanners: Which is Better?
- 3.4. Software and Apps for Interpreting OBD2 Data
- 4. Step-by-Step Guide to Connecting an OBD2 Scanner to Your Duke 390
- 4.1. Preparing Your Bike and Scanner
- 4.2. Connecting the Scanner to the 4-Pin Connector
- 4.3. Powering On the Scanner and Establishing a Connection
- 4.4. Troubleshooting Connection Issues
- 5. Reading and Interpreting Data from Your Duke 390
- 5.1. Understanding Real-Time Data Streams
- 5.2. Identifying and Decoding Diagnostic Trouble Codes (DTCs)
- 5.3. Common Error Codes for Duke 390 and Their Meanings
- 5.4. Clearing Error Codes and Resetting the ECU
- 6. Advanced Diagnostics and Troubleshooting
- 6.1. Using Live Data for Performance Analysis
- 6.2. Diagnosing Sensor Issues with OBD2 Data
- 6.3. Identifying Fuel System Problems
- 6.4. Troubleshooting Ignition System Faults
- 7. Customizing Your Duke 390 with OBD2 Data
- 7.1. Tuning Your Bike for Optimal Performance
- 7.2. Monitoring Engine Health for Longevity
- 7.3. Data Logging and Analysis for Track Days
- 7.4. Modifying ECU Parameters (Advanced)
- 8. DIY OBD2 Connector Installation for Duke 390
- 8.1. Required Tools and Materials
- 8.2. Step-by-Step Installation Guide
- 8.3. Safety Precautions and Best Practices
- 8.4. Testing the Connection and Verifying Data
- 9. Common Issues and Troubleshooting Tips
- 9.1. Scanner Not Connecting to the ECU
- 9.2. Incorrect Data Readings
- 9.3. Error Codes Not Clearing
- 9.4. Communication Errors and CAN Bus Issues
- 10. Maintaining Your Duke 390 with OBD2 Insights
- 10.1. Regular Monitoring of Engine Parameters
- 10.2. Preventative Maintenance Based on OBD2 Data
- 10.3. Optimizing Fuel Efficiency and Performance
- 10.4. Extending the Life of Your Motorcycle
- FAQ: Duke 390 OBD2 4 Pin
1. Understanding the Duke 390 OBD2 System
The On-Board Diagnostics (OBD) system in your Duke 390 is a critical component for monitoring and maintaining your motorcycle’s health. By understanding how it works, you can proactively address potential issues and ensure optimal performance.
1.1. What is OBD2 and How Does it Apply to the Duke 390?
OBD2, or On-Board Diagnostics version 2, is a standardized system used in modern vehicles to monitor engine performance and emissions. While primarily known for its use in cars and trucks, OBD2 is also applicable to motorcycles like the Duke 390. According to the Environmental Protection Agency (EPA), OBD2 systems are designed to provide access to a vehicle’s diagnostic data, allowing mechanics and owners to identify and address issues that could affect performance or emissions compliance.
The Duke 390 utilizes a 4-pin connector that provides access to essential diagnostic information. This connector allows you to interface with the bike’s Engine Control Unit (ECU) using an OBD2 scanner.
1.2. Key Components of the OBD2 System in Duke 390
The OBD2 system in the Duke 390 consists of several key components that work together to monitor and report on the bike’s performance. These include:
- Sensors: Various sensors throughout the engine and exhaust system monitor parameters such as oxygen levels, coolant temperature, and engine speed.
- Engine Control Unit (ECU): The ECU is the brain of the system, collecting data from the sensors and making adjustments to optimize performance.
- Diagnostic Connector: The 4-pin connector provides a physical interface for connecting an OBD2 scanner to the ECU.
- Software/Apps: Apps like Torque allow you to interpret the data from the ECU and display it in a user-friendly format.
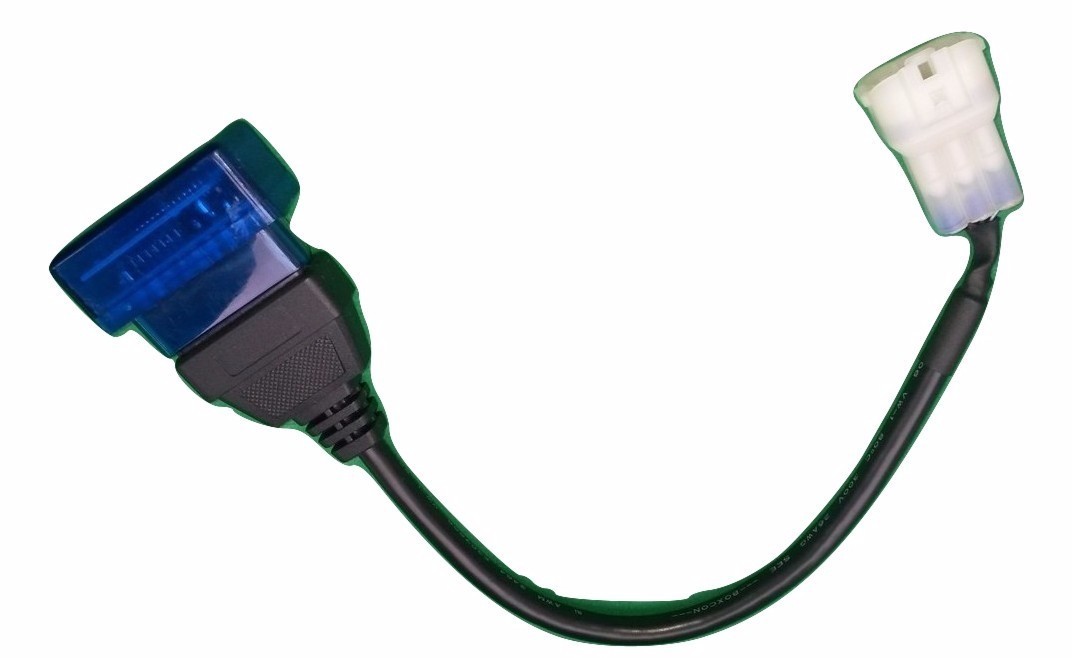
 Duke 390 OBD2 Connector Location
1.3. Benefits of Using an OBD2 Scanner on Your Duke 390
Using an OBD2 scanner on your Duke 390 offers several benefits:
- Real-Time Data: Access live data on engine performance, including coolant temperature, RPM, and throttle position.
- Error Code Diagnosis: Identify and clear diagnostic trouble codes (DTCs) to troubleshoot issues.
- Performance Monitoring: Track performance metrics to optimize your bike’s tuning and maintenance.
- Cost Savings: Diagnose and fix minor issues yourself, potentially saving on expensive mechanic fees.
1.4. Locating the OBD2 Connector on the Duke 390
The OBD2 connector on the Duke 390 is typically located under the rear seat. Here’s how to find it:
- Remove the rear seat using the key.
- Look for a 4-pin connector, usually capped or covered with a protective cover.
- The connector is often near the ECU or other electrical components.
2. Identifying the 4 Pins on the Duke 390 OBD2 Connector
Understanding the pinout of the OBD2 connector is crucial for connecting an OBD2 scanner correctly. The Duke 390 uses a 4-pin connector, and each pin serves a specific function.
2.1. Pinout Diagram and Functions
Here’s a breakdown of the typical pinout for the Duke 390 OBD2 connector:
| Pin Number | Function | Description |
|---|---|---|
| 1 | 12V+ | Positive 12V power supply |
| 2 | CAN Low | CAN bus low signal for communication |
| 3 | Ground | Ground connection |
| 4 | CAN High | CAN bus high signal for communication |
2.2. Understanding CAN Bus Communication
The Controller Area Network (CAN) bus is a communication protocol that allows different components within the motorcycle to communicate with each other. Pins 2 (CAN Low) and 4 (CAN High) are essential for the OBD2 scanner to interface with the ECU and retrieve diagnostic data. According to Bosch, the CAN bus system is designed for robust and reliable communication in automotive applications, making it ideal for the Duke 390’s diagnostic needs.
2.3. Importance of Correct Pin Identification
Incorrectly identifying the pins can lead to communication errors or even damage to the ECU. Always double-check the pinout diagram and consult your bike’s service manual to ensure proper connections. At OBD2-SCANNER.EDU.VN, we stress the importance of verifying pin configurations to prevent potential damage.
2.4. Color Coding and Wiring Standards
While wire colors can vary, the following color codes are commonly used:
- 12V+: Grey/Pink
- CAN Low: Yellow/Black
- Ground: Black/Yellow
- CAN High: Green/Black
Always refer to your bike’s wiring diagram to confirm these colors, as variations can occur between model years.
3. Choosing the Right OBD2 Scanner for Your Duke 390
Selecting the appropriate OBD2 scanner is crucial for accessing and interpreting your Duke 390’s diagnostic data. Different scanners offer varying levels of functionality and compatibility.
3.1. Factors to Consider When Selecting a Scanner
When choosing an OBD2 scanner, consider the following factors:
- Compatibility: Ensure the scanner supports the OBD2 protocol and is compatible with the Duke 390.
- Features: Look for features such as real-time data display, error code reading and clearing, and data logging.
- Ease of Use: Choose a scanner with a user-friendly interface and clear instructions.
- Price: Scanners range from basic, affordable models to advanced, professional-grade tools.
- Connectivity: Some scanners connect via Bluetooth or Wi-Fi to your smartphone or tablet.
3.2. Popular OBD2 Scanners Compatible with Duke 390
Here are some popular OBD2 scanners that are known to work well with the Duke 390:
- Autel MaxiCOM MK808: A versatile scanner with advanced diagnostic capabilities.
- OBDLink MX+: A Bluetooth scanner that works seamlessly with the Torque app.
- Veepeak Mini Bluetooth OBD2 Scanner: A budget-friendly option for basic diagnostics.
- Carly Universal Adapter: Known for its compatibility with various motorcycle models.
3.3. Bluetooth vs. Wired Scanners: Which is Better?
- Bluetooth Scanners: Offer wireless connectivity, making them convenient for on-the-go diagnostics. They typically pair with a smartphone or tablet running an OBD2 app.
- Wired Scanners: Provide a more stable connection and are less prone to interference. They often have a built-in display and user interface.
The best choice depends on your specific needs. If you value convenience and portability, a Bluetooth scanner is a great option. If you prefer a reliable connection and a dedicated display, a wired scanner may be more suitable.
3.4. Software and Apps for Interpreting OBD2 Data
Several apps can be used to interpret the data from your OBD2 scanner. Some popular choices include:
- Torque Pro: A comprehensive app with real-time data display, customizable dashboards, and error code diagnostics.
- OBD Auto Doctor: A user-friendly app for reading and clearing diagnostic trouble codes.
- DashCommand: An advanced app with performance monitoring and data logging capabilities.
4. Step-by-Step Guide to Connecting an OBD2 Scanner to Your Duke 390
Connecting an OBD2 scanner to your Duke 390 is a straightforward process. Follow these steps to ensure a successful connection:
4.1. Preparing Your Bike and Scanner
- Turn off the ignition and ensure the bike is in a safe location.
- Locate the OBD2 connector under the rear seat.
- Remove any protective cap or cover from the connector.
- Ensure your OBD2 scanner is powered on and ready to connect.
4.2. Connecting the Scanner to the 4-Pin Connector
- Align the OBD2 scanner’s connector with the 4-pin connector on your Duke 390.
- Gently push the connectors together until they are securely connected.
- If using a Bluetooth scanner, ensure it is paired with your smartphone or tablet.
4.3. Powering On the Scanner and Establishing a Connection
- Turn the ignition key to the “ON” position, but do not start the engine.
- Follow the instructions on your OBD2 scanner or app to establish a connection with the ECU.
- The scanner should now be able to read data from your bike’s sensors.
4.4. Troubleshooting Connection Issues
If you encounter connection issues, try the following:
- Double-check the connections to ensure they are secure.
- Verify that the OBD2 scanner is compatible with your Duke 390.
- Ensure the ignition is in the “ON” position.
- Consult the OBD2 scanner’s manual for troubleshooting tips.
5. Reading and Interpreting Data from Your Duke 390
Once you have successfully connected your OBD2 scanner, you can start reading and interpreting the data from your Duke 390. Understanding this data is crucial for diagnosing issues and optimizing performance.
5.1. Understanding Real-Time Data Streams
Real-time data streams provide live information on various engine parameters. Some common data streams to monitor include:
- Coolant Temperature: Indicates the temperature of the engine coolant.
- Engine RPM: Shows the engine speed in revolutions per minute.
- Throttle Position: Indicates the position of the throttle.
- Intake Air Temperature: Measures the temperature of the air entering the engine.
- Oxygen Sensor Readings: Monitors the oxygen levels in the exhaust gas.
5.2. Identifying and Decoding Diagnostic Trouble Codes (DTCs)
Diagnostic Trouble Codes (DTCs) are codes stored in the ECU that indicate a specific issue or malfunction. These codes can be read using an OBD2 scanner. According to the Society of Automotive Engineers (SAE), DTCs are standardized across the automotive industry, making it easier to diagnose issues.
Here’s how to interpret DTCs:
- Use your OBD2 scanner to read any stored DTCs.
- Each DTC consists of a five-character code, such as P0123.
- The first character indicates the system (e.g., P for Powertrain, B for Body, C for Chassis, U for Network).
- The second character indicates whether the code is generic (0) or manufacturer-specific (1).
- The remaining three characters indicate the specific fault.
5.3. Common Error Codes for Duke 390 and Their Meanings
Here are some common error codes you might encounter on your Duke 390:
| DTC | Description | Possible Causes |
|---|---|---|
| P0113 | Intake Air Temperature Sensor Circuit High Input | Faulty IAT sensor, wiring issues, or ECU problem |
| P0118 | Engine Coolant Temperature Circuit High Input | Faulty ECT sensor, wiring issues, or ECU problem |
| P0171 | System Too Lean (Bank 1) | Vacuum leak, faulty oxygen sensor, or fuel system issue |
| P0300 | Random/Multiple Cylinder Misfire Detected | Spark plugs, ignition coils, fuel injectors, or compression issues |
5.4. Clearing Error Codes and Resetting the ECU
After addressing the issue that triggered the DTC, you can use your OBD2 scanner to clear the error code and reset the ECU. This will turn off the check engine light and allow you to monitor if the issue recurs.
6. Advanced Diagnostics and Troubleshooting
Beyond basic error code reading, an OBD2 scanner can be used for advanced diagnostics and troubleshooting on your Duke 390.
6.1. Using Live Data for Performance Analysis
Live data streams can be used to analyze your bike’s performance under different conditions. For example, you can monitor coolant temperature during a ride to ensure the engine is not overheating. You can also track throttle position and RPM to optimize your riding technique.
6.2. Diagnosing Sensor Issues with OBD2 Data
OBD2 data can help you diagnose issues with specific sensors. By monitoring the sensor’s readings, you can determine if it is functioning correctly. For example, if the oxygen sensor readings are consistently high or low, it may indicate a faulty sensor.
6.3. Identifying Fuel System Problems
Fuel system problems can be identified by monitoring parameters such as fuel trim, oxygen sensor readings, and fuel injector pulse width. A lean condition (indicated by a high positive fuel trim) may indicate a vacuum leak or a faulty fuel injector.
6.4. Troubleshooting Ignition System Faults
Ignition system faults can be diagnosed by monitoring parameters such as engine RPM, misfire counts, and ignition timing. A misfire can be caused by faulty spark plugs, ignition coils, or wiring issues.
7. Customizing Your Duke 390 with OBD2 Data
OBD2 data can also be used to customize your Duke 390 and optimize its performance.
7.1. Tuning Your Bike for Optimal Performance
By monitoring live data streams, you can fine-tune your bike’s performance for different riding conditions. For example, you can adjust the fuel-air mixture to optimize power and fuel efficiency.
7.2. Monitoring Engine Health for Longevity
Regularly monitoring OBD2 data can help you identify potential issues before they become major problems. By addressing these issues early, you can extend the life of your engine and avoid costly repairs.
7.3. Data Logging and Analysis for Track Days
If you participate in track days, you can use an OBD2 scanner to log data during your sessions. This data can then be analyzed to identify areas for improvement in your riding technique and bike setup.
7.4. Modifying ECU Parameters (Advanced)
Some advanced OBD2 tools allow you to modify ECU parameters, such as fuel maps and ignition timing. However, this should only be done by experienced tuners, as incorrect modifications can damage your engine.
8. DIY OBD2 Connector Installation for Duke 390
For those who prefer a hands-on approach, installing your own OBD2 connector on your Duke 390 is a feasible project.
8.1. Required Tools and Materials
Before you begin, gather the necessary tools and materials:
- OBD2 connector (4-pin)
- Wiring (matching the color codes)
- Soldering iron and solder
- Wire stripper
- Crimping tool
- Multimeter
- Heat shrink tubing
- Electrical tape
8.2. Step-by-Step Installation Guide
-
Disconnect the Battery: Always disconnect the battery to prevent electrical shorts.
-
Locate the Factory Scan Tool Connector: Find the factory scan tool connector under the rear seat.
-
Prepare the Wires: Strip the ends of the OBD2 connector wires and the corresponding wires on the Duke 390.
-
Solder or Crimp the Connections: Connect the wires according to the pinout diagram:
- OBD2 Pin 1 (12V+) to Duke Grey/Pink (12V+)
- OBD2 Pin 2 (CAN Low) to Duke Yellow/Black (CAN Low)
- OBD2 Pin 3 (Ground) to Duke Black/Yellow (Ground)
- OBD2 Pin 4 (CAN High) to Duke Green/Black (CAN High)
-
Insulate the Connections: Use heat shrink tubing or electrical tape to insulate each connection.
-
Secure the Connector: Secure the OBD2 connector to the bike frame using zip ties or adhesive.
-
Reconnect the Battery: Reconnect the battery and test the connection with an OBD2 scanner.
8.3. Safety Precautions and Best Practices
- Always disconnect the battery before working on electrical components.
- Use proper soldering techniques to ensure reliable connections.
- Insulate all connections to prevent shorts.
- Double-check the pinout diagram before making any connections.
8.4. Testing the Connection and Verifying Data
After installation, use an OBD2 scanner to verify that the connection is working correctly. Check for real-time data streams and error codes to ensure the scanner is communicating with the ECU.
9. Common Issues and Troubleshooting Tips
Even with careful installation and setup, you may encounter some common issues when using an OBD2 scanner on your Duke 390.
9.1. Scanner Not Connecting to the ECU
If the scanner is not connecting to the ECU, try the following:
- Double-check the connections to ensure they are secure.
- Verify that the OBD2 scanner is compatible with your Duke 390.
- Ensure the ignition is in the “ON” position.
- Check the scanner’s manual for troubleshooting tips.
9.2. Incorrect Data Readings
Incorrect data readings may indicate a faulty sensor or a problem with the OBD2 scanner. Try the following:
- Verify that the scanner is using the correct protocol.
- Check the sensor’s wiring and connections.
- Replace the sensor if necessary.
- Try a different OBD2 scanner.
9.3. Error Codes Not Clearing
If you are unable to clear error codes, try the following:
- Ensure that the issue that triggered the code has been resolved.
- Try clearing the code multiple times.
- Disconnect the battery for a few minutes and then try again.
- Use a different OBD2 scanner.
9.4. Communication Errors and CAN Bus Issues
Communication errors and CAN bus issues may indicate a problem with the wiring or the ECU. Try the following:
- Check the CAN bus wiring for shorts or breaks.
- Verify that the ECU is functioning correctly.
- Consult a qualified mechanic for further diagnosis.
10. Maintaining Your Duke 390 with OBD2 Insights
Using OBD2 data to maintain your Duke 390 can help you keep your bike running smoothly and avoid costly repairs.
10.1. Regular Monitoring of Engine Parameters
Regularly monitoring engine parameters such as coolant temperature, oil pressure, and oxygen sensor readings can help you identify potential issues before they become major problems.
10.2. Preventative Maintenance Based on OBD2 Data
Based on OBD2 data, you can perform preventative maintenance to keep your bike in top condition. For example, if you notice that the engine is running lean, you can check for vacuum leaks or replace the fuel filter.
10.3. Optimizing Fuel Efficiency and Performance
By monitoring fuel trim and oxygen sensor readings, you can optimize your bike’s fuel efficiency and performance. Adjusting the fuel-air mixture can improve power and reduce emissions.
10.4. Extending the Life of Your Motorcycle
By using OBD2 data to maintain your Duke 390, you can extend the life of your motorcycle and enjoy years of trouble-free riding.
FAQ: Duke 390 OBD2 4 Pin
Here are some frequently asked questions about the Duke 390 OBD2 4 pin connector:
Q1: What is an OBD2 scanner?
An OBD2 scanner is a diagnostic tool used to read data from a vehicle’s Engine Control Unit (ECU), providing insights into engine performance and potential issues.
Q2: How do I read OBD2 error codes?
Connect an OBD2 scanner to your Duke 390’s 4-pin connector, power on the scanner, and follow the instructions to read and interpret the Diagnostic Trouble Codes (DTCs).
Q3: What are common motorcycle issues and how can I troubleshoot them?
Common issues include engine misfires, lean running conditions, and sensor failures. Use an OBD2 scanner to identify the specific DTC and troubleshoot accordingly.
Q4: Where can I find the OBD2 connector on my Duke 390?
The OBD2 connector is typically located under the rear seat, near the ECU.
Q5: What does the CAN bus do?
The CAN (Controller Area Network) bus is a communication protocol that allows different components within the motorcycle to communicate with each other.
Q6: What is the best OBD2 app for Duke 390?
Popular apps include Torque Pro, OBD Auto Doctor, and DashCommand, each offering unique features for data interpretation and diagnostics.
Q7: How can I use live data to improve my bike’s performance?
Monitor live data streams such as coolant temperature, RPM, and throttle position to analyze performance and identify areas for improvement.
Q8: Is it safe to clear OBD2 error codes?
Yes, but only after addressing the underlying issue that triggered the code. Clearing codes without fixing the problem will only result in the code reappearing.
Q9: Can I tune my Duke 390 using an OBD2 scanner?
Advanced OBD2 tools allow for ECU parameter modifications, but this should only be done by experienced tuners to avoid engine damage.
Q10: How often should I check my Duke 390 with an OBD2 scanner?
Regularly, such as during routine maintenance or if you notice any performance issues, to ensure optimal engine health.
Understanding and utilizing the Duke 390 OBD2 4 pin connector can significantly enhance your ability to maintain and optimize your motorcycle. By choosing the right scanner, interpreting the data correctly, and performing regular maintenance, you can ensure your Duke 390 runs smoothly for years to come.
For expert guidance on using OBD2 scanners and comprehensive motorcycle repair services, contact us at OBD2-SCANNER.EDU.VN. Our team is ready to assist you with all your diagnostic and maintenance needs.
Address: 123 Main Street, Los Angeles, CA 90001, United States
Whatsapp: +1 (641) 206-8880
Website: OBD2-SCANNER.EDU.VN
Take control of your motorcycle’s health today and experience the benefits of informed maintenance!