The Elm327 Interface Obd2 Scanner Setup is a straightforward process, particularly with guidance from OBD2-SCANNER.EDU.VN. This setup allows you to access your vehicle’s diagnostic data, empowering you to identify and resolve potential issues efficiently. It provides real-time insights into your vehicle’s performance, enhances diagnostic accuracy, and offers cost-effective maintenance solutions.
Contents
- 1. What Is An ELM327 Interface OBD2 Scanner And How Does It Work?
- 1.1. Key Features of ELM327 Interface OBD2 Scanners
- 1.2. Benefits of Using an ELM327 Interface
- 1.3. How ELM327 Scanners Communicate with Vehicle Systems
- 1.4. Differences Between ELM327 and Other OBD2 Scanners
- 1.5. Common Issues and Solutions for ELM327 Scanners
- 2. Preparing for Your ELM327 Interface OBD2 Scanner Setup
- 2.1. Gathering Necessary Equipment and Software
- 2.2. Understanding Your Vehicle’s OBD2 Port Location
- 2.3. Installing and Configuring the Diagnostic Software
- 3. Step-By-Step Guide to ELM327 Interface OBD2 Scanner Setup
- 3.1. Connecting the ELM327 Scanner to Your Vehicle
- 3.2. Pairing the Scanner with Your Device (Bluetooth/Wi-Fi)
- 3.3. Configuring the App to Communicate with the Scanner
- 4. Performing Initial Diagnostic Tests with Your ELM327 Scanner
- 4.1. Reading and Interpreting Diagnostic Trouble Codes (DTCs)
- 4.2. Monitoring Real-Time Engine Data
- 4.3. Performing Basic Sensor Tests
1. What Is An ELM327 Interface OBD2 Scanner And How Does It Work?
An ELM327 interface OBD2 scanner is a diagnostic tool used to communicate with a vehicle’s On-Board Diagnostics (OBD) system, allowing users to read diagnostic trouble codes (DTCs) and monitor various parameters. This device works by connecting to the vehicle’s OBD2 port, interpreting the data transmitted by the car’s computer, and relaying it to a user-friendly interface such as a smartphone, tablet, or computer, often via Bluetooth or Wi-Fi.
1.1. Key Features of ELM327 Interface OBD2 Scanners
The ELM327 interface OBD2 scanners have become indispensable tools for both professional mechanics and car enthusiasts. They offer a wide range of features that make vehicle diagnostics more accessible and efficient. These features enhance the user’s ability to understand and maintain their vehicle’s health.
- Diagnostic Trouble Codes (DTCs) Reading: ELM327 scanners excel at reading DTCs, which are codes stored by the vehicle’s computer to indicate specific problems. These codes help pinpoint issues within the engine, transmission, and other systems.
- Real-Time Data Monitoring: These scanners can monitor real-time data from various sensors in the vehicle. This includes engine speed (RPM), coolant temperature, oxygen sensor readings, and fuel trim, providing a comprehensive view of the engine’s performance.
- Compatibility: ELM327 interfaces are compatible with a wide range of vehicles that support the OBD2 protocol, which has been standard in most cars and light trucks sold in the United States since 1996.
- Connectivity: ELM327 scanners typically connect to devices like smartphones, tablets, or laptops via Bluetooth or Wi-Fi, making them easy to use and portable.
- User-Friendly Interface: Paired with appropriate software or apps, these scanners offer an intuitive interface for viewing and interpreting data. This allows users to easily navigate through the diagnostic process.
- Affordability: Compared to professional-grade diagnostic tools, ELM327 scanners are relatively inexpensive, making them accessible to a wider audience.
- Customization: Many ELM327 scanners support a variety of apps and software, allowing users to customize their diagnostic experience based on their specific needs and preferences.
- Data Logging: Some ELM327 scanners have the capability to log data over time. This can be useful for identifying intermittent issues or tracking performance changes.
- Vehicle Information: ELM327 scanners can also retrieve vehicle information such as the Vehicle Identification Number (VIN) and calibration identification.
1.2. Benefits of Using an ELM327 Interface
Utilizing an ELM327 interface comes with numerous advantages for vehicle owners and technicians alike. These benefits range from cost savings to improved diagnostic capabilities, making it a valuable tool for anyone involved in vehicle maintenance.
- Cost Savings: By diagnosing and addressing minor issues early, users can prevent them from escalating into more costly repairs. Regular monitoring can help maintain the vehicle’s condition.
- Improved Diagnostics: The ability to read and interpret DTCs accurately leads to more precise diagnostics. This ensures that repairs are targeted and effective, reducing unnecessary maintenance.
- Real-Time Monitoring: Real-time data monitoring allows users to observe how the vehicle performs under various conditions. This can aid in identifying performance issues that may not trigger a DTC.
- Ease of Use: The wireless connectivity options (Bluetooth/Wi-Fi) and user-friendly interfaces make ELM327 scanners easy to use. Both beginners and experienced technicians can navigate the diagnostic process efficiently.
- Portability: Compact and wireless, these scanners are highly portable. This makes them suitable for on-the-go diagnostics, whether on a road trip or at a remote job site.
- Wide Vehicle Compatibility: ELM327 interfaces work with a broad range of OBD2-compliant vehicles. They provide a versatile diagnostic solution for various makes and models.
- Enhanced Vehicle Understanding: Regular use of an ELM327 scanner helps users develop a better understanding of their vehicle’s operation. This knowledge empowers them to make informed decisions about maintenance and repairs.
- Preventative Maintenance: By monitoring key parameters and addressing potential issues early, users can engage in preventative maintenance. This extends the life of the vehicle and maintains its optimal performance.
- Access to Detailed Information: ELM327 scanners provide access to detailed information about the vehicle’s systems. This helps in making informed decisions about repairs and maintenance.
1.3. How ELM327 Scanners Communicate with Vehicle Systems
ELM327 scanners act as a bridge between a vehicle’s computer and a user’s device, facilitating the transfer of diagnostic information. The communication process involves several key steps and protocols that ensure accurate and reliable data exchange.
-
Physical Connection: The ELM327 scanner is physically connected to the vehicle’s OBD2 port, typically located under the dashboard. This port provides access to the vehicle’s communication network.
-
Protocol Detection: The ELM327 chip automatically detects the vehicle’s OBD2 communication protocol, which can vary depending on the make, model, and year of the vehicle. Common protocols include:
- SAE J1850 PWM and VPW: Used primarily by older Ford and GM vehicles.
- ISO 9141-2: Used by European and Asian vehicles.
- ISO 14230-4 (KWP2000): Also used by European and Asian vehicles.
- ISO 15765-4 (CAN): The current standard, used by most modern vehicles.
-
Data Request: Once the protocol is identified, the scanner sends a request for specific data to the vehicle’s computer. This request is formulated in a language that the vehicle’s computer understands.
-
Data Transmission: The vehicle’s computer responds to the request by transmitting the requested data back to the ELM327 scanner. This data includes DTCs, sensor readings, and other diagnostic information.
-
Data Interpretation: The ELM327 chip interprets the raw data received from the vehicle and converts it into a format that can be understood by the user’s device.
-
Data Display: The interpreted data is then sent to the user’s device (smartphone, tablet, or computer) via Bluetooth or Wi-Fi. The data is displayed in a user-friendly format through a diagnostic app or software.
-
User Interaction: The user can then view the data, clear DTCs, perform tests, and monitor real-time parameters. This interaction allows for informed decisions regarding vehicle maintenance and repairs.
-
Command Execution: The user can also send commands back to the vehicle’s computer through the ELM327 scanner, such as resetting the check engine light or initiating diagnostic tests.
1.4. Differences Between ELM327 and Other OBD2 Scanners
When choosing an OBD2 scanner, it is essential to understand the differences between the ELM327 interface and other available options. The ELM327 is a versatile and cost-effective choice, but it is not the only type of OBD2 scanner on the market. Here’s a comparison to help you make an informed decision:
| Feature | ELM327 Interface | Professional OBD2 Scanners |
|---|---|---|
| Price | Generally inexpensive, ranging from $10 to $100 | Significantly more expensive, ranging from $200 to several thousand dollars |
| Compatibility | Compatible with most OBD2-compliant vehicles (1996 and newer) | Compatible with a wide range of vehicles, often including older models and commercial vehicles, with broader protocol support |
| Functionality | Reads and clears DTCs, monitors real-time data, and performs basic diagnostic tests | Offers advanced functions such as bi-directional control, component testing, advanced coding, and programming capabilities |
| User Interface | Relies on third-party apps or software, which can vary in quality and ease of use | Features a dedicated, user-friendly interface with intuitive navigation and comprehensive diagnostic information |
| Connectivity | Typically connects via Bluetooth or Wi-Fi to smartphones, tablets, or computers | May have wireless capabilities but often includes direct cable connections for more reliable data transfer |
| Portability | Compact and highly portable, making it convenient for on-the-go diagnostics | Can be portable but often larger and more robust, designed for professional use in a garage or workshop |
| Updates | Software updates depend on the third-party app developer | Regularly updated by the manufacturer to support new vehicle models and diagnostic functions |
| Target User | DIY enthusiasts, car owners who want to perform basic diagnostics | Professional mechanics, automotive technicians, and repair shops |
| Data Accuracy | Accuracy depends on the quality of the ELM327 chip and the software used | High accuracy and reliability, designed for professional-grade diagnostics |
| Support | Support is limited and depends on the app developer and online communities | Comprehensive technical support from the manufacturer, including training and troubleshooting assistance |
| Durability | Generally less durable compared to professional scanners | Built to withstand heavy use in a professional environment |
| Specific Tasks | Basic diagnostics such as reading and clearing codes, monitoring engine parameters | Advanced diagnostics, including module programming, ABS bleeding, injector coding, and other specialized tasks |
| Limitations | Limited by the capabilities of the third-party software and the quality of the ELM327 chip; may not support all vehicle systems or advanced functions | Fewer limitations, supports a broader range of vehicle systems and advanced functions |
| Example | Generic ELM327 Bluetooth adapter with Torque Pro app | Snap-on Solus Edge, Autel MaxiSys MS908S Pro |
1.5. Common Issues and Solutions for ELM327 Scanners
While ELM327 scanners are valuable tools, users may encounter certain issues during their use. Knowing these common problems and their solutions can help ensure a smoother diagnostic experience.
-
Connectivity Problems:
- Issue: The scanner fails to connect to the vehicle or the paired device (smartphone, tablet, computer).
- Solution:
- Ensure the ELM327 scanner is securely plugged into the OBD2 port.
- Verify that the Bluetooth or Wi-Fi is enabled on the device and that it is properly paired with the scanner.
- Restart the device and the scanner.
- Check for any interference from other Bluetooth or Wi-Fi devices.
- Try a different diagnostic app or software.
-
Incompatible Software:
- Issue: The diagnostic app or software is not compatible with the ELM327 scanner or the vehicle.
- Solution:
- Check the app’s compatibility list to ensure it supports the ELM327 scanner and the vehicle’s make, model, and year.
- Update the app to the latest version.
- Try a different app known to be compatible with the scanner and vehicle.
-
Incorrect Data or Error Codes:
- Issue: The scanner provides inaccurate data or incorrect diagnostic trouble codes (DTCs).
- Solution:
- Verify that the vehicle information (make, model, year) is correctly entered in the app.
- Ensure the ELM327 scanner firmware is up to date.
- Check for software bugs or glitches by consulting online forums or contacting the app developer.
- Try a different diagnostic app to cross-verify the data.
-
Scanner Not Reading All Codes:
- Issue: The scanner fails to read all available DTCs or access certain vehicle systems.
- Solution:
- Ensure the ELM327 scanner supports the vehicle’s OBD2 protocol.
- Some advanced codes or systems may require a more professional-grade scanner.
- Check the app settings to ensure all available systems are selected for scanning.
-
Firmware Issues:
- Issue: The ELM327 scanner’s firmware is outdated or corrupted, causing malfunctions.
- Solution:
- Check the manufacturer’s website or app for firmware updates.
- Follow the instructions to update the firmware.
- If the firmware update fails, contact the manufacturer for support.
-
Power Issues:
- Issue: The scanner does not power on or loses power during use.
- Solution:
- Ensure the OBD2 port is providing power to the scanner.
- Check the vehicle’s fuses related to the OBD2 port.
- Try the scanner in a different vehicle to rule out vehicle-specific issues.
-
App Freezing or Crashing:
- Issue: The diagnostic app freezes or crashes while in use.
- Solution:
- Close and restart the app.
- Clear the app’s cache and data.
- Update the app to the latest version.
- Ensure the device meets the app’s minimum system requirements.
2. Preparing for Your ELM327 Interface OBD2 Scanner Setup
Before diving into the setup process for your ELM327 interface OBD2 scanner, it’s essential to take a few preliminary steps. These preparations will ensure a smooth and successful setup, enabling you to effectively diagnose and maintain your vehicle.
2.1. Gathering Necessary Equipment and Software
The first step in preparing for your ELM327 interface OBD2 scanner setup is to gather all the necessary equipment and software. Having everything on hand will streamline the process and minimize potential delays.
- ELM327 OBD2 Scanner: Purchase a reliable ELM327 scanner that is compatible with your vehicle and preferred device (smartphone, tablet, or computer). Consider factors such as connectivity (Bluetooth or Wi-Fi), supported protocols, and user reviews.
- Compatible Device: Ensure you have a compatible device such as a smartphone (iOS or Android), tablet, or computer. Check the system requirements of the diagnostic app you plan to use.
- Diagnostic App or Software: Choose a diagnostic app or software that suits your needs. Popular options include Torque Pro, OBD Fusion, Carista, and Dr. Prius (for Toyota hybrids). Download and install the app on your device.
- Vehicle Compatibility Information: Gather information about your vehicle’s make, model, year, and engine type. This information will be needed to configure the app correctly.
- User Manuals: Keep the user manuals for both the ELM327 scanner and the diagnostic app handy. These manuals often contain valuable information and troubleshooting tips.
- Internet Access: Ensure you have a stable internet connection for downloading apps, software updates, and accessing online resources.
- Extension Cable (Optional): If the OBD2 port in your vehicle is in a difficult-to-reach location, consider purchasing an OBD2 extension cable for easier access.
- Battery Charger (Optional): If you plan to perform extensive diagnostics, a battery charger can help prevent your vehicle’s battery from draining.
- Safety Gear: Wear appropriate safety gear, such as gloves and eye protection, especially if you plan to work under the hood or around the engine.
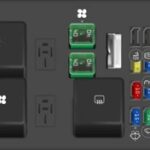
2.2. Understanding Your Vehicle’s OBD2 Port Location
Locating your vehicle’s OBD2 port is a crucial step in preparing for the ELM327 interface setup. The OBD2 port is the gateway to your vehicle’s diagnostic system, and knowing its location will make the connection process straightforward.
-
Standard Location: In most vehicles, the OBD2 port is located inside the passenger compartment, typically under the dashboard on the driver’s side.
-
Common Areas: Check the following areas for the OBD2 port:
- Under the dashboard, near the steering column
- Below the dashboard, close to the center console
- Inside the glove compartment
- Behind a small panel or cover near the pedals
-
Consult Your Vehicle’s Manual: If you cannot find the OBD2 port, consult your vehicle’s owner’s manual. The manual usually provides a diagram or description of the port’s location.
-
Use Online Resources: Online resources, such as vehicle-specific forums and websites, can also provide information and images showing the OBD2 port location for your particular make and model.
-
Physical Inspection: Use a flashlight to visually inspect the areas under the dashboard. The OBD2 port is typically a 16-pin trapezoidal connector.
-
Accessibility: Ensure that the OBD2 port is easily accessible. If it’s in a tight spot, consider using an OBD2 extension cable to make the connection easier.
-
Safety: Avoid forcing the ELM327 scanner into the OBD2 port. If it doesn’t fit easily, double-check the orientation and ensure there are no obstructions.
-
Check for Damage: Inspect the OBD2 port for any signs of damage or corrosion. If the port is damaged, it may need to be repaired or replaced before you can connect the scanner.
2.3. Installing and Configuring the Diagnostic Software
Installing and configuring the diagnostic software is a vital step in preparing your ELM327 interface OBD2 scanner. The software serves as the interface between the scanner and your device, allowing you to interpret the data from your vehicle.
-
Download the App:
- Visit the app store (Google Play Store for Android or Apple App Store for iOS) on your smartphone or tablet.
- Search for the diagnostic app you’ve chosen (e.g., Torque Pro, OBD Fusion, Carista).
- Download and install the app.
-
Install Software on a Computer:
- Visit the software provider’s website.
- Download the software installer for your operating system (Windows, macOS, Linux).
- Run the installer and follow the on-screen instructions to install the software.
-
Grant Permissions:
- When you first launch the app, it may ask for various permissions, such as Bluetooth access, location services, and access to storage.
- Grant the necessary permissions to allow the app to function correctly.
-
Connect to the ELM327 Scanner:
- Go to the app’s settings or connection menu.
- Select the connection type (Bluetooth or Wi-Fi).
- Follow the app’s instructions to pair with the ELM327 scanner.
- You may need to enter a PIN code (often “1234” or “0000”) to complete the pairing.
-
Configure Vehicle Profile:
- Enter your vehicle’s information, including make, model, year, and engine type.
- Some apps may automatically detect this information after connecting to the vehicle.
-
Customize Settings:
- Explore the app’s settings to customize the display, units of measurement, and other preferences.
- Configure any specific parameters you want to monitor regularly.
-
Test the Connection:
- Connect the ELM327 scanner to your vehicle’s OBD2 port.
- Turn on your vehicle’s ignition (but you don’t need to start the engine).
- In the app, initiate a scan or test connection.
- Verify that the app is successfully receiving data from the vehicle.
-
Update Software and Firmware:
- Check for software updates regularly to ensure you have the latest features and bug fixes.
- If available, update the ELM327 scanner’s firmware to improve performance and compatibility.
-
Consult Documentation:
- Refer to the app’s user manual or online documentation for detailed instructions and troubleshooting tips.
3. Step-By-Step Guide to ELM327 Interface OBD2 Scanner Setup
Setting up an ELM327 interface OBD2 scanner involves a series of steps that, when followed correctly, will allow you to effectively diagnose and monitor your vehicle. This guide provides a detailed, step-by-step approach to ensure a successful setup.
3.1. Connecting the ELM327 Scanner to Your Vehicle
The physical connection of the ELM327 scanner to your vehicle is the first and most crucial step in the setup process. A secure and correct connection ensures reliable data transfer between the scanner and your vehicle’s computer.
- Locate the OBD2 Port:
- Refer to your vehicle’s manual or the resources mentioned earlier to find the exact location of the OBD2 port.
- Prepare the Scanner:
- Ensure the ELM327 scanner is ready for connection. If it has an on/off switch, make sure it is in the “off” position.
- Align the Scanner:
- Align the ELM327 scanner connector with the OBD2 port. The connector is trapezoidal and should fit snugly into the port.
- Insert the Scanner:
- Gently push the ELM327 scanner into the OBD2 port until it is fully seated. You should feel a firm connection.
- Avoid forcing the scanner, as this could damage the port or the scanner.
- Check the Connection:
- Once connected, check that the scanner is securely in place. It should not wiggle or feel loose.
- Power On the Scanner (If Applicable):
- If your ELM327 scanner has a power switch, turn it on. Some scanners automatically power on when connected to the OBD2 port.
- Verify Power:
- Check for any LED indicators on the scanner to confirm that it is receiving power from the vehicle.
- Troubleshooting:
- If the scanner does not seem to be getting power, check the vehicle’s fuses related to the OBD2 port.
- Ensure that the OBD2 port is clean and free from any obstructions.
- Use an Extension Cable (If Needed):
- If the OBD2 port is in a difficult-to-reach location, use an OBD2 extension cable to provide more flexibility and easier access.
- Secure the Connection:
- Make sure the connection is stable and will not be easily disrupted during diagnostics.
3.2. Pairing the Scanner with Your Device (Bluetooth/Wi-Fi)
After physically connecting the ELM327 scanner to your vehicle, the next step is to pair it with your device (smartphone, tablet, or computer) via Bluetooth or Wi-Fi. This connection enables the transfer of diagnostic data to your device for interpretation.
-
Enable Bluetooth/Wi-Fi on Your Device:
- Go to the settings menu on your smartphone, tablet, or computer.
- Enable Bluetooth or Wi-Fi, depending on the type of connection supported by your ELM327 scanner.
-
Put the Scanner in Pairing Mode:
- Some ELM327 scanners automatically enter pairing mode when powered on.
- Others may require you to press a button or follow a specific procedure to initiate pairing mode.
- Refer to the scanner’s user manual for instructions.
-
Search for Available Devices:
- On your device, search for available Bluetooth or Wi-Fi devices.
- The ELM327 scanner should appear in the list of available devices.
-
Select the ELM327 Scanner:
- Choose the ELM327 scanner from the list of available devices.
-
Enter PIN Code (If Required):
- You may be prompted to enter a PIN code to complete the pairing process.
- The default PIN code is often “1234” or “0000”.
- Refer to the scanner’s user manual for the correct PIN code.
-
Complete the Pairing Process:
- Follow any on-screen prompts to complete the pairing process.
- Once paired, the device should indicate that it is connected to the ELM327 scanner.
-
Verify the Connection:
- Open the diagnostic app on your device.
- Go to the app’s settings or connection menu.
- Select the ELM327 scanner as the connected device.
- Initiate a test connection to verify that the app is successfully communicating with the scanner.
-
Troubleshooting:
- If the device fails to pair with the scanner, try restarting both devices.
- Ensure that the scanner is within range of the device.
- Check for interference from other Bluetooth or Wi-Fi devices.
- Consult the scanner’s user manual or online resources for troubleshooting tips.
-
Save the Connection (If Possible):
- Some apps allow you to save the connection settings for future use.
- This can save time and effort when connecting the scanner in the future.
3.3. Configuring the App to Communicate with the Scanner
With the ELM327 scanner paired to your device, configuring the diagnostic app to communicate with the scanner is the next essential step. Proper configuration ensures that the app can effectively receive and interpret data from the scanner.
-
Open the Diagnostic App:
- Launch the diagnostic app on your smartphone, tablet, or computer.
-
Access the Settings Menu:
- Navigate to the app’s settings menu. This is typically found in the main menu or under an “Options” or “Preferences” section.
-
Select OBD2 Adapter or Connection Settings:
- Look for a section related to OBD2 adapter settings or connection preferences.
- This may be labeled as “Adapter Type,” “Connection Type,” or similar.
-
Choose the Connection Type:
- Select the connection type that matches how your ELM327 scanner is connected (Bluetooth or Wi-Fi).
-
Select the ELM327 Adapter:
- The app should display a list of available OBD2 adapters.
- Choose your ELM327 scanner from the list.
- If the scanner does not appear, you may need to manually enter its Bluetooth or Wi-Fi address.
-
Configure the OBD2 Protocol:
- Some apps require you to manually select the OBD2 protocol used by your vehicle.
- If you are unsure, select the “Auto Detect” option, and the app will attempt to identify the correct protocol.
-
Test the Connection:
- Many apps have a “Test Connection” or “Check Adapter” option.
- Use this option to verify that the app is successfully communicating with the ELM327 scanner.
- The app should display a message indicating whether the connection is successful.
-
Configure Vehicle Profile:
- Enter your vehicle’s information, including make, model, year, and engine type.
- This information helps the app interpret the data correctly.
-
Customize Display Settings:
- Configure the display settings to show the parameters you want to monitor.
- Adjust the units of measurement (e.g., Celsius or Fahrenheit) to your preference.
-
Save the Settings:
- Save the configuration settings so that you do not have to repeat the process each time you use the app.
-
Troubleshooting:
- If the app fails to connect to the scanner, double-check the connection settings and ensure that the ELM327 scanner is properly paired with your device.
- Consult the app’s user manual or online resources for troubleshooting tips.
-
Update App and Firmware:
- Ensure that the app and the ELM327 scanner’s firmware are up to date to improve performance and compatibility.
4. Performing Initial Diagnostic Tests with Your ELM327 Scanner
Once your ELM327 scanner is set up and connected, you can begin performing initial diagnostic tests to assess your vehicle’s health. These tests provide valuable insights into your vehicle’s performance and can help identify potential issues early on.
4.1. Reading and Interpreting Diagnostic Trouble Codes (DTCs)
Reading and interpreting Diagnostic Trouble Codes (DTCs) is a primary function of the ELM327 scanner. DTCs are codes stored by the vehicle’s computer to indicate specific problems or malfunctions.
-
Connect the Scanner and Open the App:
- Ensure the ELM327 scanner is connected to your vehicle’s OBD2 port.
- Turn on the vehicle’s ignition (but you don’t need to start the engine).
- Launch the diagnostic app on your device and ensure it is connected to the scanner.
-
Navigate to the DTC Section:
- In the app, find the section for reading DTCs. This may be labeled as “Read Codes,” “Fault Codes,” or similar.
-
Initiate the Code Reading Process:
- Select the option to read DTCs. The app will communicate with the vehicle’s computer and retrieve any stored codes.
-
View the DTCs:
- The app will display a list of DTCs, if any are present.
- Each code is typically represented by a five-character alphanumeric code (e.g., P0300).
-
Record the Codes:
- Write down or save a screenshot of the DTCs.
- This will be useful for further research and troubleshooting.
-
Interpret the Codes:
- Use the app’s built-in DTC lookup feature (if available) to get a brief description of each code.
- Alternatively, use online resources such as OBD-Codes.com or consult your vehicle’s service manual for detailed information.
- Understand the meaning of each code and the potential causes of the issue.
-
Prioritize the Codes:
- Determine which codes are most critical based on their descriptions and potential impact on vehicle performance.
- Address the most severe issues first.
-
Clear the Codes (Optional):
- If desired, you can clear the DTCs using the app’s “Clear Codes” or “Erase Codes” function.
- Be aware that clearing the codes will also reset any associated diagnostic data.
- Only clear the codes if you have recorded them and understand the underlying issues.
-
Verify the Repair:
- After addressing the issues indicated by the DTCs, clear the codes and drive the vehicle to see if the codes return.
- If the codes reappear, it indicates that the problem has not been fully resolved.
-
Troubleshooting:
- If you are unsure about the meaning of a DTC or how to address the underlying issue, consult a professional mechanic or automotive technician.
4.2. Monitoring Real-Time Engine Data
Monitoring real-time engine data is a powerful feature of ELM327 scanners, allowing you to observe various parameters as the engine operates. This can help diagnose performance issues and ensure your vehicle is running optimally.
-
Connect the Scanner and Open the App:
- Ensure the ELM327 scanner is connected to your vehicle’s OBD2 port.
- Turn on the vehicle’s ignition (but you don’t need to start the engine).
- Launch the diagnostic app on your device and ensure it is connected to the scanner.
-
Navigate to the Real-Time Data Section:
- In the app, find the section for monitoring real-time data. This may be labeled as “Real-Time Information,” “Live Data,” or similar.
-
Select Parameters to Monitor:
- Choose the parameters you want to monitor from the list of available options.
- Common parameters include:
- Engine speed (RPM)
- Vehicle speed
- Coolant temperature
- Intake air temperature
- Mass airflow (MAF)
- Oxygen sensor readings
- Fuel trim
- Throttle position
- Battery voltage
-
View the Data:
- The app will display the selected parameters in real-time.
- You can typically view the data in numerical form, as graphs, or as gauges.
-
Record the Data (Optional):
- Some apps allow you to record the data for later analysis.
- This can be useful for identifying intermittent issues or tracking performance changes over time.
-
Analyze the Data:
- Observe the data as the engine operates under various conditions (idle, acceleration, cruising).
- Look for any abnormal readings or patterns that may indicate a problem.
- Compare the data to the expected values for your vehicle.
-
Troubleshooting:
- Use the real-time data to diagnose performance issues.
- For example, if the engine is running rough, monitor the oxygen sensor readings and fuel trim to identify potential fuel-related problems.
-
Adjust Display Settings:
- Customize the display settings to show the parameters that are most relevant to your diagnostic needs.
-
Save Configurations:
- Save your preferred configurations for future use.
-
Consult Resources:
- Refer to your vehicle’s service manual or online resources for information on interpreting the real-time data.
4.3. Performing Basic Sensor Tests
Performing basic sensor tests with your ELM327 scanner is an effective way to verify the functionality of various sensors in your vehicle. These tests can help identify faulty sensors that may be causing performance issues.
-
Connect the Scanner and Open the App:
- Ensure the ELM327 scanner is connected to your vehicle’s OBD2 port.
- Turn on the vehicle’s ignition (but you don’t need to start the engine).
- Launch the diagnostic app on your device and ensure it is connected to the scanner.
-
Navigate to the Sensor Test Section:
- In the app, find the section for performing sensor tests. This may be labeled as “Sensor Tests,” “Component Tests,” or similar.
-
Select the Sensor to Test:
- Choose the sensor you want to test from the list of available options.
- Common sensors to test include:
- Oxygen sensors
- Mass airflow (MAF) sensor
- Throttle position sensor (TPS)
- Coolant temperature sensor
- Intake air temperature sensor
-
Initiate the Test:
- Follow the app’s instructions to initiate the test.
- The app may provide specific instructions on how to perform the test