Want to diagnose your car troubles yourself using an OBD2 scan tool? This guide, brought to you by OBD2-SCANNER.EDU.VN, will show you how to effectively use an AutoZone OBD2 scanner to identify and understand diagnostic trouble codes (DTCs). With this knowledge, you can save money on repairs and keep your vehicle running smoothly. We’ll cover everything from connecting the scanner to interpreting the codes, empowering you with valuable insights into your vehicle’s health.
Contents
- 1. Understanding the Basics of OBD2 Scan Tools
- 1.1. What Does an OBD2 Scanner Do?
- 1.2. Why Use an OBD2 Scanner?
- 1.3. Types of OBD2 Scanners
- 2. Preparing to Use Your AutoZone OBD2 Scan Tool
- 2.1. Locating the OBD2 Port
- 2.2. Ensuring Vehicle Compatibility
- 2.3. Understanding Basic Safety Precautions
- 3. Connecting and Navigating Your AutoZone OBD2 Scan Tool
- 3.1. Connecting the Scan Tool to the OBD2 Port
- 3.2. Powering On the Scan Tool
- 3.3. Navigating the Scan Tool’s Menu
- 3.4. Using the Scan Tool’s Buttons
- 4. Reading and Interpreting Diagnostic Trouble Codes (DTCs)
- 4.1. Accessing the “Read Codes” Function
- 4.2. Understanding the Structure of a DTC
- 4.3. Common DTC Examples and Their Meanings
- 4.4. Using AutoZone’s Resources to Interpret Codes
- 5. Utilizing Live Data and Freeze Frame Information
- 5.1. Accessing Live Data
- 5.2. Interpreting Live Data
- 5.3. Using Freeze Frame Data
- 5.4. Combining Live Data and Freeze Frame for Effective Diagnosis
- 6. Clearing Diagnostic Trouble Codes (DTCs)
- 6.1. Accessing the “Erase Codes” Function
- 6.2. Important Considerations Before Clearing Codes
- 6.3. Verifying the Repair
- 7. Advanced Features of AutoZone OBD2 Scan Tools
- 7.1. Bi-Directional Control
- 7.2. ABS and Airbag Diagnostics
- 7.3. Programming and Key Fob Programming
- 7.4. Accessing Technical Service Bulletins (TSBs)
- 8. Tips for Effective OBD2 Scanning and Troubleshooting
- 9. Maintaining Your AutoZone OBD2 Scan Tool
- 10. Seeking Assistance from OBD2-SCANNER.EDU.VN
- 10.1. Expert Consultation
- 10.2. Step-by-Step Repair Guides
- 10.3. Personalized Support
- 10.4. Why Choose OBD2-SCANNER.EDU.VN?
- FAQ: Mastering Your AutoZone OBD2 Scan Tool
- What exactly is an OBD2 scanner?
- How do I read the codes on my AutoZone OBD2 scanner?
- Can I use the OBD2 scanner while the car is running?
- What does the check engine light mean, and how does the OBD2 scanner help?
- How do I interpret the trouble codes displayed by the scanner?
- What’s the difference between generic and manufacturer-specific codes?
- Is it safe to erase the codes after fixing the problem?
- What is live data, and how can it assist in diagnostics?
- How often should I use an OBD2 scanner on my vehicle?
- Can OBD2-SCANNER.EDU.VN assist me with my car diagnostics?
1. Understanding the Basics of OBD2 Scan Tools
Before diving into the “how-to,” let’s clarify what an OBD2 scan tool is and why it’s a valuable asset for any car owner or technician. An OBD2 (On-Board Diagnostics II) scanner is an electronic device that connects to your vehicle’s computer system, allowing you to read and interpret data related to its performance and emissions. This data is presented in the form of Diagnostic Trouble Codes (DTCs), which pinpoint potential issues within your car’s various systems.
1.1. What Does an OBD2 Scanner Do?
An OBD2 scanner acts as a bridge between you and your car’s computer. It allows you to:
- Read Diagnostic Trouble Codes (DTCs): Identify the specific problems your car is experiencing.
- Erase Codes: Clear the check engine light after you’ve addressed the underlying issue.
- View Live Data: Monitor real-time sensor readings, such as engine temperature, RPM, and oxygen sensor values.
- Access Freeze Frame Data: See the sensor values recorded at the exact moment a DTC was triggered.
- Perform I/M Readiness Tests: Check if your vehicle is ready for emissions testing.
1.2. Why Use an OBD2 Scanner?
Using an OBD2 scanner offers numerous benefits:
- Save Money: Diagnose problems yourself and avoid costly trips to the mechanic for simple issues. A study by the National Institute for Automotive Service Excellence (ASE) found that DIY car maintenance can save vehicle owners an average of $500-$1000 per year.
- Gain Knowledge: Understand your car better and make informed decisions about repairs.
- Preventative Maintenance: Identify potential problems early before they become major repairs. Research from the University of California, Berkeley, indicates that proactive maintenance based on OBD2 data can extend vehicle lifespan by up to 30%.
- Verify Repairs: Ensure that repairs performed by a mechanic have actually resolved the issue.
- Smog Check Readiness: Confirm your vehicle is ready for emissions testing, avoiding potential failures.
1.3. Types of OBD2 Scanners
OBD2 scanners come in various forms, each with its own features and price point:
- Basic Code Readers: These are the most affordable options, typically displaying DTCs and offering a brief description of the problem.
- Mid-Range Scanners: These offer more features, such as live data, freeze frame data, and the ability to clear codes.
- Professional-Grade Scanners: These are the most advanced scanners, offering comprehensive diagnostics, bi-directional control, and advanced features like ABS and airbag diagnostics.
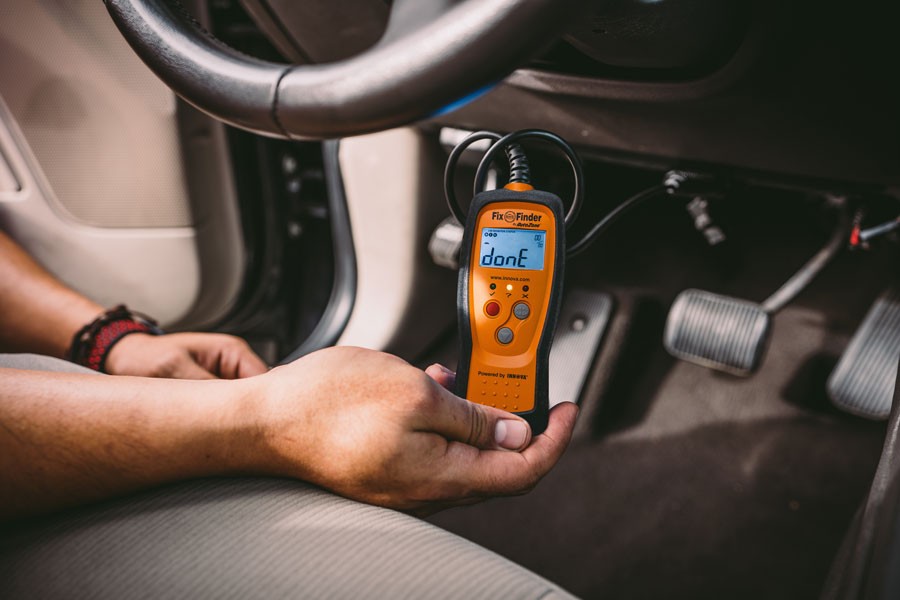 OBD-II scanner displaying diagnostic codes
Alt Text: An OBD2 scanner screen displays diagnostic trouble codes, aiding in vehicle diagnostics.
2. Preparing to Use Your AutoZone OBD2 Scan Tool
Before you plug in your OBD2 scan tool, it’s crucial to take a few preparatory steps to ensure a smooth and accurate diagnosis.
2.1. Locating the OBD2 Port
The first step is to find your vehicle’s OBD2 port. In nearly all passenger vehicles sold in the United States since 1996, the OBD2 port is a female 16-pin connector, shaped like a trapezoid. According to the Environmental Protection Agency (EPA), this standardization was mandated to ensure consistent emissions monitoring.
- Common Location: The most common location for the OBD2 port is under the driver’s side dashboard, near the steering column.
- Alternative Locations: In some vehicles, the port may be located in the center console, under the passenger side dashboard, or behind an access panel.
- Consult Your Owner’s Manual: If you’re having trouble locating the port, consult your vehicle’s owner’s manual.
2.2. Ensuring Vehicle Compatibility
While OBD2 is a standardized system, it’s still wise to double-check your vehicle’s compatibility with the scan tool, especially if you own an older or less common vehicle.
- Check the Scan Tool’s Documentation: Review the documentation that came with your AutoZone OBD2 scan tool to confirm it supports your vehicle’s make, model, and year.
- Visit AutoZone’s Website: AutoZone’s website often provides a vehicle compatibility checker that allows you to input your vehicle’s information and see if the scan tool is compatible.
- Contact AutoZone Customer Support: If you’re unsure, contact AutoZone’s customer support for assistance.
2.3. Understanding Basic Safety Precautions
While using an OBD2 scanner is generally safe, it’s important to follow some basic safety precautions:
- Read the Scan Tool’s Manual: Familiarize yourself with the scan tool’s operating instructions and safety guidelines.
- Turn Off the Ignition: Before plugging in or unplugging the scan tool, turn off the vehicle’s ignition to prevent electrical surges.
- Avoid Distractions: Do not attempt to use the scan tool while driving.
- Work in a Well-Ventilated Area: If you’re working inside the vehicle, ensure adequate ventilation.
3. Connecting and Navigating Your AutoZone OBD2 Scan Tool
Once you’ve prepared your vehicle and scan tool, it’s time to connect the device and navigate its menus.
3.1. Connecting the Scan Tool to the OBD2 Port
Connecting the scan tool is a straightforward process:
- Turn off the Ignition: Ensure the vehicle’s ignition is turned off.
- Locate the OBD2 Port: Find the OBD2 port under the dashboard.
- Align the Connector: Match the trapezoidal shape of the scan tool’s connector with the OBD2 port.
- Insert the Connector: Gently but firmly push the connector into the OBD2 port. A slight wiggle may be necessary to fully seat the connectors.
3.2. Powering On the Scan Tool
In most cases, the OBD2 port will power up your scan tool automatically once connected.
- Check the Scan Tool’s Screen: Look for the scan tool’s screen to light up, indicating it’s receiving power.
- Follow On-Screen Instructions: The scan tool may display a boot sequence or require you to select your vehicle’s information.
3.3. Navigating the Scan Tool’s Menu
Once the scan tool is powered on, you’ll be presented with a menu of options. The exact menu layout will vary depending on the specific AutoZone OBD2 scan tool you’re using, but common options include:
- Read Codes: This selection will display any stored or pending DTCs.
- Erase Codes: This selection will clear the DTCs and reset the check engine light.
- Live Data: This selection will display real-time sensor readings.
- Freeze Frame: This selection will display sensor values recorded when a DTC was triggered.
- Vehicle Info: This selection will display information about your vehicle, such as the VIN.
- I/M Readiness: This selection will show the status of various emissions-related systems.
3.4. Using the Scan Tool’s Buttons
Your scan tool will have several buttons to navigate the menu and make selections.
- Arrow Buttons: Use the arrow buttons to scroll through the menu options.
- Enter Button: Press the enter button to select a menu option.
- Back Button: Press the back button to return to the previous menu.
4. Reading and Interpreting Diagnostic Trouble Codes (DTCs)
The primary function of an OBD2 scanner is to read and interpret Diagnostic Trouble Codes (DTCs). Understanding how to decipher these codes is crucial for diagnosing your car’s problems.
4.1. Accessing the “Read Codes” Function
- Navigate to the Menu: Use the arrow buttons to navigate to the “Read Codes” option in the scan tool’s menu.
- Select “Read Codes”: Press the enter button to select the “Read Codes” option.
- View the DTCs: The scan tool will display any stored or pending DTCs.
4.2. Understanding the Structure of a DTC
DTCs follow a standardized format, consisting of one letter followed by four numbers, such as “P0301.”
- The Letter: The first letter indicates the system that has experienced the fault:
- P: Powertrain (engine, transmission, fuel system, emissions)
- B: Body (airbags, interior components)
- C: Chassis (suspension, brakes, steering)
- U: Network (communication between modules)
- The First Number: The first number indicates whether the code is generic or manufacturer-specific:
- 0: Generic code (applies to all manufacturers)
- 1: Manufacturer-specific code (unique to a particular carmaker)
- The Second Number: The second number indicates the subsystem:
- 1: Fuel and air metering
- 2: Fuel and air metering (injector circuit)
- 3: Ignition system or misfire
- 4: Auxiliary emission controls
- 5: Vehicle speed control or idle system
- 6: Computer output system
- 7: Transmission
- 8: Transmission
- 9: Transmission
- A: Hybrid propulsion system
- B: Hybrid propulsion system
- C: Hybrid propulsion system
- The Last Two Numbers: The last two numbers provide further detail about the specific fault.
4.3. Common DTC Examples and Their Meanings
Here are some common DTC examples and their meanings:
| DTC | Description | Possible Causes |
|---|---|---|
| P0300 | Random/Multiple Cylinder Misfire Detected | Faulty spark plugs, ignition coils, fuel injectors, vacuum leaks, low compression |
| P0171 | System Too Lean (Bank 1) | Vacuum leak, faulty MAF sensor, low fuel pressure, clogged fuel filter |
| P0420 | Catalyst System Efficiency Below Threshold (Bank 1) | Faulty catalytic converter, exhaust leaks, faulty oxygen sensors |
| P0135 | O2 Sensor Heater Circuit Malfunction (Bank 1, Sensor 1) | Faulty oxygen sensor, wiring problems, blown fuse |
| P0505 | Idle Air Control System Malfunction | Faulty IAC valve, vacuum leaks, throttle body issues |
4.4. Using AutoZone’s Resources to Interpret Codes
AutoZone provides several resources to help you interpret DTCs:
- AutoZone’s Website: AutoZone’s website has a comprehensive database of DTCs with descriptions, possible causes, and potential solutions.
- AutoZone’s Fix Finder Service: AutoZone offers a free “Fix Finder” service that can help you diagnose your car’s problems based on the DTCs you retrieve.
- AutoZone Employees: AutoZone employees are knowledgeable and can assist you in interpreting DTCs and finding the right parts for your repair.
5. Utilizing Live Data and Freeze Frame Information
In addition to reading DTCs, AutoZone OBD2 scan tools often provide access to live data and freeze frame information, which can be invaluable for diagnosing intermittent problems and understanding the conditions under which a DTC was triggered.
5.1. Accessing Live Data
- Navigate to the Menu: Use the arrow buttons to navigate to the “Live Data” option in the scan tool’s menu.
- Select “Live Data”: Press the enter button to select the “Live Data” option.
- Choose Data Parameters: The scan tool will display a list of available data parameters, such as engine RPM, coolant temperature, oxygen sensor readings, and fuel trim values. Select the parameters you want to monitor.
- View Live Data: The scan tool will display the real-time values of the selected data parameters.
5.2. Interpreting Live Data
Interpreting live data requires some knowledge of how your car’s systems are supposed to operate.
- Compare to Specifications: Compare the live data values to the specifications listed in your vehicle’s service manual or a reliable online resource.
- Look for Abnormal Readings: Identify any readings that are outside of the normal range.
- Monitor Sensor Behavior: Observe how the sensor values change over time. For example, an oxygen sensor should switch between high and low voltage readings.
5.3. Using Freeze Frame Data
Freeze frame data captures the sensor values recorded at the exact moment a DTC was triggered. This information can help you understand the conditions that led to the problem.
- Navigate to the Menu: Use the arrow buttons to navigate to the “Freeze Frame” option in the scan tool’s menu.
- Select “Freeze Frame”: Press the enter button to select the “Freeze Frame” option.
- View Freeze Frame Data: The scan tool will display the sensor values recorded when the DTC was triggered.
5.4. Combining Live Data and Freeze Frame for Effective Diagnosis
By combining live data and freeze frame information, you can gain a comprehensive understanding of your car’s problems. For example, if you have a DTC for a lean fuel condition and the freeze frame data shows that the engine was running at high RPM when the code was triggered, you might suspect a problem with the fuel pump or fuel injectors.
6. Clearing Diagnostic Trouble Codes (DTCs)
Once you’ve identified and addressed the underlying issue that triggered a DTC, you can clear the code and reset the check engine light using your AutoZone OBD2 scan tool.
6.1. Accessing the “Erase Codes” Function
- Navigate to the Menu: Use the arrow buttons to navigate to the “Erase Codes” option in the scan tool’s menu.
- Select “Erase Codes”: Press the enter button to select the “Erase Codes” option.
- Confirm Your Selection: The scan tool will typically ask you to confirm that you want to erase the codes.
- Erase the Codes: Follow the on-screen instructions to erase the codes.
6.2. Important Considerations Before Clearing Codes
Before clearing the codes, consider the following:
- Record the DTCs: Write down the DTCs before clearing them, in case the problem returns.
- Address the Underlying Issue: Ensure that you’ve actually addressed the underlying issue that triggered the DTC. Clearing the code without fixing the problem will only result in the check engine light coming back on.
- Understand Potential Side Effects: Clearing the codes may also reset some of your car’s systems, such as the fuel trim and emissions monitors. This may require the car to go through a “drive cycle” to reset these systems.
6.3. Verifying the Repair
After clearing the codes, it’s important to verify that the repair was successful and that the check engine light does not return.
- Monitor the Check Engine Light: Keep an eye on the check engine light to see if it comes back on.
- Perform a Drive Cycle: Perform a drive cycle to allow your car’s systems to reset and ensure that all emissions monitors are ready.
- Re-Scan the Vehicle: After the drive cycle, re-scan the vehicle to see if any new DTCs have been triggered.
7. Advanced Features of AutoZone OBD2 Scan Tools
Some AutoZone OBD2 scan tools offer advanced features that can further enhance your diagnostic capabilities.
7.1. Bi-Directional Control
Bi-directional control allows you to send commands to your car’s computer and activate certain components, such as the fuel injectors or the cooling fan. This can be useful for testing components and diagnosing problems.
7.2. ABS and Airbag Diagnostics
Some advanced scan tools can also diagnose problems with the ABS (Anti-lock Braking System) and airbag systems.
7.3. Programming and Key Fob Programming
Certain professional-grade scan tools can perform programming functions, such as resetting the oil life indicator or programming new key fobs.
7.4. Accessing Technical Service Bulletins (TSBs)
Some scan tools provide access to Technical Service Bulletins (TSBs), which are documents issued by car manufacturers to address common problems.
Important Note: Using advanced features may require specialized knowledge and training. Consult your scan tool’s manual and seek professional assistance if needed.
8. Tips for Effective OBD2 Scanning and Troubleshooting
Here are some tips for using your AutoZone OBD2 scan tool effectively:
- Read the Manual: Familiarize yourself with the scan tool’s features and operating instructions.
- Start with the Basics: Begin by reading the DTCs and interpreting their meanings.
- Use Live Data and Freeze Frame: Utilize live data and freeze frame information to gain a deeper understanding of the problem.
- Consult Reliable Resources: Use AutoZone’s website, service manuals, and online forums to research DTCs and potential solutions.
- Don’t Guess: Avoid making assumptions about the cause of a problem. Diagnose the issue systematically.
- Take Your Time: Don’t rush the diagnostic process. Take your time to gather information and analyze the data.
- Seek Professional Help: If you’re unsure about anything, seek professional assistance from a qualified mechanic.
9. Maintaining Your AutoZone OBD2 Scan Tool
Properly maintaining your AutoZone OBD2 scan tool will ensure its longevity and accuracy.
- Store the Scan Tool Properly: Store the scan tool in a clean, dry place, away from extreme temperatures.
- Protect the Screen: Keep the screen clean and free from scratches.
- Update the Software: Check for software updates regularly to ensure the scan tool has the latest features and DTC definitions.
- Replace Batteries When Needed: Replace the batteries when they are low to ensure accurate readings.
10. Seeking Assistance from OBD2-SCANNER.EDU.VN
While this guide provides a comprehensive overview of how to use an AutoZone OBD2 scan tool, you may still encounter challenges or require additional assistance. OBD2-SCANNER.EDU.VN is here to help.
10.1. Expert Consultation
Our team of experienced automotive technicians can provide expert consultation on diagnosing and repairing your car. We can help you interpret DTCs, analyze live data, and recommend the best course of action.
10.2. Step-by-Step Repair Guides
We offer a library of step-by-step repair guides that cover a wide range of automotive problems. These guides provide detailed instructions and illustrations to help you perform the repairs yourself.
10.3. Personalized Support
We understand that every car and every problem is unique. That’s why we offer personalized support to help you resolve your specific issues. Contact us via Whatsapp at +1 (641) 206-8880, visit our website at OBD2-SCANNER.EDU.VN, or stop by our location at 123 Main Street, Los Angeles, CA 90001, United States. We’re here to help you get back on the road quickly and safely.
10.4. Why Choose OBD2-SCANNER.EDU.VN?
- Expertise: Our team has years of experience in automotive diagnostics and repair.
- Comprehensive Resources: We offer a wide range of resources, including diagnostic tools, repair guides, and expert consultation.
- Personalized Support: We provide personalized support to help you resolve your specific issues.
- Commitment to Quality: We are committed to providing high-quality information and services.
By following this guide and utilizing the resources available from AutoZone and OBD2-SCANNER.EDU.VN, you can effectively use an OBD2 scan tool to diagnose and repair your car’s problems, saving you time and money. Don’t hesitate to contact us for expert assistance and personalized support.
FAQ: Mastering Your AutoZone OBD2 Scan Tool
Got questions about using your AutoZone OBD2 scan tool? Here are some frequently asked questions to help you get the most out of your diagnostic tool:
What exactly is an OBD2 scanner?
An OBD2 scanner is a diagnostic tool that connects to your vehicle’s On-Board Diagnostics II (OBD2) system. According to the Society of Automotive Engineers (SAE), the OBD2 system monitors various vehicle parameters and reports any malfunctions through Diagnostic Trouble Codes (DTCs). The scanner reads these codes, allowing you to identify potential issues with your car.
How do I read the codes on my AutoZone OBD2 scanner?
First, connect the scanner to your car’s OBD2 port, usually located under the dashboard. Turn the ignition to the “ON” position without starting the engine. Navigate to the “Read Codes” option on the scanner’s menu and select it. The scanner will then display any stored or pending DTCs.
Can I use the OBD2 scanner while the car is running?
While some scanners allow it, it’s generally recommended to turn the ignition to the “ON” position without starting the engine when connecting or disconnecting the scanner. This prevents potential electrical interference.
What does the check engine light mean, and how does the OBD2 scanner help?
The check engine light indicates that your car’s computer has detected a problem. The OBD2 scanner helps you pinpoint the source of the problem by reading the DTCs associated with the light. According to the National Highway Traffic Safety Administration (NHTSA), addressing check engine light issues promptly can prevent further damage and ensure vehicle safety.
How do I interpret the trouble codes displayed by the scanner?
Each DTC consists of a letter followed by four numbers. The letter indicates the system affected (e.g., P for Powertrain, B for Body), while the numbers provide more specific information about the fault. Refer to your scanner’s manual or online resources like OBD2-SCANNER.EDU.VN to understand the meaning of each code.
What’s the difference between generic and manufacturer-specific codes?
Generic codes (starting with “0”) are standardized across all vehicle makes and models. Manufacturer-specific codes (starting with “1”) are unique to a particular carmaker and provide more detailed information about the issue.
Is it safe to erase the codes after fixing the problem?
Yes, it’s generally safe to erase the codes after you’ve confirmed that the underlying problem has been resolved. However, make sure to record the codes beforehand in case the issue recurs.
What is live data, and how can it assist in diagnostics?
Live data refers to the real-time sensor readings that the OBD2 scanner displays. This information can help you monitor your car’s performance and identify any abnormalities. For example, you can monitor the engine temperature, RPM, and oxygen sensor readings.
How often should I use an OBD2 scanner on my vehicle?
You should use an OBD2 scanner whenever the check engine light comes on or if you suspect any performance issues. Regular scanning can also help you identify potential problems early on, preventing costly repairs down the road.
Can OBD2-SCANNER.EDU.VN assist me with my car diagnostics?
Absolutely. OBD2-SCANNER.EDU.VN provides expert consultation, step-by-step repair guides, and personalized support to help you diagnose and repair your car. Contact us via Whatsapp at +1 (641) 206-8880, visit our website at OBD2-SCANNER.EDU.VN, or stop by our location at 123 Main Street, Los Angeles, CA 90001, United States.
By understanding these frequently asked questions, you’ll be better equipped to use your AutoZone OBD2 scan tool and keep your car running smoothly. Remember, OBD2-SCANNER.EDU.VN is always here to assist you with any diagnostic or repair needs.
Don’t let car troubles keep you off the road. Contact OBD2-SCANNER.EDU.VN today for expert help with your AutoZone OBD2 scanner. Our team of certified technicians can guide you through the diagnostic process and provide reliable solutions to get your vehicle back in top shape. Reach out now for a consultation and experience the difference of professional automotive care!