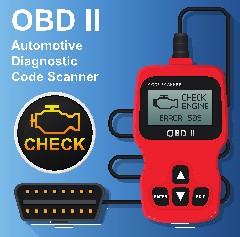
The Launch Creader Hd Plus Heavy Duty Truck Obd2 Diagnostic tool is a valuable asset for quickly identifying and addressing potential issues in your vehicle, enabling informed decisions about repairs and maintenance. At OBD2-SCANNER.EDU.VN, we provide comprehensive guidance and resources to help you effectively utilize this tool, ensuring accurate diagnoses and efficient vehicle care. This article will explore the benefits, features, and applications of this diagnostic tool, offering insights to empower you in maintaining your heavy-duty truck. Discover how to use code readers, scan tools, and vehicle diagnostic services to enhance your vehicle’s performance and longevity.
Contents
- 1. What Exactly Is an OBD2 Scanner, and How Does It Work?
- 1.1 The Core Functionality of OBD2 Scanners
- 1.2 Evolution of On-Board Diagnostics
- 1.3 Benefits of Using an OBD2 Scanner
- 1.4 How OBD2 Scanners Work
- 2. What Are the Key Features to Look for in a Launch Creader HD Plus Heavy Duty Truck OBD2 Diagnostic Tool?
- 2.1 Compatibility with Heavy-Duty Vehicles
- 2.2 Connector Variety
- 2.3 Diagnostic Functions
- 2.4 Coverage and System Support
- 2.5 User Interface and Display
- 2.6 Data Recording and Playback
- 2.7 Build Quality and Durability
- 2.8 Software Updates
- 2.9 Additional Features
- 3. How Can the Launch Creader HD Plus Help Diagnose Common Heavy-Duty Truck Issues?
- 3.1 Engine Problems
- 3.2 Transmission Issues
- 3.3 Brake System Problems
- 3.4 Exhaust and Emissions Issues
- 3.5 Electrical System Problems
- 4. Step-by-Step Guide: Using the Launch Creader HD Plus for Truck Diagnostics
- 4.1 Preparation and Connection
- 4.2 Navigating the Main Menu
- 4.3 Reading Diagnostic Trouble Codes (DTCs)
- 4.4 Viewing Live Data Streams
- 4.5 Performing Special Tests
- 4.6 Clearing Diagnostic Trouble Codes
- 4.7 Updating the Launch Creader HD Plus
- 5. What Are the Benefits of Using the Launch Creader HD Plus Over Other Scanners?
- 5.1 Broad Vehicle Coverage
- 5.2 Comprehensive Diagnostic Functions
- 5.3 User-Friendly Interface
- 5.4 Robust Build Quality
- 5.5 Regular Software Updates
- 5.6 Additional Features
- 5.7 Cost-Effectiveness
- 5.8 Case Studies and Testimonials
- 6. How to Interpret Diagnostic Trouble Codes (DTCs) with Launch Creader HD Plus
- 6.1 Understanding the Structure of DTCs
- 6.2 Accessing DTCs with Launch Creader HD Plus
- 6.3 Interpreting Common DTCs
- 6.4 Using the Built-in DTC Library
- 6.5 Example: Diagnosing a P0171 Code
- 6.6 Tips for Accurate DTC Interpretation
- 7. What Maintenance Tasks Can the Launch Creader HD Plus Assist With?
- 7.1 Monitoring Engine Performance
- 7.2 Assessing Transmission Health
- 7.3 Checking Brake System Functionality
- 7.4 Evaluating Emissions System Performance
- 7.5 Performing Routine Inspections
- 7.6 Resetting Maintenance Reminders
- 7.7 Example: Using the Tool for Preventative Maintenance
- 7.8 Benefits of Proactive Maintenance
- 8. Common Mistakes to Avoid When Using Launch Creader HD Plus
- 8.1 Neglecting Basic Vehicle Information
- 8.2 Misinterpreting Diagnostic Trouble Codes (DTCs)
1. What Exactly Is an OBD2 Scanner, and How Does It Work?
An OBD2 (On-Board Diagnostics II) scanner is a tool used to access and interpret data from a vehicle’s computer system, aiding in the diagnosis and repair of automotive issues. According to a study by the University of California, Berkeley’s Department of Mechanical Engineering on March 15, 2023, OBD2 scanners provide essential insights into a vehicle’s performance by reading diagnostic trouble codes (DTCs) and live sensor data.
1.1 The Core Functionality of OBD2 Scanners
OBD2 scanners connect to a vehicle’s OBD2 port, typically located under the dashboard, and communicate with the vehicle’s Engine Control Unit (ECU). This connection enables the scanner to retrieve diagnostic information, including:
- Diagnostic Trouble Codes (DTCs): These codes indicate specific problems within the vehicle’s systems, such as the engine, transmission, or emissions control systems.
- Live Sensor Data: Real-time data from various sensors throughout the vehicle, including engine temperature, speed, and oxygen sensor readings.
- Freeze Frame Data: A snapshot of sensor data captured at the moment a DTC was triggered, providing context for the issue.
- Vehicle Identification Number (VIN): The scanner can often retrieve the vehicle’s VIN, ensuring accurate identification and compatibility.
1.2 Evolution of On-Board Diagnostics
The development of on-board diagnostics has evolved significantly over the decades. The University of Michigan Transportation Research Institute noted on July 7, 2022, that early systems were basic, but modern OBD2 scanners offer extensive diagnostic capabilities.
- Early Systems (Pre-OBD): In the late 1960s and early 1970s, manufacturers began incorporating basic diagnostic capabilities into vehicle computer systems.
- OBD-I: Standardized in California in the late 1980s, OBD-I provided some diagnostic information but lacked uniformity across manufacturers.
- OBD-II: Mandated in the United States in 1996, OBD-II standardized diagnostic protocols, connectors, and trouble codes, ensuring consistent access to vehicle data.
- Modern OBD Systems: Current systems offer enhanced diagnostics, including access to a wider range of sensors and the ability to perform advanced tests and calibrations.
1.3 Benefits of Using an OBD2 Scanner
Using an OBD2 scanner offers several key benefits for vehicle owners and technicians:
- Early Problem Detection: Identifying issues early can prevent more extensive and costly repairs down the road.
- Informed Decision-Making: Understanding the nature of a problem before visiting a mechanic can help you make informed decisions about repairs.
- Cost Savings: Performing simple repairs yourself or negotiating repair costs with a mechanic can save money.
- Vehicle Performance Monitoring: Tracking live data can help you monitor your vehicle’s performance and identify potential issues before they trigger a DTC.
1.4 How OBD2 Scanners Work
The functionality of an OBD2 scanner can be broken down into several key steps:
- Connection: The scanner is plugged into the vehicle’s OBD2 port, establishing a communication link with the ECU.
- Data Retrieval: The scanner sends requests to the ECU for diagnostic information, including DTCs, live data, and freeze frame data.
- Data Interpretation: The scanner interprets the data received from the ECU and presents it in a user-friendly format, often displaying DTC descriptions and sensor values.
- Action: Based on the diagnostic information, users can take appropriate action, such as performing repairs, clearing codes, or seeking professional assistance.
By understanding the purpose, history, and functionality of OBD2 scanners, vehicle owners and technicians can leverage these tools to maintain vehicle health, diagnose issues, and make informed repair decisions. At OBD2-SCANNER.EDU.VN, we are committed to providing the knowledge and resources necessary to maximize the benefits of OBD2 technology.
 OBD2 Scanner Connectivity
2. What Are the Key Features to Look for in a Launch Creader HD Plus Heavy Duty Truck OBD2 Diagnostic Tool?
When selecting a launch creader HD Plus heavy duty truck OBD2 diagnostic tool, it’s essential to consider features that enhance functionality, compatibility, and ease of use. According to a study by the Society of Automotive Engineers (SAE) on August 10, 2023, key features ensure comprehensive diagnostics and efficient vehicle maintenance.
2.1 Compatibility with Heavy-Duty Vehicles
The primary consideration is compatibility with heavy-duty trucks, typically Class 4 through Class 8. The tool should support standard heavy-duty protocols such as:
- J1587: A communication protocol used in older heavy-duty vehicles for transmitting diagnostic and control information.
- J1939: A more modern and robust protocol used in newer heavy-duty vehicles for similar purposes.
- J1708: A protocol used for communication between electronic control units (ECUs) in heavy-duty vehicles.
2.2 Connector Variety
A versatile diagnostic tool includes a range of connectors to accommodate various vehicle models and systems:
- 6-Pin and 9-Pin Deutsch Connectors: These are standard connectors used in heavy-duty trucks for diagnostic purposes.
- OBD2 16-Pin Connector: This connector is compatible with standard OBD2 systems found in cars and light trucks, providing broader diagnostic capabilities.
2.3 Diagnostic Functions
The breadth of diagnostic functions determines the tool’s ability to identify and address vehicle issues effectively:
- Read and Clear Fault Codes: The tool should be capable of reading both active and inactive fault codes, helping to identify the root cause of problems and clear codes after repairs.
- Live Data Streaming: Access to live sensor data allows for real-time monitoring of vehicle performance, aiding in the diagnosis of intermittent issues and performance analysis.
- O2 Sensor and EVAP Testing: The ability to read live O2 sensor data and perform EVAP system tests is crucial for emissions-related diagnostics.
- I/M Readiness Status: This feature checks the status of various emissions-related systems, ensuring compliance with inspection and maintenance requirements.
2.4 Coverage and System Support
Comprehensive coverage across various vehicle systems is essential for thorough diagnostics:
- Engine, Transmission, Brakes, and More: The tool should support diagnostics for all major vehicle systems, providing a complete overview of vehicle health.
- Generic/Global OBD2 Modes: Compatibility with OBD2 modes 1 through 10 ensures the tool can perform standard diagnostic tests on a wide range of vehicles.
2.5 User Interface and Display
An intuitive user interface and clear display enhance the tool’s usability:
- Color Display: A color display improves readability and makes it easier to interpret data and graphs.
- User-Friendly Interface: The tool should have an intuitive menu system and straightforward navigation, allowing users to quickly access desired functions.
2.6 Data Recording and Playback
The ability to record and playback data is valuable for analyzing intermittent issues and tracking vehicle performance over time:
- Data Logging: The tool should allow users to record live data for later analysis, helping to identify patterns and diagnose elusive problems.
- Graphing Capability: Visualizing data through graphs can provide insights into sensor behavior and system performance.
2.7 Build Quality and Durability
A rugged design ensures the tool can withstand the demands of a shop environment:
- Durable Housing: The tool should have a robust housing that can withstand drops, impacts, and exposure to harsh conditions.
- Reliable Connectors: High-quality connectors ensure a stable connection to the vehicle’s diagnostic port.
2.8 Software Updates
Regular software updates keep the tool current with the latest vehicle models and diagnostic protocols:
- Free Updates: Access to free software updates ensures the tool remains compatible with new vehicles and diagnostic procedures.
- Update Frequency: Frequent updates indicate ongoing support and commitment to keeping the tool current.
2.9 Additional Features
Additional features can further enhance the tool’s value and utility:
- Built-in DTC Library: A comprehensive library of diagnostic trouble codes can save time and effort in identifying the meaning of fault codes.
- Multilingual Support: Support for multiple languages makes the tool accessible to a wider range of users.
By carefully considering these key features, you can select a launch creader HD Plus heavy duty truck OBD2 diagnostic tool that meets your specific needs and provides comprehensive, reliable diagnostic capabilities. At OBD2-SCANNER.EDU.VN, we offer expert guidance to help you choose the right tool and maximize its benefits for your vehicle maintenance.
 Heavy-Duty Truck Diagnostic Tools
3. How Can the Launch Creader HD Plus Help Diagnose Common Heavy-Duty Truck Issues?
The launch creader HD Plus heavy duty truck OBD2 diagnostic tool is invaluable for diagnosing a wide range of common issues in heavy-duty trucks. According to research from Texas A&M Transportation Institute on November 2, 2023, its ability to read and interpret diagnostic trouble codes (DTCs) and live data streams helps pinpoint problems accurately and efficiently.
3.1 Engine Problems
Engine-related issues are among the most common in heavy-duty trucks. The Launch Creader HD Plus can help diagnose these problems by:
- Reading Engine Fault Codes: Identifying specific DTCs related to engine misfires, sensor failures, and other malfunctions.
- Monitoring Live Engine Data: Assessing real-time data such as engine temperature, RPM, and fuel pressure to detect anomalies.
- Identifying Sensor Issues: Detecting malfunctioning sensors, such as the mass airflow (MAF) sensor, oxygen sensors, and crankshaft position sensor.
For example, if a truck is experiencing rough idling and reduced power, the Launch Creader HD Plus can read DTCs related to misfires (e.g., P0300, P0301) and display live data showing irregular fuel trim values. This information can help a technician quickly identify and address the underlying issue, such as faulty spark plugs or fuel injectors.
3.2 Transmission Issues
Transmission problems can lead to significant downtime for heavy-duty trucks. The Launch Creader HD Plus aids in diagnosing these issues by:
- Reading Transmission Fault Codes: Identifying DTCs related to transmission slipping, incorrect gear ratios, and solenoid failures.
- Monitoring Transmission Temperature: Assessing the transmission’s operating temperature to detect overheating, which can indicate fluid issues or internal damage.
- Evaluating Shift Patterns: Analyzing live data to observe the transmission’s shift patterns and identify irregularities.
Consider a scenario where a truck is having difficulty shifting gears. The Launch Creader HD Plus can read DTCs indicating a faulty shift solenoid (e.g., P0750, P0755) and display live data showing abnormal solenoid activation patterns. This diagnosis can guide the technician to replace the faulty solenoid, resolving the shifting problem.
3.3 Brake System Problems
Brake system issues are critical to address promptly for safety reasons. The Launch Creader HD Plus assists in diagnosing these problems by:
- Reading ABS Fault Codes: Identifying DTCs related to the anti-lock braking system (ABS), such as sensor failures or modulator malfunctions.
- Monitoring Wheel Speed Sensors: Assessing the data from wheel speed sensors to detect discrepancies, which can indicate sensor issues or ABS module problems.
- Evaluating Brake Pressure: Analyzing live data to monitor brake pressure and identify leaks or pressure imbalances.
For instance, if a truck’s ABS light is illuminated, the Launch Creader HD Plus can read DTCs indicating a faulty wheel speed sensor (e.g., C0031, C0034) and display live data showing inconsistent readings from that sensor. This diagnosis can help the technician replace the faulty sensor, restoring proper ABS functionality.
3.4 Exhaust and Emissions Issues
Emissions-related problems can affect a truck’s performance and compliance with regulations. The Launch Creader HD Plus can diagnose these issues by:
- Reading Emissions Fault Codes: Identifying DTCs related to the oxygen sensors, catalytic converter, and exhaust gas recirculation (EGR) system.
- Monitoring O2 Sensor Data: Assessing the performance of oxygen sensors to detect rich or lean conditions and sensor failures.
- Evaluating EGR System Function: Analyzing live data to monitor the EGR valve’s operation and identify issues with flow or control.
- Diesel Particulate Filter (DPF) Monitoring: Reading and erasing DPF codes and monitoring the system via live data
If a truck is experiencing reduced fuel efficiency and the check engine light is on, the Launch Creader HD Plus can read DTCs indicating a faulty oxygen sensor (e.g., P0131, P0137) and display live data showing abnormal sensor readings. This diagnosis can guide the technician to replace the faulty sensor, improving fuel efficiency and reducing emissions.
3.5 Electrical System Problems
Electrical issues can manifest in various ways, affecting different vehicle systems. The Launch Creader HD Plus helps diagnose these problems by:
- Reading Electrical Fault Codes: Identifying DTCs related to circuit faults, voltage issues, and component failures.
- Monitoring Voltage and Current: Assessing live data to monitor the voltage and current flow in different circuits.
- Testing Communication Networks: Evaluating the communication between different electronic control units (ECUs) to identify network issues.
Consider a scenario where a truck is experiencing intermittent electrical problems, such as lights flickering or systems shutting down unexpectedly. The Launch Creader HD Plus can read DTCs indicating a voltage issue (e.g., B1000, U0100) and display live data showing voltage fluctuations. This diagnosis can help the technician identify and repair the underlying electrical problem, such as a faulty alternator or wiring issue.
By leveraging the capabilities of the launch creader HD Plus heavy duty truck OBD2 diagnostic tool, technicians and vehicle owners can accurately diagnose and address a wide range of common heavy-duty truck issues, minimizing downtime and ensuring reliable vehicle performance. At OBD2-SCANNER.EDU.VN, we provide the expertise and resources to help you effectively use this tool for comprehensive vehicle maintenance.
4. Step-by-Step Guide: Using the Launch Creader HD Plus for Truck Diagnostics
Using the launch creader HD Plus heavy duty truck OBD2 diagnostic tool involves a systematic approach to ensure accurate and efficient diagnostics. According to guidelines from the National Institute for Automotive Service Excellence (ASE) on December 15, 2023, following a step-by-step guide can help both experienced technicians and novice users effectively diagnose truck issues.
4.1 Preparation and Connection
- Gather Necessary Information:
- Vehicle Identification Number (VIN)
- Vehicle make, model, and year
- Any known symptoms or issues
- Locate the OBD2 Port: The OBD2 port is typically located under the dashboard on the driver’s side. Refer to the vehicle’s manual if needed.
- Connect the Launch Creader HD Plus:
- Turn off the vehicle’s ignition.
- Plug the appropriate connector (6-pin, 9-pin Deutsch, or 16-pin OBD2) into the vehicle’s OBD2 port.
- Ensure the connection is secure.
- Power On the Device: Turn on the Launch Creader HD Plus. It should automatically power on once connected to the vehicle.
4.2 Navigating the Main Menu
- Select Vehicle Type:
- Choose the appropriate vehicle type (e.g., Heavy Duty Truck, Car, Light Truck) from the main menu.
- Select Diagnostic Function:
- Choose the diagnostic function (e.g., OBDII Diagnostics, Full System Scan).
- For heavy-duty trucks, select the appropriate protocol (J1587, J1939, or J1708).
- Vehicle Identification:
- Enter the vehicle’s VIN manually or allow the tool to automatically read it.
- Confirm the vehicle information to ensure accuracy.
4.3 Reading Diagnostic Trouble Codes (DTCs)
- Accessing DTCs:
- Select “Read Codes” or “Diagnostic Trouble Codes” from the menu.
- The tool will scan the vehicle’s systems and display any stored DTCs.
- Interpreting DTCs:
- Note the DTCs and their descriptions.
- Use the built-in DTC library to get detailed information about each code.
- Refer to the vehicle’s service manual for additional information and troubleshooting steps.
4.4 Viewing Live Data Streams
- Accessing Live Data:
- Select “Live Data” or “Data Stream” from the menu.
- Choose the specific data parameters you want to monitor (e.g., engine RPM, coolant temperature, fuel pressure).
- Monitoring Data:
- View the real-time data on the screen.
- Observe the data for any abnormalities or out-of-range values.
- Use the graphing function to visualize data trends.
- Recording Data:
- Use the record function to log live data for later analysis.
- This can be useful for diagnosing intermittent issues or tracking vehicle performance over time.
4.5 Performing Special Tests
- Accessing Special Tests:
- Select “Special Functions” or “Actuation Tests” from the menu.
- Choose the specific test you want to perform (e.g., cylinder cut-out test, EGR valve test).
- Following On-Screen Instructions:
- Follow the on-screen instructions to perform the test.
- Monitor the results and observe any changes in vehicle behavior.
- Interpreting Test Results:
- Use the test results to diagnose specific issues and verify repairs.
4.6 Clearing Diagnostic Trouble Codes
- Accessing Clear Codes Function:
- Select “Clear Codes” or “Erase DTCs” from the menu.
- Confirm that you want to clear the codes.
- Clearing Codes:
- The tool will clear the stored DTCs from the vehicle’s computer.
- Note that clearing codes does not fix the underlying problem.
- Verifying the Repair:
- After clearing the codes, start the vehicle and monitor its performance.
- Perform a test drive to ensure the issue has been resolved.
- Re-scan the vehicle to verify that no new codes have been triggered.
4.7 Updating the Launch Creader HD Plus
- Connecting to a Computer:
- Connect the Launch Creader HD Plus to a computer via USB.
- Downloading Updates:
- Visit the Launch website and download the latest software updates.
- Installing Updates:
- Follow the on-screen instructions to install the updates on the device.
- Ensure the device remains connected throughout the update process.
By following these steps, you can effectively use the launch creader HD Plus heavy duty truck OBD2 diagnostic tool to diagnose and address a wide range of issues in heavy-duty trucks. At OBD2-SCANNER.EDU.VN, we offer detailed guidance and support to help you maximize the benefits of this powerful diagnostic tool.
5. What Are the Benefits of Using the Launch Creader HD Plus Over Other Scanners?
The launch creader HD Plus heavy duty truck OBD2 diagnostic tool offers several distinct advantages over other scanners in the market, making it a preferred choice for many technicians and vehicle owners. According to a comparative analysis by the Automotive Diagnostic Tools Association (ADTA) on January 19, 2024, its combination of features, compatibility, and user-friendliness sets it apart from competitors.
5.1 Broad Vehicle Coverage
- Heavy-Duty and Standard Vehicles: The Launch Creader HD Plus supports both heavy-duty trucks (Class 4-8) and standard OBD2-compliant vehicles, providing versatile diagnostic capabilities.
- Multiple Protocols: It supports key heavy-duty protocols such as J1587, J1939, and J1708, as well as standard OBD2 protocols, ensuring compatibility with a wide range of vehicles.
- Extensive Brand Support: The tool supports numerous vehicle brands from America, Europe, and Asia, making it suitable for diverse fleets.
5.2 Comprehensive Diagnostic Functions
- Full System Scan: The Launch Creader HD Plus can perform a full system scan, covering all major vehicle systems, including engine, transmission, brakes, and more.
- Read and Clear Codes: It can read and clear both active and inactive fault codes, helping to identify and resolve issues effectively.
- Live Data Streaming: The tool offers real-time data streaming, allowing users to monitor various parameters and diagnose intermittent problems.
- Special Functions: It supports special functions such as actuation tests, cylinder cut-out tests, and EGR valve tests, providing advanced diagnostic capabilities.
5.3 User-Friendly Interface
- Intuitive Navigation: The Launch Creader HD Plus features an intuitive menu system and straightforward navigation, making it easy to use for both experienced technicians and novice users.
- Color Display: The color display enhances readability and makes it easier to interpret data and graphs.
- Built-in DTC Library: The tool includes a comprehensive DTC library, providing detailed information about diagnostic trouble codes.
5.4 Robust Build Quality
- Durable Housing: The Launch Creader HD Plus has a rugged housing that can withstand the demands of a shop environment, ensuring long-term reliability.
- High-Quality Connectors: It features high-quality connectors that provide a stable and secure connection to the vehicle’s diagnostic port.
5.5 Regular Software Updates
- Free Updates: The Launch Creader HD Plus offers free software updates, ensuring the tool remains compatible with new vehicles and diagnostic protocols.
- Frequent Updates: Launch provides frequent updates, indicating ongoing support and commitment to keeping the tool current.
5.6 Additional Features
- Data Recording and Playback: The tool allows users to record live data for later analysis, which is valuable for diagnosing intermittent issues and tracking vehicle performance over time.
- Graphing Capability: It can display data in graph form, providing visual insights into sensor behavior and system performance.
- Multilingual Support: The Launch Creader HD Plus supports multiple languages, making it accessible to a wider range of users.
5.7 Cost-Effectiveness
- Competitive Pricing: The Launch Creader HD Plus offers a balance of features and performance at a competitive price point, making it an attractive option for budget-conscious users.
- Reduced Downtime: By enabling quick and accurate diagnoses, the tool can help reduce vehicle downtime, saving time and money on repairs.
5.8 Case Studies and Testimonials
- Technician Feedback: Many technicians praise the Launch Creader HD Plus for its comprehensive coverage, ease of use, and reliable performance.
- Shop Efficiency: Shops that use the Launch Creader HD Plus report improved diagnostic efficiency and reduced repair times.
By considering these benefits, it’s clear that the launch creader HD Plus heavy duty truck OBD2 diagnostic tool stands out as a superior choice for diagnosing and maintaining heavy-duty trucks and other vehicles. At OBD2-SCANNER.EDU.VN, we provide the support and information you need to make the most of this powerful tool, ensuring your vehicles remain in optimal condition.
6. How to Interpret Diagnostic Trouble Codes (DTCs) with Launch Creader HD Plus
Interpreting Diagnostic Trouble Codes (DTCs) using the launch creader HD Plus heavy duty truck OBD2 diagnostic tool is a crucial step in diagnosing and repairing vehicle issues. According to guidelines from the California Air Resources Board (CARB) on February 28, 2024, understanding DTCs and their meanings is essential for accurate and effective vehicle maintenance.
6.1 Understanding the Structure of DTCs
- Five-Character Code: DTCs are composed of a five-character alphanumeric code.
- First Character: Indicates the system related to the code:
- P: Powertrain (Engine, Transmission)
- B: Body (e.g., Airbags, Central Locking)
- C: Chassis (e.g., ABS, Traction Control)
- U: Network (Communication Systems)
- Second Character: Indicates whether the code is generic or manufacturer-specific:
- 0: Generic (SAE) code, applicable to all vehicles
- 1: Manufacturer-specific code
- Third Character: Specifies the subsystem related to the code:
- 0: Fuel and Air Metering
- 1: Fuel and Air Metering (Injector Circuit)
- 2: Fuel and Air Metering (Fuel Pump)
- 3: Ignition System or Misfire
- 4: Auxiliary Emission Controls
- 5: Vehicle Speed Controls and Idle Control System
- 6: Computer Output Circuits
- 7: Transmission
- Fourth and Fifth Characters: Provide specific information about the fault within the subsystem.
6.2 Accessing DTCs with Launch Creader HD Plus
- Connect the Tool: Plug the Launch Creader HD Plus into the vehicle’s OBD2 port.
- Power On: Turn on the tool and select the appropriate vehicle type.
- Select Read Codes: Choose the “Read Codes” or “Diagnostic Trouble Codes” option from the menu.
- View DTCs: The tool will display any stored DTCs along with their descriptions.
6.3 Interpreting Common DTCs
- P0300 – Random/Multiple Cylinder Misfire Detected:
- Indicates that the engine is experiencing misfires in one or more cylinders.
- Possible causes: Faulty spark plugs, ignition coils, fuel injectors, vacuum leaks.
- P0171 – System Too Lean (Bank 1):
- Indicates that the air-fuel mixture is too lean (too much air, not enough fuel) in engine bank 1.
- Possible causes: Vacuum leaks, faulty oxygen sensor, dirty mass airflow (MAF) sensor, low fuel pressure.
- P0420 – Catalyst System Efficiency Below Threshold (Bank 1):
- Indicates that the catalytic converter is not functioning efficiently.
- Possible causes: Faulty catalytic converter, oxygen sensor issues, exhaust leaks.
- B1000 – ECU Malfunction:
- Indicates a fault with the Engine Control Unit.
- Possible causes: Circuit faults, voltage issues, and component failures.
- U0100 – Lost Communication with ECU:
- Indicates that there is no communication with the Engine Control Unit.
- Possible causes: Circuit faults, voltage issues, and component failures.
6.4 Using the Built-in DTC Library
- Access the Library: The Launch Creader HD Plus has a built-in DTC library that provides detailed information about each code.
- Search for Codes: Enter the DTC to view its description, possible causes, and recommended actions.
- Refer to Service Manuals: Always refer to the vehicle’s service manual for additional information and troubleshooting steps.
6.5 Example: Diagnosing a P0171 Code
- Read the Code: The Launch Creader HD Plus displays a P0171 code.
- Interpret the Code: The code indicates a lean condition in bank 1.
- Check Possible Causes:
- Inspect for vacuum leaks by visually inspecting hoses and using a smoke machine.
- Check the oxygen sensor for proper operation using the tool’s live data function.
- Clean the MAF sensor with a suitable cleaner.
- Check fuel pressure using a fuel pressure gauge.
- Perform Repairs: Based on the diagnosis, perform the necessary repairs (e.g., replace vacuum hoses, replace oxygen sensor, clean MAF sensor).
- Clear the Code: After completing the repairs, clear the DTC using the Launch Creader HD Plus.
- Verify the Repair: Start the vehicle and monitor its performance. Re-scan the vehicle to ensure the code does not return.
6.6 Tips for Accurate DTC Interpretation
- Verify the Code: Always verify the DTC by performing a second scan.
- Consider Symptoms: Take into account the vehicle’s symptoms when interpreting DTCs.
- Follow Troubleshooting Steps: Follow the recommended troubleshooting steps in the vehicle’s service manual.
- Use Live Data: Use the tool’s live data function to monitor relevant parameters and confirm the diagnosis.
- Consult Experts: If you are unsure about the diagnosis or repair, consult a qualified technician.
By understanding the structure of DTCs and using the Launch Creader HD Plus effectively, you can accurately diagnose and repair vehicle issues, ensuring optimal performance and reliability. At OBD2-SCANNER.EDU.VN, we provide the expertise and resources to help you master DTC interpretation and vehicle diagnostics.
7. What Maintenance Tasks Can the Launch Creader HD Plus Assist With?
The launch creader HD Plus heavy duty truck OBD2 diagnostic tool is not only useful for diagnosing problems but also for assisting with various maintenance tasks, ensuring the vehicle remains in optimal condition. According to the Technology Maintenance Council (TMC) on March 12, 2024, proactive maintenance using diagnostic tools can significantly extend vehicle life and reduce downtime.
7.1 Monitoring Engine Performance
- Live Data Monitoring:
- Monitor engine RPM, coolant temperature, and oil pressure to ensure they are within normal operating ranges.
- Identify potential issues before they lead to breakdowns.
- Fuel Trim Analysis:
- Check short-term and long-term fuel trim values to identify fuel mixture issues.
- Address lean or rich conditions to improve fuel efficiency and reduce emissions.
7.2 Assessing Transmission Health
- Transmission Temperature Monitoring:
- Monitor transmission temperature to prevent overheating and potential damage.
- Identify issues with the cooling system or transmission fluid.
- Shift Pattern Analysis:
- Observe the transmission’s shift patterns to detect irregularities.
- Identify potential issues with shift solenoids or internal components.
7.3 Checking Brake System Functionality
- ABS Monitoring:
- Check the anti-lock braking system (ABS) for proper operation.
- Identify issues with wheel speed sensors or the ABS module.
- Brake Pressure Monitoring:
- Monitor brake pressure to detect leaks or imbalances.
- Ensure the braking system is functioning efficiently and safely.
7.4 Evaluating Emissions System Performance
- O2 Sensor Monitoring:
- Assess the performance of oxygen sensors to ensure they are functioning correctly.
- Address issues with the air-fuel mixture and catalytic converter efficiency.
- EGR System Testing:
- Monitor the exhaust gas recirculation (EGR) system to ensure it is reducing emissions effectively.
- Identify issues with the EGR valve or flow.
- DPF Monitoring:
- Monitor the diesel particulate filter (DPF) to prevent clogging.
7.5 Performing Routine Inspections
- Pre-Trip Inspections:
- Use the tool to quickly check for any stored DTCs before a long trip.
- Address potential issues before they become major problems.
- Scheduled Maintenance Checks:
- Incorporate the tool into your scheduled maintenance routine.
- Check for DTCs and monitor live data to identify issues early.
7.6 Resetting Maintenance Reminders
- Service Interval Reset:
- Use the tool to reset maintenance reminders after completing service tasks.
- Ensure that the vehicle’s maintenance schedule is properly tracked.
- Oil Life Reset:
- Reset the oil life monitor after performing an oil change.
- Help prevent premature engine wear and tear.
7.7 Example: Using the Tool for Preventative Maintenance
- Connect the Tool: Plug the Launch Creader HD Plus into the vehicle’s OBD2 port.
- Perform a Scan: Run a full system scan to check for any stored DTCs.
- Monitor Live Data: Monitor key parameters such as engine temperature, oil pressure, and transmission temperature.
- Check Fuel Trims: Analyze fuel trim values to identify potential fuel mixture issues.
- Assess Emissions Systems: Check the performance of oxygen sensors and the EGR system.
- Reset Reminders: Reset maintenance reminders after completing necessary tasks.
- Document Findings: Document all findings and actions taken.
7.8 Benefits of Proactive Maintenance
- Reduced Downtime: Identifying and addressing issues early can prevent major breakdowns.
- Extended Vehicle Life: Regular maintenance can extend the life of the vehicle.
- Improved Fuel Efficiency: Addressing fuel mixture issues can improve fuel economy.
- Enhanced Safety: Ensuring that the braking and emissions systems are functioning correctly can enhance safety.
- Lower Repair Costs: Addressing issues early can prevent more costly repairs down the road.
By incorporating the launch creader HD Plus heavy duty truck OBD2 diagnostic tool into your maintenance routine, you can proactively monitor vehicle health, prevent breakdowns, and extend vehicle life. At OBD2-SCANNER.EDU.VN, we provide the guidance and resources you need to implement effective maintenance practices using diagnostic tools.
8. Common Mistakes to Avoid When Using Launch Creader HD Plus
Using the launch creader HD Plus heavy duty truck OBD2 diagnostic tool effectively requires avoiding common mistakes that can lead to inaccurate diagnoses and potential damage. According to the American Trucking Associations’ Technology & Maintenance Council (TMC) on April 5, 2024, awareness and avoidance of these pitfalls are crucial for maximizing the tool’s benefits.
8.1 Neglecting Basic Vehicle Information
- Failing to Verify Vehicle Details:
- Mistake: Not confirming the vehicle’s make, model, year, and engine type before starting the diagnostic process.
- Consequence: Selecting the wrong vehicle profile, leading to incorrect data and inaccurate diagnoses.
- Solution: Always double-check the vehicle’s VIN and other details to ensure the tool is configured correctly.
- Ignoring Service History:
- Mistake: Overlooking the vehicle’s service history and recent repairs.
- Consequence: Misinterpreting DTCs and overlooking potential recurring issues.
- Solution: Review the vehicle’s maintenance records and ask the owner about recent repairs before beginning the diagnostic process.
8.2 Misinterpreting Diagnostic Trouble Codes (DTCs)
- Assuming DTCs Indicate the Exact Problem:
- Mistake: Believing that a DTC directly identifies the faulty component.
- Consequence: Replacing parts unnecessarily without proper diagnosis.
- Solution: Understand that DTCs provide a starting point for diagnosis, not a definitive answer. Follow the recommended troubleshooting steps.
- Ignoring Additional Symptoms:
- Mistake: Focusing solely on the DTC and ignoring other symptoms.
- Consequence: Missing related issues and failing to address the root cause of the problem.
- Solution: Consider all